In this tutorial you are going to learn how to implement Token-based authentication using Django REST Framework (DRF).
The token authentication works by exchanging username and password for a token that will be used in all subsequent
requests so to identify the user on the server side.
The specifics of how the authentication is handled on the client side vary a lot depending on the
technology/language/framework you are working with. The client could be a mobile application using iOS or Android.
It could be a desktop application using Python or C++. It could be a Web application using PHP or Ruby.
But once you understand the overall process, it’s easier to find the necessary resources and documentation for your
specific use case.
Token authentication is suitable for client-server applications, where the token is safely stored. You should never
expose your token, as it would be (sort of) equivalent of a handing out your username and password.
Table of Contents
Setting Up The REST API Project
So let’s start from the very beginning. Install Django and DRF:
pip install django
pip install djangorestframework
Create a new Django project:
django-admin.py startproject myapi .
Navigate to the myapi folder:
cd myapi
Start a new app. I will call my app core:
django-admin.py startapp core
Here is what your project structure should look like:
myapi/
 |-- core/
 |    |-- migrations/
 |    |-- __init__.py
 |    |-- admin.py
 |    |-- apps.py
 |    |-- models.py
 |    |-- tests.py
 |    +-- views.py
 |-- __init__.py
 |-- settings.py
 |-- urls.py
 +-- wsgi.py
manage.py
Add the core app (you created) and the rest_framework app (you installed) to the INSTALLED_APPS, inside the
settings.py module:
myapi/settings.py
INSTALLED_APPS=[# Django Apps'django.contrib.admin','django.contrib.auth','django.contrib.contenttypes','django.contrib.sessions','django.contrib.messages','django.contrib.staticfiles',# Third-Party Apps'rest_framework',# Local Apps (Your project's apps)'myapi.core',]
Return to the project root (the folder where the manage.py script is), and migrate the database:
python manage.py migrate
Let’s create our first API view just to test things out:
myapi/core/views.py
fromrest_framework.viewsimportAPIViewfromrest_framework.responseimportResponseclassHelloView(APIView):defget(self,request):content={'message':'Hello, World!'}returnResponse(content)
Now register a path in the urls.py module:
myapi/urls.py
fromdjango.urlsimportpathfrommyapi.coreimportviewsurlpatterns=[path('hello/',views.HelloView.as_view(),name='hello'),]
So now we have an API with just one endpoint /hello/ that we can perform GET requests. We can use the browser to
consume this endpoint, just by accessing the URL http://127.0.0.1:8000/hello/:
![Hello Endpoint HTML]()
We can also ask to receive the response as plain JSON data by passing the format parameter in the querystring like
http://127.0.0.1:8000/hello/?format=json:
![Hello Endpoint JSON]()
Both methods are fine to try out a DRF API, but sometimes a command line tool is more handy as we can play more easily
with the requests headers. You can use cURL, which is widely available on all major
Linux/macOS distributions:
curl http://127.0.0.1:8000/hello/
![Hello Endpoint cURL]()
But usually I prefer to use HTTPie, which is a pretty awesome Python command line tool:
http http://127.0.0.1:8000/hello/
![Hello Endpoint HTTPie]()
Now let’s protect this API endpoint so we can implement the token authentication:
myapi/core/views.py
fromrest_framework.viewsimportAPIViewfromrest_framework.responseimportResponsefromrest_framework.permissionsimportIsAuthenticated# <-- HereclassHelloView(APIView):permission_classes=(IsAuthenticated,)# <-- And heredefget(self,request):content={'message':'Hello, World!'}returnResponse(content)
Try again to access the API endpoint:
http http://127.0.0.1:8000/hello/
![Hello Endpoint HTTPie Forbidden]()
And now we get an HTTP 403 Forbidden error. Now let’s implement the token authentication so we can access this
endpoint.
Implementing the Token Authentication
We need to add two pieces of information in our settings.py module. First include rest_framework.authtoken to
your INSTALLED_APPS and include the TokenAuthentication to REST_FRAMEWORK:
myapi/settings.py
INSTALLED_APPS=[# Django Apps'django.contrib.admin','django.contrib.auth','django.contrib.contenttypes','django.contrib.sessions','django.contrib.messages','django.contrib.staticfiles',# Third-Party Apps'rest_framework','rest_framework.authtoken',# <-- Here# Local Apps (Your project's apps)'myapi.core',]REST_FRAMEWORK={'DEFAULT_AUTHENTICATION_CLASSES':['rest_framework.authentication.TokenAuthentication',# <-- And here],}
Migrate the database to create the table that will store the authentication tokens:
python manage.py migrate
![Migrate Auth Token]()
Now we need a user account. Let’s just create one using the manage.py command line utility:
python manage.py createsuperuser --username vitor --email vitor@example.com
The easiest way to generate a token, just for testing purpose, is using the command line utility again:
python manage.py drf_create_token vitor
![drf_create_token]()
This piece of information, the random string 9054f7aa9305e012b3c2300408c3dfdf390fcddf is what we are going to use
next to authenticate.
But now that we have the TokenAuthentication in place, let’s try to make another request to our /hello/ endpoint:
http http://127.0.0.1:8000/hello/
![WWW-Authenticate Token]()
Notice how our API is now providing some extra information to the client on the required authentication method.
So finally, let’s use our token!
http http://127.0.0.1:8000/hello/ 'Authorization: Token 9054f7aa9305e012b3c2300408c3dfdf390fcddf'
![REST Token Authentication]()
And that’s pretty much it. For now on, on all subsequent request you should include the header Authorization: Token 9054f7aa9305e012b3c2300408c3dfdf390fcddf.
The formatting looks weird and usually it is a point of confusion on how to set this header. It will depend on the
client and how to set the HTTP request header.
For example, if we were using cURL, the command would be something like this:
curl http://127.0.0.1:8000/hello/ -H 'Authorization: Token 9054f7aa9305e012b3c2300408c3dfdf390fcddf'
Or if it was a Python requests call:
importrequestsurl='http://127.0.0.1:8000/hello/'headers={'Authorization':'Token 9054f7aa9305e012b3c2300408c3dfdf390fcddf'}r=requests.get(url,headers=headers)
Or if we were using Angular, you could implement an HttpInterceptor and set a header:
import{Injectable}from'@angular/core';import{HttpRequest,HttpHandler,HttpEvent,HttpInterceptor}from'@angular/common/http';import{Observable}from'rxjs';@Injectable()exportclassAuthInterceptorimplementsHttpInterceptor{intercept(request:HttpRequest<any>,next:HttpHandler):Observable<HttpEvent<any>>{constuser=JSON.parse(localStorage.getItem('user'));if(user&&user.token){request=request.clone({setHeaders:{Authorization:`Token${user.accessToken}`}});}returnnext.handle(request);}}
User Requesting a Token
The DRF provide an endpoint for the users to request an authentication token using their username and password.
Include the following route to the urls.py module:
myapi/urls.py
fromdjango.urlsimportpathfromrest_framework.authtoken.viewsimportobtain_auth_token# <-- Herefrommyapi.coreimportviewsurlpatterns=[path('hello/',views.HelloView.as_view(),name='hello'),path('api-token-auth/',obtain_auth_token,name='api_token_auth'),# <-- And here]
So now we have a brand new API endpoint, which is /api-token-auth/. Let’s first inspect it:
http http://127.0.0.1:8000/api-token-auth/
![API Token Auth]()
It doesn’t handle GET requests. Basically it’s just a view to receive a POST request with username and password.
Let’s try again:
http post http://127.0.0.1:8000/api-token-auth/ username=vitor password=123
![API Token Auth POST]()
The response body is the token associated with this particular user. After this point you store this token and apply
it to the future requests.
Then, again, the way you are going to make the POST request to the API depends on the language/framework you are using.
If this was an Angular client, you could store the token in the localStorage, if this was a Desktop CLI application
you could store in a text file in the user’s home directory in a dot file.
Conclusions
Hopefully this tutorial provided some insights on how the token authentication works. I will try to follow up this
tutorial providing some concrete examples of Angular applications, command line applications and Web clients as well.
It is important to note that the default Token implementation has some limitations such as only one token per user, no
built-in way to set an expiry date to the token.
You can grab the code used in this tutorial at github.com/sibtc/drf-token-auth-example.


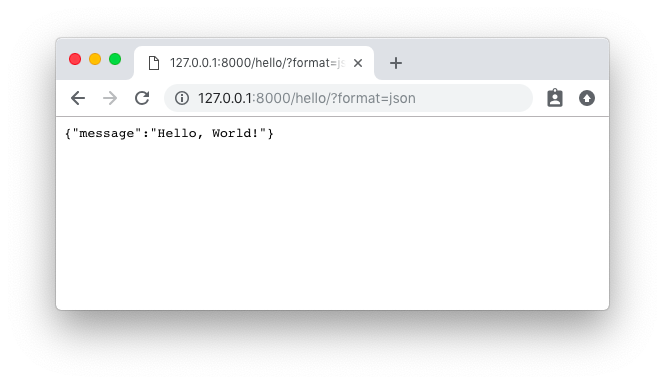
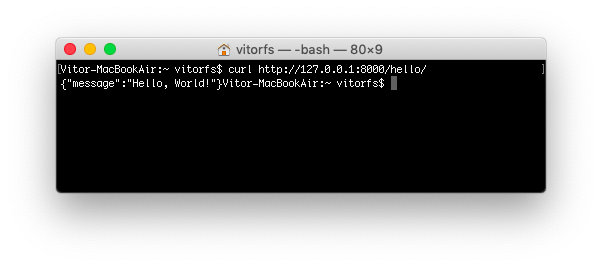
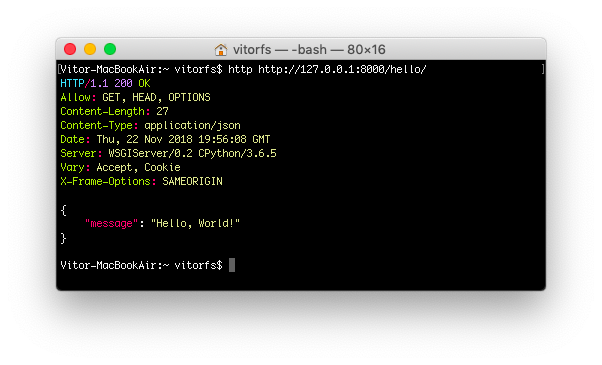
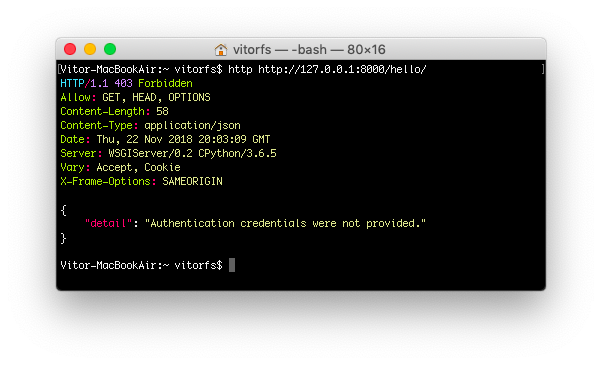
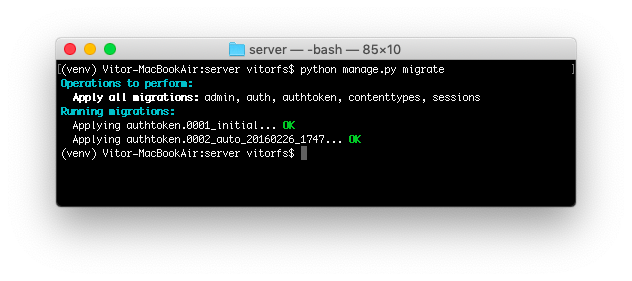
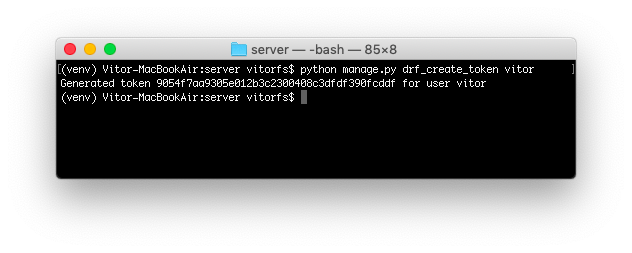
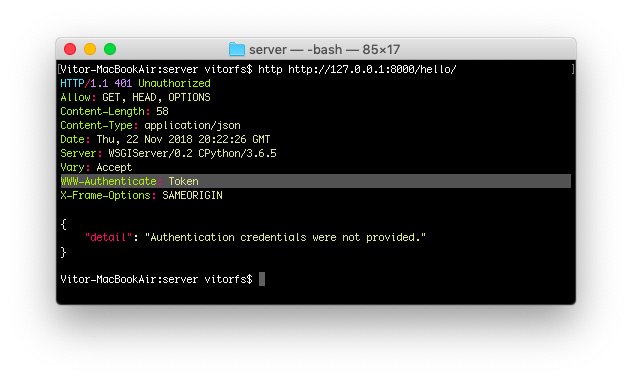
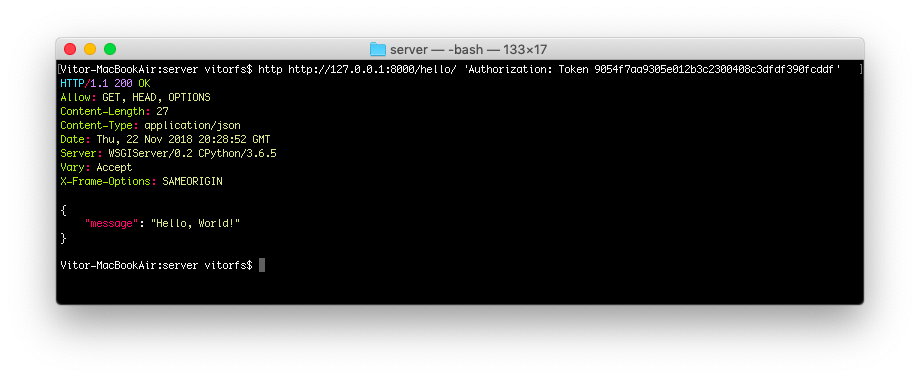
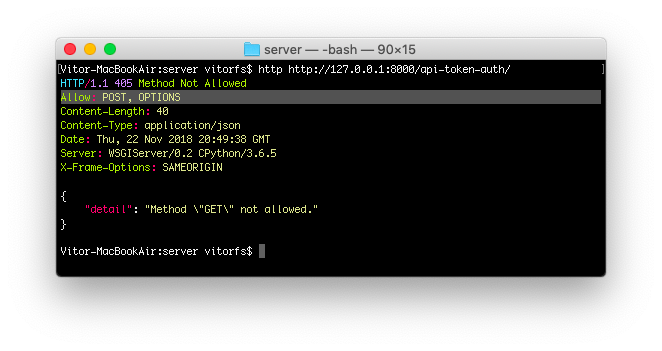
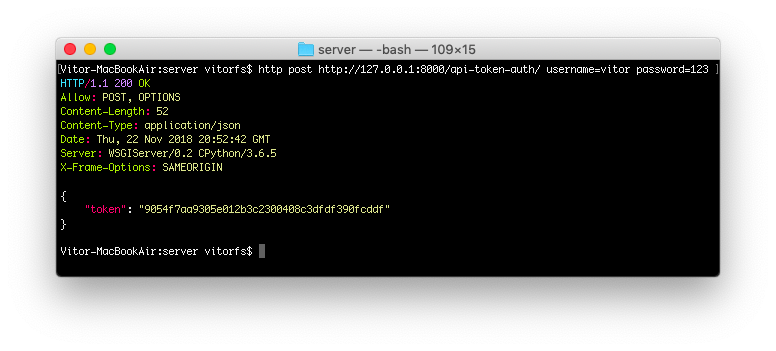
 Figure 1. ...
 Figure 2. Example of Python Compiler Editor. Here, we edit the ./utils/somelib.py example library.
 Figure 3.


