↧
PSF GSoC students blogs: Week #9 | Fixes in Swagger and schema validation
↧
PSF GSoC students blogs: Ninth week of GSoC
1. What did you do this week?
I have compiled a list for week 9 in my changelog here: https://github.com/sappelhoff/gsoc2019/blob/master/changelog.md#week-92. What is coming up next?
Next, I will mostly work on the mne-study template. With Mainak, I discussed that the next step would be to implement a CI test suite.3. Did you get stuck anywhere?
In the MNE-Python codebase there was a "magical" factor of 85 multiplied with a variable, and it was not documented where that was coming from. It took me a while to figure out (and verify!) that this is the average head radius (assuming an unrealistically spherical head) in millimeters. Now the documentation is much better, but it helped me to learn once more that one has to either
- write clean code
- e.g., instead of having the factor 85 there, make it a variable with the name `realistic_head_radius_mm` (or something like it)
- write a good documentation
- E.g., make short but instructive comments, or more exhaustive documentation in the function or module docstrings
probably a combination of both is best.
↧
↧
Catalin George Festila: Python 3.7.3 : Using the twitter python module - part 003.
Today I will speak about twitter python module with the new changes of the A.P.I.
This two tutorial will not work now because the twitter A.P.I is changed.
The reason I don't delete it is the similar flow programming and access the A.P.I.:
Use the twitter python module - part 001.
Use the twitter python module - part 002.
Let's start with the install of this python module with Python version
↧
Stack Abuse: Serverless Python Application Development with AWS Chalice
Introduction
In software development, we are constantly building solutions for end-users that solve a particular problem or ease/automate a certain process. Therefore, designing and building the software is not the only part of the process as we have to make the software available to the intended users.
For web-based applications, deployment is a very important aspect and part of the process since the application not only needs to work, but also needs to work for many users concurrently and be highly available.
Some of the deployment options that are available to us include buying our own server hardware and deploying our applications or renting server space in other companies. This comes at a cost not only of the resources needed to acquire them, but also the maintenance costs and personnel to monitor the server resources.
What if we could make our application available without having to worry about provisioning servers or maintaining them? Our agility and delivery would be greatly enhanced.
We can achieve this through a serverless computing platform such as AWS Lambda, which is made available by Amazon Web Services.
What is Serverless Computing?
Cloud providers offer different solutions to deploying and running applications, one of them being serverless computing. In this architecture, the cloud provider hosts your applications and takes on the responsibilities of server management in terms of software and hardware. Think of it as Infrastructure as a Service (IaaS).
The cloud provider handles scaling, availability, server maintenance, and configuration among other things so that as the developers, our focus is entirely on our code. This, in turn, reduces the overhead required to make our applications run and available to our end users.
Serverless computing has its advantages, but it also poses some drawbacks such as the developer is limited to the options or tools that the provider uses for purposes such as logging, tracing, and monitoring and the developer cannot use their own tools. Also, as a developer, you are tied to the availability of the provider, if they experience issues or outages, then our application is also affected.
AWS is a leading cloud provider that offers serverless computing through AWS Lambda. This is a serverless compute runtime that allows developers to run their code in response to certain events from users, such as making a request or uploading files into an S3 bucket.
This service also allows us to only pay for the computing resources that we utilize rather than a blanket cost for the services. This happens through a Lambda function that scales to match the scale and is independent of the underlying infrastructure.
What is Chalice?
Chalice is a microframework for building and quickly deploying serverless applications in Python to AWS Lambda functions. Chalice not only helps us create Python applications but to also quickly deploy them by providing a command-line tool for creating, managing, and deploying our application.
Chalice also provides integration functionality to other Amazon services such as Amazon API Gateway, Amazon Simple Storage Service(S3), and Simple Queue Service (SQS), among others. We can create RESTful APIs, tasks that run on a certain schedule or integrate to the S3 bucket for storage.
Setup
AWS Setup
To get started with Chalice, we need to have an AWS account set up to interact with and deploy our code to. This can be achieved through the AWS homepage where we can sign up or log in to an existing AWS account. AWS requires that we not only offer our details but also our billing details, but for this demonstration we will be using the AWS Free Tier for testing and development purposes, for which we will not be billed.
Once our account is set up, under our profile dropdown, there is a section called "My Security Credentials". Here we will be able to create credentials that will be used when interacting with the AWS console. These credentials will be also used by the Amazon CLI tool.
Amazon also offers a CLI tool that we can use to interact with our AWS services using commands in our terminal. It is available for Mac, Linux and, Windows platforms and requires Python 2.6+ or Python 3.3 or later version. We can install it by running the following pip command:
$ pip install awscli
Once set up, we can test the CLI tool by running:
$ aws --version
More details about the CLI tool and installation on other platforms can be found here.
With the AWS CLI tool setup, we will use the credentials, i.e, secret key and access ID, that we generated earlier to configure our CLI tool by running:
$ aws configure
We will get a prompt to fill in our Access Key ID, Secret Access Key and default regions and output formats. The last two are optional but we will need the access key and secret that we obtained from the AWS console dashboard.
You can also configure different credentials for different users on AWS. More on that and other details can be found here.
Project Setup
For this demo project, we will be building a Python application and it is good practice to work within a virtual environment to keep our project environment abstracted from the system’s Python environment. For this purpose, we will utilize the Virtualenv tool to create a virtual environment within which we will work.
In case the Virtualenv tool is not yet installed, we can install it by simply running:
$ pip install virtualenv
More information about the Virtualenv tool can be found here.
With Virtualenv installed, let us head over to our working directory and create an environment by running the following command:
$ virtualenv --python=python3 venv-chalice
We will activate our environment by running:
$ source venv-chalice/bin/activate
Our environment is now set up, and we can now install Chalice and verify the installation by running the following commands:
$ pip install chalice
$ chalice --help
The second command here is simply used to verify the installation of Chalice.
Implementation
We now have an AWS account, the AWS CLI tool installed, the environment setup, and Chalice installed. We can now use Chalice to create our simple RESTful API as follows:
$ chalice new-project demoapp
This command creates a simple Chalice project within a folder that is of the following structure:
$ tree demoapp
demoapp
├── app.py
└── requirements.txt
Any other requirements that our Chalice app will require to run while deployed on AWS Lambda will go into the requirements.txt file within the demoapp folder, and our new functionality will mainly reside in the app.py file. We can create other files and import them into the app.py file, which is our main project file.
For our simple API, we will create an API that returns a list of a user’s public GitHub repositories, the languages used in each, and the number of stars that repository has. This information is publicly available on the GitHub API, therefore we will not need credentials to interact with the API. We will create a function that receives a username and returns the details we require. If the username provided does not exist, then we will receive an empty response payload.
Let us create the github_repos function that will be responsible for the GitHub API interaction:
import requests

def github_repos(username):
    # Final list to contain our repository objects
    formatted_repos = []

    if username:
        # Format the url by insterting the passed username
        url = "https://api.github.com/users/{}/repos".format(username)

        r = requests.get(url)

        # Get the JSON containing the list of repositories
        list_of_repos = r.json()

        for repo in list_of_repos:
            repo_object = {
              "name": repo["name"],
              "stars": repo["watchers"],
              "language": repo["language"],
            }

            formatted_repos.append(repo_object)

    return formatted_repos
The function github_repos receives a username and plugs it into the GitHub API URL before making the request. The response received has a lot of information that we do not need for now, so we extract the details of a repository that we need, create a new object and add it to the list of formatted_repos that we will send back to the user via the Chalice app.
Let us run a few local tests for our function first and this is the output:

The function is now ready to be integrated into our Chalice app on the app.py file, and this is the final version of our app:
import requests
from chalice import Chalice

def github_repos(username):
    # Function implementation above

app = Chalice(app_name='demoapp')

@app.route('/')
def index():
    return {'hello': 'world'}

# Create our new route to handle github repos functionality
@app.route('/user/{username}')
def github(username):
    return {"repos": github_repos(username)}
Our application is now ready to be consumed by users, let us now deploy it to AWS Lambda.
Deploying our App
Deploying a Chalice application to AWS Lambda is as simple as running the following command in our working directory:
$ chalice deploy
Chalice will handle the deployment process for us and return a link with which we can interact with the RESTful API we have just created:

To test our API, we can use Postman, a web browser, or any other API interaction tool to make requests to the /user/<github-username> endpoint on the "REST API URL" from the screenshot above. I passed in my GitHub username and this was the output:

If we make any changes to our code, we just run the chalice deploy command again and Chalice will redeploy our application with the changes we have just made.
When we head over to the AWS Console and click on the "Functions" section in the collapsible sidebar on the left side, we can see the Lambda function that is currently running our application:

When we click on our function, we get more details about it such as the current configuration, environment variables set for our application, execution roles, and memory configuration.
AWS also gives us monitoring options such as event logs and metrics through CloudWatch which is a monitoring and management service offered by AWS.
This is the view of the monitoring dashboard for our application:

We get statistics on the number of invocations by users, durations of requests served by our API, the success and error rates, among other things.
We even get a view of the individual requests in the same dashboard, though this is not visible in the screenshot above. There’s so much that AWS does for us out of the box, making our deployment experience short and straight to the point. We do not have to worry about maintaining our own server or implementing our own methods of monitoring and logging as AWS has us covered for this.
This is the serverless experience.
Summary
In this article, we have created a serverless Python API using the Chalice microframework and deployed it on AWS Lambda. The AWS CLI, alongside the Chalice CLI tools, has helped us bootstrap our project quickly and we deployed it to AWS Lambda using just one single command.
Ours is a serverless application since we did not have to handle any server provision or maintenance on our side. We just wrote the code and let AWS handle the rest for us, including deployment, scaling, and monitoring of our application. The time taken to make our application available has decreased significantly, even though we are still reliant on AWS for other aspects such as monitoring our application.
The source code for this project is available here on GitHub.
↧
PSF GSoC students blogs: 5th weekly checkin
Hello everyone!
This weekly check-in is related to the scheduled for July 29.
1. What did you do this week?
This week I got my PR merged. I finished the tests for command setup and am now editing the documentation.
2. What is coming up next?
After the documentation is accepted, I will work on enable the validation command.3. Did you get stuck anywhere?
I got stuck in thinking some unit tests and had to travel to my family's home so got less time to work with on Thursday.
Leonardo Rodrigues.
↧
↧
Chris Moffitt: Automated Report Generation with Papermill: Part 2
Introduction
This guest post is the second article about using python tools to automate a report generation pipeline. If you have not read the first post you should probably review before continuing with this article.
Before we get started, I would like to re-introduce the author:
Hey there! My name is Duarte O.Carmo and I’m a digital consultant at Jabra. I absolutely love using python for automation, web development, data science and analysis, or pretty much any other subject. Learn more about me by visiting my website, feel free to get in touch :)
Part 2 - Designing a solution
Welcome to part 2 of this two-part series post about automating report generation using python, jupyter, papermill, and a couple of other tools.
In the first part, we covered 4 main important processes that are part of the automation process. In this second and final part, we will bring everything together and build our report automation system.
Note: This code was written in python 3.7. You might have to adapt the code for older versions of python.
All of the code for this article is available on GitHub.
A workflow to automatically generate reports in a shared cloud folder
Let’s imagine you want to generate automatic reports for every similar excel file of sales reports. You also want to share them with your colleagues. Your colleagues are interested in the reports, but not in learning how to program python, how would you proceed?
There are a lot of options, and hardly any incorrect ones, but one I found particularly interesting was using what a lot of people and companies already use: a cloud folder (Google Drive, OneDrive, Dropbox).
Cloud folders (particularly shared ones) are very popular in companies. So a good idea would be to create a shared folder where everyone can upload sales excel reports, and automatically generate Html reports from them, so everyone can read!
Here is the basic architecture of the solution:

Let’s describe each one of the steps:
- A user uploads a new excel sales report to a shared cloud folder.
- We sync the cloud folder with a local folder and detect a new excel sales report.
- We use papermill to generate a new notebook file from that new excel sales report.
- We use nbconvert to generate an Html file from that new notebook file.
- We upload the Html file to the cloud folder, so the user can read it.
Let’s start building this step by step:
1. Sync a cloud folder with a local folder and detect new files
To sync cloud directories with local directories, we will a tool called Rclone. Of course, we will integrate it with python.
Start by installing rclone in the same machine as your local folder (your personal computer or a virtual private server for example).
To do so, on a Mac or Linux machine, you should:
$ curl https://rclone.org/install.sh | sudo bash
On Windows, download the executable in the Rclone downloads page.
Once rclone is installed, we must configure it. Depending on your cloud provider (Dropbox, Google Drive, OneDrive), the instructions will vary, so make sure to follow the configuration instructions.
Once configured, let us do a first sync from the command line:
$ rclone sync remote:REMOTE_FOLDER_NAME LOCAL_FOLDER_NAME
This will sync your local folder with your remote folder.
We can also spark this command from a python script using the core subprocess library. That allows you to run command-line programs from python:
importsubprocess# define our variablesREMOTE_FOLDER_NAME="shared folder"LOCAL_FOLDER="local folder"# run the rclone sync command from pythonsubprocess.run(["rclone","sync",f"remote:{REMOTE_FOLDER_NAME}",LOCAL_FOLDER])Now that we know how to sync a local and a cloud directory, how do we
detect if a user has uploaded a new file to our cloud directory? Well,
an option would be to navigate to our local directory and use the
ls
command and see what pops out.
Rclone also allows us to list files in our cloud directory. Having this, we can create a python function that detects new files if they have been uploaded to the cloud folder:
defget_new_files(remote_folder,local_folder):""" A function that returns files that were uploaded to the cloud folder and do not exist in our local folder."""# list the files in our cloud folderlist_cloud=subprocess.run(["rclone","lsf",f"remote:{remote_folder}"],capture_output=True,text=True,)# transform the command output into a listcloud_directories=list_cloud.split("\n")[0:-1]print(f"In the cloud we have: \n{cloud_directories}")# list the files in our local folderlist_cloud=subprocess.run(["ls",local_folder],capture_output=True,text=True)# transform the command output into a listlocal_directories=list_cloud.stdout.split("\n")[0:-1]print(f"In the local copy we have: \n{local_directories}")# create a list with the differences between the two lists abovenew_files=list(set(cloud_directories)-set(local_directories))returnnew_filesA couple of notes about the script above:
- The
capture_outputfile in thesubprocess.runfunction, allows us to capture the output of the command. - The
textflag allows us to treat everything as text, avoiding problems with spaces for example. - After running
subprocess.run, we apply the.splitfunction to parse the output of thesubprocess.runfunction which is a string of different files separated by a line break (\n). This split function allows us to but all the elements into a nicely formatted python list. - The
new_fileslist will contain only files that are in the cloud directory, but not in the local directory, or in other words: the excel file that users have uploaded to the cloud drive. In case there are no differences, the function will return an empty list.
2. Using Papermill and Nbconvert to generate new reports
Once we have a reliable way of detecting if new files are uploaded to
the cloud, we now need to process that new file and generate an
html
report from it.
We will use two of the tools mentioned in the first article: papermill, and nbconvert.
We start by creating a function that will produce a new notebook file,
based on an excel report. Using, of course, a notebook template (for
example
template.ipynb
) as previously described in part 1.
importpapermillaspmdefrun_notebook(excel_report,notebook_template):# take only the name of the file, and ignore the .xlsx endingno_extension_name=excel_report.split(".")[0]# run with papermillpm.execute_notebook(notebook_template,f"{no_extension_name}.ipynb",parameters=dict(filename=excel_report),)returnno_extension_nameThen, we must convert the notebook to an Html file. To do this, we
create another function that calls the
nbconvert
command from the
python interpreter.
importsubprocessdefgenerate_html_report(notebook_file):generate=subprocess.run(["jupyter","nbconvert",notebook_file,"--to=html",])print("HTML Report was generated")returnTrueThis function runs the nbconvert command previously described in the beginning of the article, from a python script.
4. Uploading an Html file back to the cloud folder
There is another Rclone command that is pretty handy. If you want to push a file from a local folder to a cloud folder, you can use the following from the command line:
$ rclone copy FILENAME remote:REMOTE_FOLDER_NAME
We could do it from the command line, but why not do it from python? With the subprocess library, it’s pretty straightforward:
importsubprocessdefpush_to_cloud(remote_folder,html_report):push=subprocess.run(["rclone","copy",html_report,f"remote:{remote_folder}"])print("Report Published!!!")5. Bringing it all together
Finally, after giving you a rundown of all of the major tools and processes, here is the full script that scans the cloud folder for new excel sales reports, then generates and uploads an Html analysis of the reports.
The script,
cloud_reporter.py
follows:
importsubprocessimportsysimportpapermillaspapermillREMOTE_FOLDER="your cloud folder name"LOCAL_FOLDER="your local folder name"TEMPLATE_NOTEBOOK="template_notebook.ipynb"defget_new_files(remote_folder,local_folder):""" A function that returns files that were uploaded to the cloud folder and do not exist in our local folder."""# list the files in our cloud folderlist_cloud=subprocess.run(["rclone","lsf",f"remote:{remote_folder}"],capture_output=True,text=True,)# transform the command output into a listcloud_directories=list_cloud.split("\n")[0:-1]print(f"In the cloud we have: \n{cloud_directories}")# list the files in our local folderlist_cloud=subprocess.run(["ls",local_folder],capture_output=True,text=True)# transform the command output into a listlocal_directories=list_cloud.stdout.split("\n")[0:-1]print(f"In the local copy we have: \n{local_directories}")# create a list with the differences between the two lists abovenew_files=list(set(cloud_directories)-set(local_directories))returnnew_filesdefsync_directories(remote_folder,local_folder):""" A function that syncs a remote folder with a local folder with rclone."""sync=subprocess.run(["rclone","sync",f"remote:{remote_folder}",local_folder])print("Syncing local directory with cloud....")returnsync.returncodedefrun_notebook(excel_report,template_notebook):""" A function that runs a notebook against an excel report via papermill."""no_extension_name=excel_report.split(".")[0]papermill.execute_notebook(template_notebook,f"{no_extension_name}.ipynb",parameters=dict(filename=excel_report),)returnno_extension_namedefgenerate_html_report(notebook_file):""" A function that converts a notebook into an html file."""generate=subprocess.run(["jupyter","nbconvert",notebook_file,"--to=html"])print("HTML Report was generated")returnTruedefpush_to_cloud(remote_folder,filename):""" A function that pushes to a remote cloud folder a specific file."""push=subprocess.run(["rclone","copy",filename,f"remote:{remote_folder}"])print("Report Published!!!")defmain():print("Starting updater..")# detect if there are new files in the remote foldernew_files=get_new_files(remote_folder=REMOTE_FOLDER,local_folder=LOCAL_FOLDER)# if there are none, exitifnotnew_files:print("Everything is synced. No new files.")sys.exit()# else, continueelse:print("There are files missing.")print(new_files)# sync directories to get new excel reportsync_directories(remote_folder=REMOTE_FOLDER,local_folder=LOCAL_FOLDER)# generate new notebook and extract the nameclean_name=run_notebook(new_files[0])# the new notebook generate will have the following namenotebook_name=f"{clean_name}.ipynb"# generate the html report from the notebookgenerate_html_report(notebook_name)# the notebook name will be the followinghtml_report_name=f"{clean_name}.html"# push the new notebook to the cloudpush_to_cloud(html_report=html_report_name,remote_folder=ONEDRIVE_FOLDER)# make sure everything is synced againsync_directories(remote_folder=REMOTE_FOLDER,local_folder=LOCAL_FOLDER)print("Updater finished.")returnTrueif__name__=="main":main()6. Running the updater regularly
Once you get the script running, one option is to copy it to a virtual
private server (you can get one in
digitalocean.com
for example) and have it run regularly via something like
cron
.
Security Warning
If you are going to sync sensitive company information to a
virtual private server, please make sure that you have permission, and
that you take necessary security
measures
to protect the server.
You should read more about cron before messing with it. It allows you to run scripts every X amount of time. A simple approach to our problem would be:
Make sure the script is running successfully in your server by:
- Installing and configuring rclone.
- Installing jupyter and nbconvert.
- Creating a local folder to serve as a remote copy.
- Modifying the script above with your variables (base notebook, remote folder name, and local folder name).
- Making sure the script runs.
Editing your crontab by:
$ crontab -e
Adding a crontab job that navigates to a certain directory and runs the
cloud_reporter.pyfile, every X minutes using python.Here is an example of it running every 4 minutes:
*/4 * * * * python /path/to/your/folder/cloud_reporter.py
Uploading a new excel file to your cloud folder and wait a minimum of 4 minutes, and a new Html report should be generated and uploaded automatically!
Give access to the shared cloud folder (Dropbox, Google Drive) to your colleagues, and let them upload any excel report.
Final thoughts
And just like this, we reach the end of this article series!
Hopefully, these tools and scripts will inspire you to go out and automate report generation or any other process around you. Making it as simple as possible to your colleagues to generate reports.
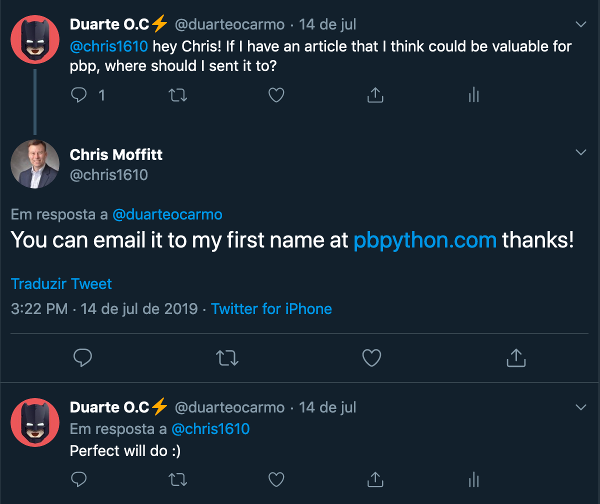
I would like to thank Chris for allowing me to collaborate with him in these posts. I really had a blast building these tools and writing these “guides”. A team effort that started with a simple reach out on twitter:
All of the code for this article series is in this GitHub repo.
↧
Real Python: Understanding the Python Traceback
Python prints a traceback when an exception is raised in your code. The traceback output can be a bit overwhelming if you’re seeing it for the first time or you don’t know what it’s telling you. But the Python traceback has a wealth of information that can help you diagnose and fix the reason for the exception being raised in your code. Understanding what information a Python traceback provides is vital to becoming a better Python programmer.
By the end of this tutorial, you’ll be able to:
- Make sense of the next traceback you see
- Recognize some of the more common tracebacks
- Log a traceback successfully while still handling the exception
Free Bonus:Click here to get our free Python Cheat Sheet that shows you the basics of Python 3, like working with data types, dictionaries, lists, and Python functions.
What Is a Python Traceback?
A traceback is a report containing the function calls made in your code at a specific point. Tracebacks are known by many names, including stack trace, stack traceback, backtrace, and maybe others. In Python, the term used is traceback.
When your program results in an exception, Python will print the current traceback to help you know what went wrong. Below is an example to illustrate this situation:
# example.pydefgreet(someone):print('Hello, '+someon)greet('Chad')Here, greet() gets called with the parameter someone. However, in greet(), that variable name is not used. Instead, it has been misspelled as someon in the print() call.
Note: This tutorial assumes you understand Python exceptions. If you are unfamiliar or just want a refresher, then you should check out Python Exceptions: An Introduction.
When you run this program, you’ll get the following traceback:
$ python example.py
Traceback (most recent call last):  File "/path/to/example.py", line 4, in <module>    greet('Chad')  File "/path/to/example.py", line 2, in greet    print('Hello, ' + someon)NameError: name 'someon' is not defined
This traceback output has all of the information you’ll need to diagnose the issue. The final line of the traceback output tells you what type of exception was raised along with some relevant information about that exception. The previous lines of the traceback point out the code that resulted in the exception being raised.
In the above traceback, the exception was a NameError, which means that there is a reference to some name (variable, function, class) that hasn’t been defined. In this case, the name referenced is someon.
The final line in this case has enough information to help you fix the problem. Searching the code for the name someon, which is a misspelling, will point you in the right direction. Often, however, your code is a lot more complicated.
How Do You Read a Python Traceback?
The Python traceback contains a lot of helpful information when you’re trying to determine the reason for an exception being raised in your code. In this section, you’ll walk through different tracebacks in order to understand the different bits of information contained in a traceback.
Python Traceback Overview
There are several sections to every Python traceback that are important. The diagram below highlights the various parts:

In Python, it’s best to read the traceback from the bottom up:
Blue box: The last line of the traceback is the error message line. It contains the exception name that was raised.
Green box: After the exception name is the error message. This message usually contains helpful information for understanding the reason for the exception being raised.
Yellow box: Further up the traceback are the various function calls moving from bottom to top, most recent to least recent. These calls are represented by two-line entries for each call. The first line of each call contains information like the file name, line number, and module name, all specifying where the code can be found.
Red underline: The second line for these calls contains the actual code that was executed.
There are a few differences between traceback output when you’re executing your code in the command-line and running code in the REPL. Below is the same code from the previous section executed in a REPL and the resulting traceback output:
>>>
>>> defgreet(someone):... print('Hello, '+someon)... >>> greet('Chad')Traceback (most recent call last):
  File "<stdin>", line 1, in <module>
  File "<stdin>", line 2, in greetNameError: name 'someon' is not defined
Notice that in place of file names, you get "<stdin>". This makes sense since you typed the code in through standard input. Also, the executed lines of code are not displayed in the traceback.
Note: If you are used to seeing stack traces in other programming languages, then you’ll notice a major difference in the way a Python traceback looks in comparison. Most other languages print the exception at the top and then go from top to bottom, most recent calls to least recent.
It has already been said, but just to reiterate, a Python traceback should be read from bottom to top. This is very helpful since the traceback is printed out and your terminal (or wherever you are reading the traceback) usually ends up at the bottom of the output, giving you the perfect place to start reading the traceback.
Specific Traceback Walkthrough
Going through some specific traceback output will help you better understand and see what information the traceback will give you.
The code below is used in the examples following to illustrate the information a Python traceback gives you:
# greetings.pydefwho_to_greet(person):returnpersonifpersonelseinput('Greet who? ')defgreet(someone,greeting='Hello'):print(greeting+', '+who_to_greet(someone))defgreet_many(people):forpersoninpeople:try:greet(person)exceptException:print('hi, '+person)Here, who_to_greet() takes a value, person, and either returns it or prompts for a value to return instead.
Then, greet() takes a name to be greeted, someone, and an optional greeting value and calls print(). who_to_greet() is also called with the someone value passed in.
Finally, greet_many() will iterate over the list of people and call greet(). If there is an exception raised by calling greet(), then a simple backup greeting is printed.
This code doesn’t have any bugs that would result in an exception being raised as long as the right input is provided.
If you add a call to greet() to the bottom of greetings.py and specify a keyword argument that it isn’t expecting (for example greet('Chad', greting='Yo')), then you’ll get the following traceback:
$ python example.py
Traceback (most recent call last):  File "/path/to/greetings.py", line 19, in <module>    greet('Chad', greting='Yo')TypeError: greet() got an unexpected keyword argument 'greting'
Once again, with a Python traceback, it’s best to work backward, moving up the output. Starting at the final line of the traceback, you can see that the exception was a TypeError. The messages that follow the exception type, everything after the colon, give you some great information. It tells you that greet() was called with a keyword argument that it didn’t expect. The unknown argument name is also given to you: greting.
Moving up, you can see the line that resulted in the exception. In this case, it’s the greet() call that we added to the bottom of greetings.py.
The next line up gives you the path to the file where the code exists, the line number of that file where the code can be found, and which module it’s in. In this case, because our code isn’t using any other Python modules, we just see <module> here, meaning that this is the file that is being executed.
With a different file and different input, you can see the traceback really pointing you in the right direction to find the issue. If you are following along, remove the buggy greet() call from the bottom of greetings.py and add the following file to your directory:
# example.pyfromgreetingsimportgreetgreet(1)Here you’ve set up another Python file that is importing your previous module, greetings.py, and using greet() from it. Here’s what happens if you now run example.py:
$ python example.py
Traceback (most recent call last):  File "/path/to/example.py", line 3, in <module>    greet(1)  File "/path/to/greetings.py", line 5, in greet    print(greeting + ', ' + who_to_greet(someone))TypeError: must be str, not int
The exception raised in this case is a TypeError again, but this time the message is a little less helpful. It tells you that somewhere in the code it was expecting to work with a string, but an integer was given.
Moving up, you see the line of code that was executed. Then the file and line number of the code. This time, however, instead of <module>, we get the name of the function that was being executed, greet().
Moving up to the next executed line of code, we see our problematic greet() call passing in an integer.
Sometimes after an exception is raised, another bit of code catches that exception and also results in an exception. In these situations, Python will output all exception tracebacks in the order in which they were received, once again ending in the most recently raise exception’s traceback.
Since this can be a little confusing, here’s an example. Add a call to greet_many() to the bottom of greetings.py:
# greetings.py...greet_many(['Chad','Dan',1])This should result in printing greetings to all three people. However, if you run this code, you’ll see an example of the multiple tracebacks being output:
$ python greetings.py
Hello, ChadHello, DanTraceback (most recent call last):  File "greetings.py", line 10, in greet_many    greet(person)  File "greetings.py", line 5, in greet    print(greeting + ', ' + who_to_greet(someone))TypeError: must be str, not intDuring handling of the above exception, another exception occurred:Traceback (most recent call last):  File "greetings.py", line 14, in <module>    greet_many(['Chad', 'Dan', 1])  File "greetings.py", line 12, in greet_many    print('hi, ' + person)TypeError: must be str, not int
Notice the highlighted line starting with During handling in the output above. In between all tracebacks, you’ll see this line. Its message is very clear, while your code was trying to handle the previous exception, another exception was raised.
Note: Python’s feature of displaying the previous exceptions tracebacks were added in Python 3. In Python 2, you’ll only get the last exception’s traceback.
You have seen the previous exception before, when you called greet() with an integer. Since we added a 1 to the list of people to greet, we can expect the same result. However, the function greet_many() wraps the greet() call in a try and except block. Just in case greet() results in an exception being raised, greet_many() wants to print a default greeting.
The relevant portion of greetings.py is repeated here:
defgreet_many(people):forpersoninpeople:try:greet(person)exceptException:print('hi, '+person)So when greet() results in the TypeError because of the bad integer input, greet_many() handles that exception and attempts to print a simple greeting. Here the code ends up resulting in another, similar, exception. It’s still attempting to add a string and an integer.
Seeing all of the traceback output can help you see what might be the real cause of an exception. Sometimes when you see the final exception raised, and its resulting traceback, you still can’t see what’s wrong. In those cases, moving up to the previous exceptions usually gives you a better idea of the root cause.
What Are Some Common Tracebacks in Python?
Knowing how to read a Python traceback when your program raises an exception can be very helpful when you’re programming, but knowing some of the more common tracebacks can also speed up your process.
Here are some common exceptions you might come across, the reasons they get raised and what they mean, and the information you can find in their tracebacks.
AttributeError
The AttributeError is raised when you try to access an attribute on an object that doesn’t have that attribute defined. The Python documentation defines when this exception is raised:
Raised when an attribute reference or assignment fails. (Source)
Here’s an example of the AttributeError being raised:
>>>
>>> an_int=1>>> an_int.an_attributeTraceback (most recent call last):
  File "<stdin>", line 1, in <module>AttributeError: 'int' object has no attribute 'an_attribute'
The error message line for an AttributeError tells you that the specific object type, int in this case, doesn’t have the attribute accessed, an_attribute in this case. Seeing the AttributeError in the error message line can help you quickly identify which attribute you attempted to access and where to go to fix it.
Most of the time, getting this exception indicates that you are probably working with an object that isn’t the type you were expecting:
>>>
>>> a_list=(1,2)>>> a_list.append(3)Traceback (most recent call last):
  File "<stdin>", line 1, in <module>AttributeError: 'tuple' object has no attribute 'append'
In the example above, you might be expecting a_list to be of type list, which has a method called .append(). When you receive the AttributeError exception and see that it was raised when you are trying to call .append(), that tells you that you probably aren’t dealing with the type of object you were expecting.
Often, this happens when you are expecting an object to be returned from a function or method call to be of a specific type, and you end up with an object of type None. In this case, the error message line will read, AttributeError: 'NoneType' object has no attribute 'append'.
ImportError
The ImportError is raised when something goes wrong with an import statement. You’ll get this exception, or its subclass ModuleNotFoundError, if the module you are trying to import can’t be found or if you try to import something from a module that doesn’t exist in the module. The Python documentation defines when this exception is raised:
Raised when the import statement has troubles trying to load a module. Also raised when the ‘from list’ in
from ... importhas a name that cannot be found. (Source)
Here’s an example of the ImportError and ModuleNotFoundError being raised:
>>>
>>> importasdfTraceback (most recent call last):
  File "<stdin>", line 1, in <module>ModuleNotFoundError: No module named 'asdf'>>> fromcollectionsimportasdfTraceback (most recent call last):
  File "<stdin>", line 1, in <module>ImportError: cannot import name 'asdf'
In the example above, you can see that attempting to import a module that doesn’t exist, asdf, results in the ModuleNotFoundError. When attempting to import something that doesn’t exist, asdf, from a module that does exists, collections, this results in an ImportError. The error message lines at the bottom of the tracebacks tell you which thing couldn’t be imported, asdf in both cases.
IndexError
The IndexError is raised when you attempt to retrieve an index from a sequence, like a list or a tuple, and the index isn’t found in the sequence. The Python documentation defines when this exception is raised:
Raised when a sequence subscript is out of range. (Source)
Here’s an example that raises the IndexError:
>>>
>>> a_list=['a','b']>>> a_list[3]Traceback (most recent call last):
  File "<stdin>", line 1, in <module>IndexError: list index out of range
The error message line for an IndexError doesn’t give you great information. You can see that you have a sequence reference that is out of range and what the type of the sequence is, a list in this case. That information, combined with the rest of the traceback, is usually enough to help you quickly identify how to fix the issue.
KeyError
Similar to the IndexError, the KeyError is raised when you attempt to access a key that isn’t in the mapping, usually a dict. Think of this as the IndexError but for dictionaries. The Python documentation defines when this exception is raised:
Raised when a mapping (dictionary) key is not found in the set of existing keys. (Source)
Here’s an example of the KeyError being raised:
>>>
>>> a_dict['b']Traceback (most recent call last):
  File "<stdin>", line 1, in <module>KeyError: 'b'
The error message line for a KeyError gives you the key that could not be found. This isn’t much to go on but, combined with the rest of the traceback, is usually enough to fix the issue.
For an in-depth look at KeyError, take a look at Python KeyError Exceptions and How to Handle Them.
NameError
The NameError is raised when you have referenced a variable, module, class, function, or some other name that hasn’t been defined in your code. The Python documentation defines when this exception is raised:
Raised when a local or global name is not found. (Source)
In the code below, greet() takes a parameter person. But in the function itself, that parameter has been misspelled to persn:
>>>
>>> defgreet(person):... print(f'Hello, {persn}')>>> greet('World')Traceback (most recent call last):
  File "<stdin>", line 1, in <module>
  File "<stdin>", line 2, in greetNameError: name 'persn' is not defined
The error message line of the NameError traceback gives you the name that is missing. In the example above, it’s a misspelled variable or parameter to the function that was passed in.
A NameError will also be raised if it’s the parameter that you misspelled:
>>>
>>> defgreet(persn):... print(f'Hello, {person}')>>> greet('World')Traceback (most recent call last):
  File "<stdin>", line 1, in <module>
  File "<stdin>", line 2, in greetNameError: name 'person' is not defined
Here, it might seem as though you’ve done nothing wrong. The last line that was executed and referenced in the traceback looks good. If you find yourself in this situation, then the thing to do is to look through your code for where the person variable is used and defined. Here you can quickly see that the parameter name was misspelled.
SyntaxError
The SyntaxError is raised when you have incorrect Python syntax in your code. The Python documentation defines when this exception is raised:
Raised when the parser encounters a syntax error. (Source)
Below, the problem is a missing colon that should be at the end of the function definition line. In the Python REPL, this syntax error is raised right away after hitting enter:
>>>
>>> defgreet(person)
  File "<stdin>", line 1defgreet(person)^SyntaxError: invalid syntax
The error message line of the SyntaxError only tells you that there was a problem with the syntax of your code. Looking into the lines above gives you the line with the problem and usually a ^ (caret) pointing to the problem spot. Here, the colon is missing from the function’s def statement.
Also, with SyntaxError tracebacks, the regular first line Traceback (most recent call last): is missing. That is because the SyntaxError is raised when Python attempts to parse your code, and the lines aren’t actually being executed.
TypeError
The TypeError is raised when your code attempts to do something with an object that can’t do that thing, such as trying to add a string to an integer or calling len() on an object where its length isn’t defined. The Python documentation defines when this exception is raised:
Raised when an operation or function is applied to an object of inappropriate type. (Source)
Following are several examples of the TypeError being raised:
>>>
>>> 1+'1'Traceback (most recent call last):
  File "<stdin>", line 1, in <module>TypeError: unsupported operand type(s) for +: 'int' and 'str'>>> '1'+1Traceback (most recent call last):
  File "<stdin>", line 1, in <module>TypeError: must be str, not int>>> len(1)Traceback (most recent call last):
  File "<stdin>", line 1, in <module>TypeError: object of type 'int' has no len()
All of the above examples of raising a TypeError results in an error message line with different messages. Each of them does a pretty good job of informing you of what is wrong.
The first two examples attempt to add strings and integers together. However, they are subtly different:
- The first is trying to add a
strto anint. - The second is trying to add an
intto astr.
The error message lines reflect these differences.
The last example attempts to call len() on an int. The error message line tells you that you can’t do that with an int.
ValueError
The ValueError is raised when the value of the object isn’t correct. You can think of this as an IndexError that is raised because the value of the index isn’t in the range of the sequence, only the ValueError is for a more generic case. The Python documentation defines when this exception is raised:
Raised when an operation or function receives an argument that has the right type but an inappropriate value, and the situation is not described by a more precise exception such as
IndexError. (Source)
Here are two examples of ValueError being raised:
>>>
>>> a,b,c=[1,2]Traceback (most recent call last):
  File "<stdin>", line 1, in <module>ValueError: not enough values to unpack (expected 3, got 2)>>> a,b=[1,2,3]Traceback (most recent call last):
  File "<stdin>", line 1, in <module>ValueError: too many values to unpack (expected 2)
The ValueError error message line in these examples tells you exactly what the problem is with the values:
In the first example, you are trying to unpack too many values. The error message line even tells you that you were expecting to unpack 3 values but got 2 values.
In the second example, the problem is that you are getting too many values and not enough variables to unpack them into.
How Do You Log a Traceback?
Getting an exception and its resulting Python traceback means you need to decide what to do about it. Usually fixing your code is the first step, but sometimes the problem is with unexpected or incorrect input. While it’s good to provide for those situations in your code, sometimes it also makes sense to silence or hide the exception by logging the traceback and doing something else.
Here’s a more real-world example of code that needs to silence some Python tracebacks. This example uses the requests library. You can find out more about it in Python’s Requests Library (Guide):
# urlcaller.pyimportsysimportrequestsresponse=requests.get(sys.argv[1])print(response.status_code,response.content)This code works well. When you run this script, giving it a URL as a command-line argument, it will call the URL and then print the HTTP status code and the content from the response. It even works if the response was an HTTP error status:
$ python urlcaller.py https://httpbin.org/status/200
200 b''$ python urlcaller.py https://httpbin.org/status/500
500 b''
However, sometimes the URL your script is given to retrieve doesn’t exist, or the host server is down. In those cases, this script will now raise an uncaught ConnectionError exception and print a traceback:
$ python urlcaller.py http://thisurlprobablydoesntexist.com...During handling of the above exception, another exception occurred:Traceback (most recent call last):  File "urlcaller.py", line 5, in <module>response=requests.get(sys.argv[1])  File "/path/to/requests/api.py", line 75, in getreturnrequest('get',url,params=params,**kwargs)
  File "/path/to/requests/api.py", line 60, in requestreturnsession.request(method=method,url=url,**kwargs)
  File "/path/to/requests/sessions.py", line 533, in requestresp=self.send(prep,**send_kwargs)
  File "/path/to/requests/sessions.py", line 646, in sendr=adapter.send(request,**kwargs)
  File "/path/to/requests/adapters.py", line 516, in sendraiseConnectionError(e,request=request)requests.exceptions.ConnectionError: HTTPConnectionPool(host='thisurlprobablydoesntexist.com', port=80): Max retries exceeded with url: / (Caused by NewConnectionError('<urllib3.connection.HTTPConnection object at 0x7faf9d671860>: Failed to establish a new connection: [Errno -2] Name or service not known',))
The Python traceback here can be very long with many other exceptions being raised and finally resulting in the ConnectionError being raised by requests itself. If you move up the final exceptions traceback, you can see that the problem all started in our code with line 5 of urlcaller.py.
If you wrap the offending line in a try and except block, catching the appropriate exception will allow your script to continue to work with more inputs:
# urlcaller.py...tryresponse=requests.get(sys.argv[1])exceptrequests.exceptions.ConnectionError:print(-1,'Connection Error')else:print(response.status_code,response.content)The code above uses an else clause with the try and except block. If you’re unfamiliar with this feature of Python, then check out the section on the else clause in Python Exceptions: An Introduction.
Now when you run the script with a URL that will result in a ConnectionError being raised, you’ll get printed a -1 for the status code, and the content Connection Error:
$ python urlcaller.py http://thisurlprobablydoesntexist.com
-1 Connection Error
This works great. However, in most real systems, you don’t want to just silence the exception and resulting traceback, but you want to log the traceback. Logging tracebacks allows you to have a better understanding of what goes wrong in your programs.
Note: To learn more about Python’s logging system, check out Logging in Python.
You can log the traceback in the script by importing the logging package, getting a logger, and calling .exception() on that logger in the except portion of the try and except block. Your final script should look something like the following code:
# urlcaller.pyimportloggingimportsysimportrequestslogger=logging.getLogger(__name__)try:response=requests.get(sys.argv[1])exceptrequests.exceptions.ConnectionErrorase:logger.exception()print(-1,'Connection Error')else:print(response.status_code,response.content)Now when you run the script for a problematic URL, it will print the expected -1 and Connection Error, but it will also log the traceback:
$ python urlcaller.py http://thisurlprobablydoesntexist.com...
  File "/path/to/requests/adapters.py", line 516, in sendraiseConnectionError(e,request=request)requests.exceptions.ConnectionError: HTTPConnectionPool(host='thisurlprobablydoesntexist.com', port=80): Max retries exceeded with url: / (Caused by NewConnectionError('<urllib3.connection.HTTPConnection object at 0x7faf9d671860>: Failed to establish a new connection: [Errno -2] Name or service not known',))-1 Connection Error
By default, Python will send log messages to standard error (stderr). This looks like we haven’t suppressed the traceback output at all. However, if you call it again while redirecting the stderr, you can see that the logging system is working, and we can save our logs off for later:
$ python urlcaller.py http://thisurlprobablydoesntexist.com 2> my-logs.log
-1 Connection Error
Conclusion
The Python traceback contains great information that can help you find what is going wrong in your Python code. These tracebacks can look a little intimidating, but once you break it down to see what it’s trying to show you, they can be super helpful. Going through a few tracebacks line by line will give you a better understanding of the information they contain and help you get the most out of them.
Getting a Python traceback output when you run your code is an opportunity to improve your code. It’s one way Python tries to help you out.
Now that you know how to read a Python traceback, you can benefit from learning more about some tools and techniques for diagnosing the problems that your traceback output is telling you about. Python’s built-in traceback module can be used to work with and inspect tracebacks. The traceback module can be helpful when you need to get more out of the traceback output. It would also be helpful to learn more about some techniques for debugging your Python code.
[ Improve Your Python With 🐍 Python Tricks 💌 – Get a short & sweet Python Trick delivered to your inbox every couple of days. >> Click here to learn more and see examples ]
↧
Tryton News: Release of Relatorio 0.9.0
@ced wrote:
We are glade to announce the release of Relatorio version 0.9.0.
Relatorio is a templating library which provides a way to easily output several kinds of files but mainly OpenDocument.
This is a minor release that adds new features:
- Support out parameter of render
- Write opendocument stream directly to the ZipFile
The package is available at https://pypi.python.org/pypi/relatorio/0.9.0
The documentation is available at https://relatorio.readthedocs.io/en/0.9.0
Posts: 1
Participants: 1
↧
Codementor: HTML Parser — Developer Tools
Short list with code samples to parse HTML using Python / BeautifulSoup library.
↧
↧
PSF GSoC students blogs: So long, FFTPACK
What did you do this week?
Perhaps the most significant task this week was completely removing the fortran FFTPACK code from SciPy and rewriting scipy.fftpack using scipy.fft's pocketfft backend. This drastically simplifies the code with a diff of -8,856 lines of code.
I've also made a number of smaller improvements to scipy.fft as well as a significant performance improvement to scipy.signal.fftconvolve.
The first scipy.fft backend has also been created after my pyFFTW PR was merged this week. This means that SciPy users can accelerate their FFT transforms with all of pyFFTW's features using nothing more than a few function calls.
What is coming up next?
- Adding a CuPy backend for scipy.fft
- Implementing efficient shape-changing transforms in pypocketfft
- Writing tests for the pyFFTW real-to-real transforms PR
- Adding the ability to query active backends for uarray
Did you get stuck anywhere?
No blockers this week.
↧
PSF GSoC students blogs: weeklyCheckIn[9]
What did I do this week?
After completing tests and features for mscolab's project window and getting the PR merged, I started working on a more tricky part of the project. Introducing version control to mscolab server's storage. As explained on the previous blog, this is done to introduce some features to project. Mainly the following
- undo/redo a particular change(commit) - TO BE IMPLEMENTED
- checkout to a particular commit - IMPLEMENTED
I used 'gitpython' library to handle git related functionalities. For now, the commit hash is stored in 'Change' model. It might seem like it's redundant, which is true, but we'll work on this later to find a way to store every detail in the commit, to scrap the 'Change' model.
What's coming up next?
The aforementioned features are already implemented, I have to write tests before I make a PR. Once the PR is created, I will parallelly start working on GUI to create projects, users, and displaying user and project details in project window. After this, my mentor has planned a testing of added features in development server.
Did I get stuck anywhere?
There were two major places where I got stuck.
- While introducing version control to file storage,
git commitwould not work if this file is opened in 'w'(write mode) in any part of program. I had to close the opened reference, so the most recent changes are committed. - I couldn't find a reason to why this happened, but while opening a 'question' with PyQt's MessageBox in an event handler of QListWidgetItem's activate event, it opens multiple times if the 'QListWidget' is reloaded. Maybe because if an item is activated, and another item is added to the list in the event handler, the new item in that index is activated again, in a loop. I avoided it by setting an 'active_change_id' to keep track of the activated item's id and then manually asking an user to press a button to checkout to that change.
↧
Luke Plant: Pylint false positives
In some recent discussion on Reddit, I claimed that, for cases where I’m already using flake8, it seemed as though 95% of Pylint’s reported problems were false positives. Others had very different experiences, so I was intrigued enough to actually do some measurements.
I took part of the code from a side project where I don’t use Pylint, ran Pylint (with some very basic tuning) and tried to analyse the result in terms of helpful warnings compared to false positives etc.
To give some background about the project:
- It’s a fairly typical Django app, which means it is a fairly typical Python app — Django has some of its own idiosyncrasies, and as a framework rather than just a library it imposes some additional constraints, but it tries to make your code normal Python, and has been getting better at that in recent years. Some of the “framework-y” problems it brings will apply to many other libraries that use any framework-like patterns (such as callbacks or the template method design pattern).
- It has about 22,000 lines of Python, but I only ran the Pylint on just under half of this, 11,000, or about 9000 without spaces. That half did include more than its fair share of view code and test code.
- I do use flake8 already on this project, and keep errors to zero. The point of this experiment was for me to assess the benefit of Pylint given that I’m already using flake8.
- The project has decent test coverage, but as I’m the only developer it has never had the benefit of peer code review.
Hopefully this analysis will be useful to other people in assessing whether to add Pylint to their stack of code quality checks. I’m assuming that if you use something like Pylint, you will generally use it systematically as part of required code quality checks, keeping issues to zero. (Otherwise you will have an ever growing list of issues, won’t take it seriously and won’t spot new problems, defeating any usefulness it might have had.)
Overall, Pylint had 1650 complaints about the code I ran it against. Below is my breakdown of that number. More details for all of the error messages can be found in Pylint’s feature list.
Bugs
Pylint found 1 bug in my code. By ‘bug’, I’m including only things that have observably bad behaviour at runtime, at least potentially. In this case, it was an overly broad except clause — broad-except as Pylint calls it. To be specific it was except Exception, not a ‘bare except’ because flake8 already catches those. This would have caused wrong behaviour in the presence of certain kinds of runtime exceptions. If this bug was ever triggered at runtime (and I don’t have evidence that is has been) in this case the resulting bad behaviour would likely have been trivial to non-existent in terms of consequences, but it could have been worse.
TOTAL: 1
Helpful
In addition to this one bug, there were other issues that I’ve classified as ‘helpful’ — Pylint found genuine issues with my code, which, while they were not causing immediate runtime problems, could cause problems in terms of future bugs or maintenance issues.
7 of these were too-many-locals / too-many-branches / too-many-local-variables that together related to 3 parts of my code that were badly structured. A better structure is not immediately obvious, but I’m sure I could do better than what is there.
The remainder were:
- unused-argument× 3 - one of which was an actual mistake compared to what I thought I’d done, where the code only did the right thing by accident, and 2 of which were (unused and unnecessary) keyword args that would have caused problems in the future if I’d tried to use them.
- redefined-builtin× 2
- dangerous-default-value× 2 — these weren’t bugs in my usage because I never used the default, but good to get them fixed.
- stop-iteration-return× 1 — I learnt something I probably would not have found out otherwise here.
- no-self-argument× 1
TOTAL: 16
Cosmetic
These are things I considered to be very minor issues that were not causing problems and were unlikely to do so, but on the other hand fixing them certainly wouldn’t hurt. Some of them are debatable stylistic things. Some of them I put in this category while similar errors were in other categories, because of differences in context which made a difference in my judgement. If I was using Pylint, I would fix these issues to keep it happy, but in most cases probably wouldn’t bother otherwise.
invalid-name× 192
These were mostly one letter variables, in contexts where they were mostly harmless e.g.
forfinglob.glob("some_directory/*.tmp"):os.unlink(f)
Or
forkinkeys:...
Many were in test code.
len-as-condition× 20
useless-object-inheritance× 16 (Python 2 leftovers)
no-else-return× 11
no-else-raise× 1
bad-continuation× 6
redefined-builtin× 4
inconsistent-return-statements× 1
consider-using-set-comprehension× 1
chained-comparison× 1
TOTAL: 252
Unhelpful
These are ones where I regarded the suggestion Pylint was making as unhelpful — there were good reasons for the way it was written, even if a bit unusual, and, in my judgement, the code is better off the way it is — although I could see that other people might make a different judgement, or different choices in coding style and design could potentially have avoided the issues.
too-many-ancestors× 76
These were all in test code, where I’m using a bunch of mixins to provide utilities or mocking of certain things.
unused-variable× 43
This were almost all in test code, where I was destructuring a tuple on assignment:
foo,bar=get_some_stuff()
and then not using one of them. There are easy ways to silence Pylint in these cases (e.g. names like unused), but the names as they were enhanced readability, and a future maintainer (including myself) who might need the value would probably do better if I left the code as it is.
invalid-name× 26
These were cases where I had chosen decent names in context, but ones that happened to fall foul of Pylint’s naming standards e.g. db (which is a well accepted abbreviation for database), and some other names that ended up being non-standard but more understandable the way they were, in my opinion. If you are a stickler for consistency then you might have disagreed here.
redefined-outer-name× 16
Sometimes the right name is the right name, in both inner and outer contexts, and you would never need to use the outer name from the inner context.
too-few-public-methods× 14
Examples included data classes of the kind you create with attrs, which might have zero public methods, or a class that was implementing a dictionary interface but actually only needed to provide a single __getitem__ to work correctly.
no-self-use× 12
These were all in test code, where I had deliberately added methods to a base class or mixin which didn’t use self, because it was more convenient to import them and make them available to a test case that way. Some of them even wrapped standalone functions that did the same thing.
attribute-defined-outside-init× 10
There were good reasons in these cases! Mostly test code.
too-many-locals× 6, too-many-return-statements× 6, too-many-branches× 2, too-many-statements× 2
Yes, these functions were long, but having looked at them, I didn’t think there were nice ways of cleaning them up that would be an overall improvement. One of them, while long, was straightforward and had a very clear structure and wasn’t ‘messy’, while any ways of shortening it I could think of would have involved unhelpful layers of indirection or awkward utility functions.
arguments-differ× 6
Mostly due to using *args and **kwargs in an overridden method, which is usually actually a good way to protect yourself from changes in method signatures from 3rd party packages (but has downsides too, and in some cases this error could highlight genuine bugs).
ungrouped-imports× 4
I already use isort to manage my imports
fixme× 4
Yes, I have some TODOs, but I don’t want to fix them right now.
duplicate-code× 3
Sometimes you have a small amount of boilerplate that is kind of unavoidable, and if the ‘body’ of the code is small, this warning gets triggered.
broad-except× 2
abstract-method× 2
redefined-builtin× 2
too-many-lines× 1
I have tried to think of natural ways to break this module down, and can’t. It’s also one of those places where I think a linter is just the wrong tool. If I have a module with 980 lines of code, and add another 30 so I cross the 1,000 limit, a linter complaining at me is just not helpful. If 980 is OK, why is 1010 so bad? I don’t want to have to refactor that module in order for the build to succeed, and I also want to be keeping my linter silent, so the only thing I can sensibly do at this point is silence the linter somehow, which defeats the purpose.
pointless-statement× 1
expression-not-assigned× 1
cyclic-import× 1
The import cycle had already been broken by placing one inside a function. I couldn’t see a better way to structure the code given the constraints.
unused-import× 1
I already had a # NOQA to silence this for flake8.
too-many-public-methods× 1
If my test class has 35 tests, instead of the maximum 20, is that actually a problem?
too-many-arguments× 1
TOTAL: 243
Can’t fix
This covers a category of issues that I couldn’t fix, even if I wanted to, due to external constraints, like the fact you might need to provide a callback/class to a third party library or framework that has to satisfy certain requirements.
unused-argument× 21
invalid-name× 13
protected-access× 3
Included some access to “documented internals” like sys._getframe in stdlib and Django’s Model._meta (which is documented).
too-few-public-methods× 3
too-many-arguments× 2
wrong-import-position× 2
attribute-defined-outside-init× 1
too-many-ancestors× 1
TOTAL: 46
Incorrect
These are ones where Pylint was simply making objectively wrong assertions about my code. If the assertion had been correct, it would probably have been something to act upon, but it wasn’t.
These are not things you could reasonably file as Pylint bugs - the dynamism of Python makes some of the things Pylint is trying to detect impossible to do reliably.
no-member× 395
These were due to a handful of base classes, some from Django, others I created myself, where Pylint was unable to detect the existence of the members due to dynamism/meta-programming.
Quite a few of them were due to how I had structured my test code (using the pattern given by django-functest, which in some cases could have been fixed by adding additional base classes with ‘abstract’ methods (i.e. ones that just raise NotImplementedError), or perhaps by renaming many of my test classes (to something that in this case would have been misleading, so I wouldn’t be very inclined to do that).
invalid-name× 52
These were mainly due to Pylint applying PEP8’s rule about constants, and thinking that every top-level name defined using an = sign is a ‘constant’. Defining exactly what we mean by a constant is trickier than it sounds, but it certainly doesn’t apply to some things that are constant in nature, such as functions, and shouldn’t apply to less usual ways to create functions e.g.
deffoo():pass# etccached_foo=cache(seconds=100)(foo)
Some of the ones in this category are debatable due to the lack of definition of what a constant is e.g. should a module level defined instance of a class, which may or may not have mutable state, be considered a constant? Such as in this common idiom:
logger=logging.getLogger(__name__)
no-self-use× 23
Pylint incorrectly claimed “Method could be a function” for a bunch of cases where I’m using inheritance to provide different implementations, so couldn’t convert these to functions.
protected-access× 5
Pylint incorrectly assessed who was the ‘owner’ (i.e. the current bit of code is creating a ‘protected’ attribute on an object, and using it locally, but Pylint can’t see that).
no-name-in-module× 1
import-error× 1
pointless-statement× 1
This statement does indeed have an effect:
1/0
I was using it to deliberately throw an unusual error that would be unlikely to be caught, as part of test code. I don’t blame Pylint for not guessing that of course…
TOTAL: 477
Running total
We haven’t finished yet, but let’s put these groups together at a higher level, namely:
- “Good” — the “Bugs” and “Helpful” categories where Pylint would definite have been a positive help: 17
- “Neutral” - the “Cosmetic” category for things that have very marginal benefit, but can’t hurt (as long as they don’t take too much time): 252
- “Bad” — the “Unhelpful”, “Can’t fix” and “Incorrect” categories where Pylint is wanting us to change code that is better off the way it is, or definitely can’t be changed because of external dependencies, or because Pylint has just plain got the analysis wrong: 766
The Good:Bad ratio here is very low in my book. If Pylint was a co-worker doing code review, I’d be praying for him to leave (mostly likely ‘he’ would be the correct gender here…)
To fix the false positives you could silence the entire class of errors (which increasingly makes using Pylint pointless), or add special comments to your code individually. I’m reluctant to do the latter:
- It takes time!
- I dislike the visual clutter of comments that are just there to silence a linter.
I’m happy to add these pragmas when there are compelling benefits from using the linter, but not otherwise — I think comments are important, or should be important, so my code syntax highlighting theme shows them in strong contrast, as recommended by this article. So I do have some NOQA comments to silence flake8, for example, but for this same section of the code they add up to only 5 instances.
Docstrings
The remainder of issues that Pylint found were missing docstrings. I put these in a separate category because:
- They are very debatable, and you as a reader might have a very different policy on this kind of thing.
- I didn’t have time to do an analysis on all of them.
Overall Pylint found 620 missing docstrings (modules, functions, classes methods).
In many cases I feel very justified in not adding docstrings. For example:
- When the name is already clear. For example:
- if I have feature Foo, I don’t have to guess what FooTests might be about. I also don’t tend to add docstrings to test methods, and prefer a long name instead.
- A module foo.utils.html is most likely to contain HTML utilities used by the foo project.
- And many other cases where a good name is enough.
- When the docstring is effectively defined elsewhere — for example, if I’m implementing an interface like Django’s database router. Adding your own docstring could easily be dangerous here.
In other cases, my code certainly could have benefited from more docstrings. Probably in only about 15 to 30% of the cases that Pylint caught would I think “Yes, I should add a docstring here, thank you Pylint for reminding me”.
In general I don’t like tools that force you to write docstrings, because I think you almost always end up with bad docstrings when that happens, and they are much worse than nothing, for basically the same reasons as for bad comments:
- they waste your time reading them, because they provide no extra information, or incorrect information,
- they then make you subconsciously filter out docstrings as a useful source of info, so they make all the docstrings useless, when docstrings can contain useful info.
Warnings about docstrings are annoying because to silence them individually would require adding a comment, which is about the same amount of work, and adds the same amount of visual noise, as adding a docstring itself. So it’s pretty much inevitable that you will end up with docstrings that are not necessary or unhelpful (and are therefore actively harmful).
I’ve experienced this in practice, and I don’t think it can be solved by “choose better developers” or “try harder” — the problem is the process.
Conclusion
With these figures, I feel my previous estimates about the usefulness of Pylint (in the context of a code base where I’m already using flake8) were about right. The false positive rate would have to be massively reduced for me to consider using it.
In addition to the time and visual noise needed to deal with false positives, I would be reluctant to add something like this to a project because of the problem that junior devs may take a more slavish approach to keeping Pylint happy. This could result in them breaking working code because they didn’t understand that Pylint had got it wrong, or doing big code refactors just to enable Pylint to understand the code.
If you use Pylint from the beginning of a project, or in a project with very few third party dependencies, I imagine you might feel differently, as the rate at which you hit false positives might be low. On the other hand, this might simply be concealing the costs of these things.
Another approach would be to use Pylint with a very restricted set of errors. However, there were only a handful of errors which were consistently correct, or low enough in false positives (either in relative or absolute terms) that I would want them on my project. (These included: dangerous-default-value, stop-iteration-return, broad-exception, useless-object-inheritance)
Anyway, I hope this has been helpful to others in considering the use of Pylint, or in arguing about it with colleagues!
↧
Ofosos: A digital tally list for hackerspaces

I'm a member of an open workshop in my hometown. Last week we started joking around about getting a drink vending machine. Still half joking, I started searching on eBay for used vending machines. While on my way to a pub, I pictured having a vending machine for the workshop: cashless, probably driven by Stripe.
While at the pub, my idea was quickly voted down. Instead the idea that gained traction was a digital tally list. We started sketching out this plan. It would be driven by the same RFID tokens that give you access to the workshop. We were unsure about having a prepaid or a postpaid model.
This problem looked like it was sized in a way that we could clear out the major road blocks during my vacation last week. The pub appointment was on Tuesday, I started work on Wednesday and had some basic demo running by the end of the day. I continued on Thursday and had more features and a more streamlined UI by the end of the day.
On Friday I slapped a license on it and evaluated our RFID options. Basically the RFID token we use as a key supports the MIFARE protocol, so we can go with the cheapest reader hardware that is available at 5 Eur a piece. Right now we're still in a state where we enter a UID on the command line, when prompted, instead of running with the actual reader. But the prompt is already running in its own thread and I'm pretty sure we can just connect the RFID reader in this way.
On Sunday a very talented friend joined in and he re-styled the entire app
with the workshop's cororate design. Simplifying stuff on his way.
Overall our plan is to write a digital tally list in two weeks, going from idea to running prototype. This tally list should support donations with a variable amount, drinks with set price, as well as assorted items like the workshop fee. It also needs to support rudimentary user management and some kind of admin interface. All users will be verified by RFID.
Currently consumption is logged into a monthly log-file, so we can easily handle the payments. Users are managed by the UI itself, we just have to put the initial UID into a json file. Drink prices are read from JSON and a price update requires a restart of the app. The app itself will run on a Raspberry PI with an attached 7" display and an RFID reader attached via the serial port.
The entire app is written in Python with a QML frontend.
I'm ordering the RFID hardware and the display this week, so we have a full weekend of hacking ahead of us.
Here we go.
 Screenshot after the first week.
Let's see if we make this.
Code lives here
↧
↧
PSF GSoC students blogs: Week-9
Hello folks,
↧
Python Bytes: #141 Debugging with f-strings coming in Python 3.8
↧
ListenData: Precision Recall Curve Simplified
This article outlines precision recall curve and how it is used in real-world data science application. It includes explanation of how it is different from ROC curve. It also highlights limitation of ROC curve and how it can be solved via area under precision-recall curve. This article also covers implementation of area under precision recall curve in Python, R and SAS.
![confusion matrix]()
READ MORE »
Table of Contents
What is Precision Recall Curve?
Before getting into technical details, we first need to understand precision and recall terms in layman's term. It is essential to understand the concepts in simple words so that you can recall it for future work when it is required. Both Precision and Recall are important metrics to check the performance of binary classification model.Precision
Precision is also called Positive Predictive Value. Suppose you are building a customer attrition model which has objective to identify customers who are likely to close relationship with the company. The use of this model is to prevent attrition and boost customer profitability. It's a binary classification problem in which dependent variable is binary in nature. It has only two values either 0 or 1. 1 refers to customers who left us. 0 refers to active customers who are still with us. In this case, precision is the proportion of customers our predictive model call as attritors actually left us (attrited).Let's understand it by confusion matrix

Precision = True Positive / (True Positive + False Positive)
- True Positive : Number of customers who actually attrited whom we correctly predicted as attritors.
- False Positive : Number of customers who actually did not attrite whom we incorrectly predicted as attritors.
↧
PSF GSoC students blogs: Check-in: 9th week of GSoC (Jul 22 - Jul 28)
1. What did you do this week?
2. What is coming up next?
3. Did you get stuck anywhere?
↧
↧
PSF GSoC students blogs: Weekly Summary #10
Hi everyone!
""""
What did you do last week
In this week I was working on the development of the web service for testing, also advanced in the wsmtxca test of electronic billing with details and an improvement in the functionality with travis.
This week
In this week I will continue with the development of the web service, move forward with the project tests and correct unicode runtime problems.
Comments
In the development of the web service I was seeing several projects to test the clients for web service, such as soapUI written in java, this hang up my system it seems that I and Oracle are not compatible, summary, I could not use it until now. Seeing tools in python like Flask with which I ran simple tests and ladon to handle a web service development tool in which I could not achieve much yet. But nothing more complicated than the development itself.
"""
Regards and Good Week!
↧
ListenData: How to Import Data in Python
This tutorial explains various methods to read data in Python. Data can be in any of the popular formats - CSV, TXT, XLS/XLSX (Excel), sas7bdat (SAS), Stata, Rdata (R) etc. Loading data in python environment is the most initial step of analyzing data.
While importing external files, we need to check the following points -
If you are using Anaconda, pandas must be already installed. You need to load the package by using the following command -
We can include column names by using names= option.
READ MORE »
 |
| Import Data into Python |
- Check whether header row exists or not
- Treatment of special values as missing values
- Consistent data type in a variable (column)
- Date Type variable in consistent date format.
- No truncation of rows while reading external data
Table of Contents
Install and Load pandas Package
pandas is a powerful data analysis package. It makes data exploration and manipulation easy. It has several functions to read data from various sources.If you are using Anaconda, pandas must be already installed. You need to load the package by using the following command -
import pandas as pdIf pandas package is not installed, you can install it by running the following code in Ipython Console. If you are using Spyder, you can submit the following code in Ipython console within Spyder.
!pip install pandasIf you are using Anaconda, you can try the following line of code to install pandas -
!conda install pandas
1. Import CSV files
It is important to note that a singlebackslash does not work when specifying the file path. You need to either change it to forward slash or add one more backslash like belowimport pandas as pd
mydata= pd.read_csv("C:\\Users\\Deepanshu\\Documents\\file1.csv")
If no header (title) in raw data file
mydata1 = pd.read_csv("C:\\Users\\Deepanshu\\Documents\\file1.csv", header = None)You need to include header = None option to tell Python there is no column name (header) in data.
Add Column Names
We can include column names by using names= option.
mydata2 = pd.read_csv("C:\\Users\\Deepanshu\\Documents\\file1.csv", header = None, names = ['ID', 'first_name', 'salary'])The variable names can also be added separately by using the following command.
mydata1.columns = ['ID', 'first_name', 'salary']
2. Import File from URL
You don't need to perform additional steps to fetch data from URL. Simply put URL in read_csv() function (applicable only for CSV files stored in URL).mydata = pd.read_csv("http://winterolympicsmedals.com/medals.csv")
3. Read Text File
We can use read_table() function to pull data from text file. We can also use read_csv() with sep= "\t" to read data from tab-separated file.mydata = pd.read_table("C:\\Users\\Deepanshu\\Desktop\\example2.txt")
mydata = pd.read_csv("C:\\Users\\Deepanshu\\Desktop\\example2.txt", sep ="\t")
↧
ListenData: Python : 10 Ways to Filter Pandas DataFrame
In this article, we will cover various methods to filter pandas dataframe in Python. Data Filtering is one of the most frequent data manipulation operation. It is similar to WHERE clause in SQL or you must have used filter in MS Excel for selecting specific rows based on some conditions. In terms of speed, python has an efficient way to perform filtering and aggregation. It has an excellent package called pandas for data wrangling tasks. Pandas has been built on top of numpy package which was written in C language which is a low level language. Hence data manipulation using pandas package is fast and smart way to handle big sized datasets. ![filter pandas dataframe]()
READ MORE »
Examples of Data Filtering
It is one of the most initial step of data preparation for predictive modeling or any reporting project. It is also called 'Subsetting Data'. See some of the examples of data filtering below. - Select all the active customers whose accounts were opened after 1st January 2019
- Extract details of all the customers who made more than 3 transactions in the last 6 months
- Fetch information of employees who spent more than 3 years in the organization and received highest rating in the past 2 years
- Analyze complaints data and identify customers who filed more than 5 complaints in the last 1 year
- Extract details of metro cities where per capita income is greater than 40K dollars

Import Data
Make sure pandas package is already installed before submitting the following code. You can check it by running !pip show pandas statement in Ipython console. If it is not installed, you can install it by using the command !pip install pandas. We are going to use dataset containing details of flights departing from NYC in 2013. This dataset has 32735 rows and 16 columns. See column names below. To import dataset, we are using read_csv( ) function from pandas package.
['year', 'month', 'day', 'dep_time', 'dep_delay', 'arr_time',
       'arr_delay', 'carrier', 'tailnum', 'flight', 'origin', 'dest',
       'air_time', 'distance', 'hour', 'minute']
import pandas as pd
df = pd.read_csv("https://dyurovsky.github.io/psyc201/data/lab2/nycflights.csv")
Filter pandas dataframe by column value
Select flights details of JetBlue Airways that has 2 letters carrier code
B6 with origin from JFK airport↧