Quantcast
Channel: Planet Python
Viewing all 23144 articles
Browse latest View live

Python Software Foundation: Au revoir PyCon Pune

$
0
0

By Anwesha Das

February 2017 marked the beginning of a new journey for a new regional Python Conference - PyCon Pune.

PyCon is the meeting place for community. It gives Pythonistas an opportunity to come out of the virtual world and meet the real people behind the nicknames and the handles. It gives them an opportunity to learn new things and share their knowledge with others.

Considering the vast geographical territory of India, a single PyCon event wasn’t sufficient. PyCon Pune offered the Python community another chance to interact.

It was a four-day event; the main conference on the first two days and development sprints the second two. It was a single-track event, so all 550 attendees could attend all the sessions.


The inside story:


Pune, also known as the Oxford of the East, is amongst the fastest growing cities in the Asia Pacific region. Pune witnessed this PyCon at a hotel called Amonora, the Fern. The venue was beautiful, and we were grateful to have it: just a few weeks before the conference began, we were afraid we would have no venue at all!

The event had been located at one of oldest engineering colleges in Pune, but the venue canceled two weeks prior to the conference. Not quite the kind of news any organizers would like to hear, last minute (I can vouch for that, I was one of them).

Python Software Foundation then extended its hand to help. Team PyCon Pune as well as the Python community in India cannot thank the PSF enough for this.


PyLadies in PyCon Pune:


The PSF has always been a huge supporter of PyLadies. This time, they offered to share their booth with us. PyLadies had a huge presence at the event. From volunteering, to management, PyLadies were there everywhere. Yes, “Python is for girls.” And if we PyLadies need support in the face of a crisis, the PSF is there to hold us.


United we stand:

The first ever thing that we decided for the conference was the quote to be used on the conference t-shirt.

“Came for the language, stayed for the community”, by Brett Cannon

This set the tone of the conference. The conference is a completely volunteer-driven event: the website, finance, AV and the overall management were run by volunteers, celebrating the community in the truest sense. Help poured in from pythonistas worldwide. The logo was designed by Ryan Larch from Australia. Python communities from all over India along with Python Pune and PyLadies worked tirelessly together to make the event a success. These people keep the soul of Python (the community and language) alive.


Day 1 and Day 2 of the main conference:


With a welcome note by Kushal Das, the chair commenced the conference. The first keynote was by Honza Král. He talked about his journey in the open source world. It was interesting to know about his hurdles and how he overcame them. It is also always inspiring to see at masters were students once too. Next, Anand Chitipothu taught us to write beautiful code.The post-lunch session began with the keynote by the “official Perl guy” of the Python community, John “Warthog” Hawley, who described the path from software to hardware hacking.

The day ended with an enchanting experience - a keynote by Pravin Patil, a teacher who uses Python to teach Physics. Python plus Physics plus a Laser equaled magic in his presentation.

Katie Cunningham began Day 2, followed by the Economics Professor Stephen Turnbull. He has helped to develop Ghostscript, XEmacs, Python, and GNU Mailman. He offered a word of encouragement to us saying, “You can help develop Python - and you should!” After lunch, Nick Coghlan delivered his keynote. He discussed “opportunities and challenges in open collaboration.” The last keynote talk was by Terri Oda, about security in the open source world.

This led to the end of the main conference. The mentors for the dev sprints spoke on what they were going to work on. An open feedback session marked the close of the main conference.

Day 3 and Day 4 of the Developers Sprint


For sprints, the conference moved to the Red Hat office in Pune. A dozen projects added features and fixed bugs during the final two days of the conference. The sprints had proven to be the most popular portion of the conference: Tickets had sold out within a week.

The Red Hat office looked like a hackerspace over the weekend. People were coding, learning, having fun and celebrating Python. It was the first ever dev sprint experience for more than 95% of the attendees. It took most of the people to some time to understand what is going on and how they could participate.

Slowly folks started flocking around different mentors. There were good number of people gathering around Nick—many Pythonistas have a dream to become CPython core developers. More than 10 patches were submitted to the language. Web.py, ElasticSearch, Django, es-django-example, OpenCabs, Pagure and micropython held sprints as well. The actual number of patches submitted can be found here.

I took shelter in the micropython and hardware room, where we were worked on fun bunny boards with esp8266 devices. John was there guiding us, changing our lives (my life for certain) with blinking LEDs. The best surprise came at the end. He gave each of us a bunny board. What a lovely souvenir to take home!

The conference is intended to give people the feeling of community. The event is over but the spirit is hasn’t diminished. Please join us next year for PyCon Pune 2018, February 8 - 11.

Jean-Paul Calderone: SSH to EC2 (Refrain)

$
0
0

Recently Moshe wrote up a demonstration of the simple steps needed to retrieve an SSH public key from an EC2 instance to populate a known_hostsfile. Moshe's example uses the highly capable boto3 library for its EC2 interactions. However, since his blog is syndicated on Planet Twisted, reading it left me compelled to present an implementation based on txAWS instead.

First, as in Moshe's example, we need argv and expanduser so that we can determine which instance the user is interested in (accepted as a command line argument to the tool) and find the user's known_hosts file (conventionally located in ~):


from sys import argv
from os.path import expanduser
Next, we'll get an abstraction for working with filesystem paths. This is commonly used in Twisted APIs because it saves us from many path manipulation mistakes committed when representing paths as simple strings:

from filepath import FilePath
Now, get a couple of abstractions for working with SSH. Twisted Conch is Twisted's SSH library (client & server). KnownHostsFile knows how to read and write the known_hosts file format. We'll use it to update the file with the new key. Key knows how to read and write SSH-format keys. We'll use it to interpret the bytes we find in the EC2 console output and serialize them to be written to the known_hosts file.

from twisted.conch.client.knownhosts import KnownHostsFile
from twisted.conch.ssh.keys import Key
And speaking of the EC2 console output, we'll use txAWS to retrieve it. AWSServiceRegion is the main entrypoint into the txAWS API. From it, we can get an EC2 client object to use to retrieve the console output.

from txaws.service import AWSServiceRegion
And last among the imports, we'll write the example with inlineCallbacks to minimize the quantity of explicit callback-management code. Due to the simplicity of the example and the lack of any need to write tests for it, I won't worry about the potential problems with confusing tracebacks or hard-to-test code this might produce. We'll also use react to drive the whole thing so we don't need to explicitly import, start, or stop the reactor.

from twisted.internet.defer import inlineCallbacks
from twisted.internet.task import react
With that sizable preamble out of the way, the example can begin in earnest. First, define the main function using inlineCallbacks and accepting the reactor (to be passed by react) and the EC2 instance identifier (taken from the command line later on):

@inlineCallbacks
def main(reactor, instance_id):
Now, get the EC2 client. This usage of the txAWS API will find AWS credentials in the usual way (looking at AWS_PROFILE and in ~/.aws for us):

region = AWSServiceRegion()
ec2 = region.get_ec2_client()
Then it's a simple matter to get an object representing the desired instance and that instance's console output. Notice these APIs return Deferred so we use yield to let inlineCallbacks suspend this function until the results are available.

[instance] = yield ec2.describe_instances(instance_id)
output = yield ec2.get_console_output(instance_id)
Some simple parsing logic, much like the code in Moshe's implementation (since this is exactly the same text now being operated on). We do take the extra step of deserializing the key into an object that we can use later with a KnownHostsFile object.

keys = (
Key.fromString(key)
for key in extract_ssh_key(output.output)
)
Then write the extracted keys to the known hosts file:

known_hosts = KnownHostsFile.fromPath(
FilePath(expanduser("~/.ssh/known_hosts")),
)
for key in keys:
for name in [instance.dns_name, instance.ip_address]:
known_hosts.addHostKey(name, key)
known_hosts.save()
There's also the small matter of actually parsing the console output for the keys:

def extract_ssh_key(output):
return (
line for line in output.splitlines()
if line.startswith(u"ssh-rsa ")
)
And then kicking off the whole process:

react(main, argv[1:])
Putting it all together:

from sys import argv
from os.path import expanduser

from filepath import FilePath

from twisted.conch.client.knownhosts import KnownHostsFile
from twisted.conch.ssh.keys import Key

from txaws.service import AWSServiceRegion

from twisted.internet.defer import inlineCallbacks
from twisted.internet.task import react

@inlineCallbacks
def main(reactor, instance_id):
region = AWSServiceRegion()
ec2 = region.get_ec2_client()

[instance] = yield ec2.describe_instances(instance_id)
output = yield ec2.get_console_output(instance_id)

keys = (
Key.fromString(key)
for key in extract_ssh_key(output.output)
)

known_hosts = KnownHostsFile.fromPath(
FilePath(expanduser("~/.ssh/known_hosts")),
)
for key in keys:
for name in [instance.dns_name, instance.ip_address]:
known_hosts.addHostKey(name, key)
known_hosts.save()

def extract_ssh_key(output):
return (
line for line in output.splitlines()
if line.startswith(u"ssh-rsa ")
)

react(main, argv[1:])

So, there you have it. Roughly equivalent complexity to using boto3 and on its own there's little reason to prefer this to what Moshe has written about. However, if you have a larger Twisted-based application then you may prefer the natively asynchronous txAWS to blocking boto3 calls or managing boto3 in a thread somehow.

Also, I'd like to thank LeastAuthority (my current employer and operator of the Tahoe-LAFS-based S4 service which just so happens to lean heavily on txAWS) for originally implementing get_console_output for txAWS (which, minor caveat, will not be available until the next release of txAWS is out).

As always, if you like this sort of thing, check out the support links on the right.

Python Sweetness: Mitogen, an infrastructure code baseline that sucks less

$
0
0
h3 { font-size: larger !important; text-decoration: underline !important; margin-top: 1em !important; } table.tbl { } table.tbl td, table.tbl th { border: 1px solid black; padding: 2px; font-size: 80%; }

After many years of occasional commitment, I’m finally getting close to a solid implementation of a module I’ve been wishing existed for over a decade: given a remote machine and an SSH connection, just magically make Python code run on that machine, with no hacks involving error-prone shell snippets, temporary files, or hugely restrictive single use request-response shell pipelines, and suchlike.

I’m borrowing some biology terminology and calling it Mitogen, as that’s pretty much what the library does. Apply some to your program, and it magically becomes able to recursively split into self-replicating parts, with bidirectional communication and message routing between all the pieces, without any external assistance beyond an SSH client and/or sudo installation.

Mitogen’s goal is straightforward: make it childsplay to run Python code on remote machines, eventually regardless of connection method, without being forced to leave the rich and error-resistant joy that is a pure-Python environment. My target users would be applications like Ansible, Salt, Fabric and similar who (through no fault of their own) are universally forced to resort to obscene hacks in their implementations to affect a similar result. Mitogen may also be of interest to would-be authors of pure Python Internet worms, although support for autonomous child contexts is currently (and intentionally) absent.

Because I want this tool to be useful to infrastructure folk, Mitogen does not require free disk space on the remote machines, or even a writeable filesystem – everything is done entirely in RAM, making it possible to run your infrastructure code against a damaged machine, for example to implement a repair process. Newly spawned Python interpreters have import hooks and logging handlers configured so that everything is fetched or forwarded over the network, and the only disk accesses necessary are those required to start a remote interpreter.

Recursion

Mitogen can be used recursively: newly started child contexts can in turn be used to run portions of itself to start children-of-children, with message routing between all contexts handled automatically. Recursion is used to allow first SSHing to a machine before sudoing to a new account, all with the user’s Python code retaining full control of each new context, and executing code in them transparently, as easily as if no SSH or sudo connection were involved at all. The master context is able to control and manipulate children created in this way as easily as if they were directly connected, the API remains the same.

Currently there exists just two connection methods: ssh and sudo, with the sudo support able to cope with typing passwords interactively, and crap configurations that have requiretty enabled. I am explicitly planning to support Windows, either via WMI, psexec, or Powershell Remoting. As for other more exotic connection methods, I might eventually implement bootstrap over an IPMI serial console connection if for nothing else then as a demonstrator of how far this approach can be taken, but the ability to use the same code to manage a machine with or without a functional networking configuration would be in itself a very powerful feature.

This looks a bit like X. Isn’t this just X?

Mitogen is far from the first Python library to support remote bootstrapping, but it may be the first to specifically target infrastructure code, minimal networking footprint, read-only filesystems, stdio and logging redirection, cross-child communication, and recursive operation. Notable similar packages include Pyro and py.execnet.

This looks a bit like Fabric. Isn’t this just Fabric?

Fabric’s API feels kinda similar to what Mitogen offers, but it fundamentally operates in terms of chunks of shell snippets to implement all its functionality. You can’t easily (at least, as far as I know) trick Fabric into running your Python code remotely, or for that matter recursively across subsequent sudo and SSH connections, and arrange for that code to communicate bidirectionally with code running in the local process and autonomously between any spawned children.

Mitogen internally reuses this support for bidirectional communication to implement some pretty exciting functionality:

SSH Client Emulation

So your program has an elaborate series of tunnels setup, and it’s running code all over the place. You hit a problem, and suddenly feel the temptation to drop back to raw shell and SSH again: “I just need to sync some files!”, you tell yourself, before loudly groaning on realizing the spaghetti of duplicated tunnel configurations that would be required to get rsync running the same way as your program. What’s more, you realize that you can’t even use rsync, because you’re relying on Mitogen’s ability to run code over sudo with requiretty enabled, and you can’t even directly log into that target account.

Not a problem: Mitogen supports running local commands with a modified environment that causes their attempt to use SSH to run remote command lines to be redirected into Mitogen, and tunnelled over your program’s existing tunnels. No duplicate configuration, no wasted SSH connections, no 3-way handshake latency.

The primary goal of the SSH emulator to simplify porting existing infrastructure scripts away from shell, including those already written in Python. As a first concrete target for Mitogen, I aim to retrofit it to Ansible as a connection plug-in, where this functionality becomes necessary to support e.g. Ansible’s synchronize module.

Compared To Ansible

To understand the value of Mitogen, a short comparison against Ansible may be useful. I created an Ansible playbook talking to a VMWare Fusion Ubuntu machine, with SSH pipelining enabled (the current best performance mode in Ansible). The playbook simply executes /bin/true with become: true and discards the result 100 times.

I then created an equivalent script written against Mitogen, using its SSH and sudo functionality, and finally a trivial change to the Mitogen variant that executes the control loop on the target machine. In terms of architecture, the first Mitogen script is closer to a fair comparison to Ansible’s control flow, but the latter is a good example of the kind of intelligence Mitogen enables that would be messy, if not close to impossible with Ansible’s existing architecture.

[Side note: this is comparing performance characteristics only, in particular I am not advocating writing code against Mitogen directly! It’s possible, but you get none of the ease of use that a tool like Ansible provides. On saying that, though, a Mitogen-enabled tool composed of tens of modules would have similar performance to the numbers below, just a slightly increased base cost due to initial module upload]

Method Bytes A→BBytes B→APackets A→BPackets B→ADuration (ms)
Ansible default5,001,352 486,500 8,864 4,460 55,065
Ansible pipelining4,562,905 178,622 4,282 2,033 25,643
Mitogen local loop45,847 17,982 247 135 1,245
Mitogen remote loop22,511 5,766 51 39 784

The first and most obvious property of Ansible is that it uses a metric crap-ton of bandwidth, averaging 45kb of data for each run of /bin/true. In comparison, the raw command line “ssh host /bin/true” generates only 4.7kb and 311ms, including SSH connection setup and teardown.

Bandwidth aside, CPU alone cannot account for runtime duration, clearly significant roundtrips are involved, generating sufficient latency to become visible on an in-memory connection to a local VM. Why is that? Things are about to get real ugly, and I’m already starting to feel myself getting depressed. Remember those obscene hacks I mentioned earlier? Well, buckle your seatbelt Dorothy, because Kansas is going bye-bye..

The Ugly

[Side note: the name Ansible is borrowed from Ender’s Game, where it refers to a faster-than-light communication technology. Giggles]Ignorance is bliss

When you write some code in Ansible, like shell: /bin/true, you are telling Ansible (in most cases) that you want to execute a module named shell.py on the target machine, passing /bin/true as its argument.

So far, so logical. But how is Ansible actually running shell.py? “Simple”, by default (no pipelining) it looks like this:

  1. First it scans shell.py for every module dependency,
  2. then it adds the module and all dependents into an in-memory ZIP file, alongside a file containing the module’s serialized arguments,
  3. then it base64-encodes this ZIP file and mixes it into a templatized self-extracting Python script (module_common.py),
  4. then it writes the templatized script to the local filesystem, where it can be accessed by sftp,
  5. then it uploads the script to the target machine:
    1. first it runs a fairly simple bash snippet over SSH to find the user’s home directory,
    2. then it runs a bigger bash snippet to create a temporary directory in the user’s home directory in which to write the templatized script,
    3. then it starts an sftp session and uses it to write the templatized script to the new temporary directory,
  6. then it runs another snippet over SSH to mark the script executable,
  7. then it wraps a snippet to execute the templatized script using an obscene layer of quoting (16 quotes!!!) and passes it to sudo,
  8. finally the templatized script runs:
    1. first it creates yet another temporary directory on the target machine, this time using the tempfile module,
    2. then it writes a base64-decoded copy of the embedded ZIP file as ansible_modlib.zip into that directory,
    3. then it opens the newly written ZIP file using the zipfile module and extracts the module to be executed into the same temporary directory, named like ansible_mod_<modname>.py,
    4. then it opens the newly written ZIP file in append mode and writes a custom sitecustomize.py module into it, causing the ZIP file to be written to disk for a second time on this machine, and a third time in total,
    5. then it uses the subprocess module to execute the extracted script, with PYTHONPATH set to cause Python’s ZIP importer to search for additional dependent modules inside the extracted-and-modified ZIP file,
    6. then it uses the shutil module to delete the second temporary directory,
  9. then the shell snippet that executed the templatized script is used to run rm -rf over the first temporary directory.

When pipelining is disabled, which is the default, and required for cases where sudo has requiretty enabled, these steps (and their associated network roundtrips) recur for every single playbook step. And now you know why Ansible makes execution over a local 1Gbit LAN feel like it’s communicating with a host on Mars.

Need a breath? Don’t worry, things are about to get better. Here are some pretty graphs to look at while you’re recovering..

The Ugly (from your network’s perspective)

This shows Ansible’s pipelining mode, constantly reuploading the same huge data part and awaiting a response for each run. Be sure to note the sequence numbers (transmit byte count) and the scale of the time axis:

Now for Mitogen, demonstrating vastly more conservative use of the network:

The SSH connection setup is clearly visible in this graph, accounting for about the first 300ms on the time axis. Additional excessive roundtrips are visible as Mitogen waits for its command-line to signal successful first stage bootstrap before uploading the main implementation, and 2 subsequent roundtrips first to fetch mitogen.sudo module followed by the mitogen.master module. Eliminating module import roundtrips like these will probably be an ongoing battle, but there is a clean 80% solution that would apply in this specific case I just haven’t gotten around to implementing yet.

The fine curve representing repeated executions of /bin/true is also visible: each bump in the curve is equivalent to Ansible’s huge data uploads from earlier, but since Mitogen caches code in RAM remotely, unlike Ansible it doesn’t need to reupload everything for each call, or start a new Python process, or rewrite a ZIP file on disk, or .. etc.

Finally one last graph, showing Mitogen with the execution loop moved to the remote machine. All the latency induced by repeatedly invoking /bin/true from the local machine has disappeared.

The Less Ugly

Ansible’s pipelining mode is much better, and somewhat resembles Mitogen’s own bootstrap process. Here the templatized initial script is fed directly into the target Python interpreter, however they immediately deviate since Ansible starts by extracting the embedded ZIP file per step 8 above, and discarding all the code it uploaded once the playbook step completes, with no effort made to preserve either the Python processes spawned, or the significant amount of uploaded module code for each step.

Pipelining mode is a huge improvement, however it still suffers from making use of the SSH stdio pipeline only once (which was expensive to setup, even with multiplexing enabled), the destination Python interpreter only once (usually ~100ms+ per invocation), and as mentioned repeatedly, no caching of code in the target, not even on disk.

When Mitogen is executing your Python function:

  1. it executes SSH with a single Python command-line,
  2. then it waits for that command-line to report "EC0" on stdout,
  3. then it writes a copy of itself over the SSH pipe,
    1. meanwhile the remote Python interpreter forks into two processes,
    2. the first re-execs itself to clear the huge Python command-line passed over SSH, and resets argv[0] to something descriptive,
    3. the second signals "EC0" and waits for the parent context to send 7KiB worth of Mitogen source, which it decompresses and feeds to the first before exitting,
    4. the Mitogen source reconfigures the Python module importer, stdio, and logging framework to point back into itself, then starts a private multiplexer thread,
    5. the main thread writes "EC1" then sleeps waiting for CALL_FUNCTION messages,
    6. meanwhile the multiplexer routes messages between this context’s main thread, the parent, and any child contexts, and waits for something to trigger shutdown.
  4. then it waits for the remote process to report "EC1",
  5. then it writes a CALL_FUNCTION message which includes the target module, class, and function name and parameters,
    1. the slave receives the CALL_FUNCTION message and begins execution, satisfying in-RAM module imports using the connection to the parent context as necessary.

On subsequent invocations of your Python function, or other functions from the same module, only steps 3.6, 5, and 5.1 are necessary.

This all sounds fine and dandy, but how can I use it?

I’m working on it! For now my goal is to implement enough functionality so that Mitogen can be made to work with Ansible’s process model. The first problem is that Ansible runs playbooks using multiple local processes, and has no subprocess<->host affinity, so it is not immediately possible to cache Mitogen’s state for a host. I have a solid plan for solving that, but it’s not yet implemented.

There are a huge variety of things I haven’t started yet, but will eventually be needed for more complex setups:

  • Getting Started Documentation: it’s missing.

  • Asynchronous connect(): so large numbers of contexts can be spawned in reasonable time. For, say, 3 tiers targeting a 1,500 node network connecting in 30 seconds or so: a per-rack tier connecting to 38-42 end nodes, a per-quadrant tier connecting to 10 or so racks, a single box in the datacentre tier for access to a management LAN, reducing latency and caching uploaded modules within a datacenter’s network, and the top-level tier which is the master program itself.

  • Better Bootstrap, Module Caching And Prefetching: currently Mitogen is wasting network roundtrips in various places. This makes me lose sleep.

  • General Robustness: no doubt with real-world use, many edge cases, crashes, hangs, races and suchlike will be be discovered. Of those, I’m most concerned with ensuring the master process never hangs with CTRL+C or SIGTERM, and in the case of master disconnect, orphaned contexts completely shut down 100% of the time, even if their main thread has hung.

  • Better Connection Types: it should at least support SSH connection setup over a transparently forwarded TCP connection (e.g. via a bastion host), so that key material never leaves the master machine. Additionally I haven’t even started on Windows support yet.

  • Security Audit: currently the package is using cPickle with a highly restrictive class whitelist. I still think it should be possible to use this safely, but I’m not yet satisfied this is true. I’d also like it to optionally use JSON if the target Python version is modern enough. Additionally some design tweaks are needed to ensure a compromised slave cannot use Mitogen to cross-infect neighbouring nodes.

  • Richer Primitives: I’ve spent so much effort keeping the core of Mitogen compact that overall design has suffered, and while almost anything is possible using the base code, often it involves scrobbling around in the internal plumbing to get things working. Specifically I’d like to make it possible to pass Context handles as RPC parameters, and generalise the fakessh code so that it can handle other kinds of forwarding (e.g. TCP connections, additional UNIX pipe scenarios).

  • Tests. The big one: I’ve only started to think about tests recently as the design has settled, but so much system-level trickery is employed, always spread out across at least 2 processes, that an effective test strategy is so far elusive. Logical tests don’t capture any of the complex OS/IO ordering behaviour, and while typical integration tests would capture that, they are too coarse to rely on for catching new bugs quickly and with strong specificity.

Why are you writing about this now?

If you read this far, there’s a good chance you either work in infrastructure tooling, or were so badly burned by your experience there that you moved into management. Either way, you might be the person who could help me spend more time on this project. Perhaps you are on a 10-person team with a budget, where 30% of the man-hours are being wasted on Ansible’s connection latency? If so, you should definitely drop me an e-mail.

The problem with projects like this is that it is almost impossible to justify commercially, it is much closer to research than product, and nobody ever wants to pay for that. However, that phase is over, the base implementation looks clean and feels increasingly solid, my development tasks are becoming increasingly target-driven, and I’d love the privilege to polish up what I have, to make contemporary devops tooling a significantly less depressing experience for everyone involved.

If you merely made it to the bottom of the article because you’re interested or have related ideas, please drop me an e-mail. It’s not quite ready for the prime time, but things work more than sufficiently that early experiementation is probably welcome at this point.

Meanwhile I will continue aiming to make it suitable for use with Ansible, or perhaps a gentle fork of Ansible, since its internal layering isn’t the greatest.

بايثون العربي: تثبيت وحذف حزم بايثون بواسطة أداة pip

$
0
0

خطوة بخطوة نحو تعلم أساسيات التعامل مع أداة  إدارة الحزم pip بمهارة ومع الأمر Pip سنتعلم كيفية تثبيت وحذف مختلف حزم بايثون من PyPI.

يقترب بايثون من العقد الثالث منذ نشأته وعبر كل هذ السنين ساهم الكثير من المستخدمين في بناء العديد من حزم بايثون التي تؤدي وظائف وعمليات محددة.

إلى غاية كتابة هذه الأسطر هناك مايقارب 122 ألف حزمة موجودة على موقع PyPI وهي إختصار ل Python Package Index والتي تعني فهرس حزم بايثون وهو مستودع مركزي يحتوي على الوحدات و الحزم المجانية للغة بايثون وهو مايجعل العمل مع بايثون أمر جيد ومريح .

كما ترى فإن معظم المبرمجين بلغة بايثون يقومون ببناء حزم بايثون على إختلاف أهدافها ، ويقومون بتحديثها بما يناسب التطبيقات والبرامج الحديثة .

هناك إحتمال أن تجد أكثر من حزمة لنفس الغرض فقط عليك إختيار مايناسب غرضك من البرمجة (سنتطرق لذلك).

ولكي يكون لدينا مثال نعمل عليه سنعمل على حل بعض إستفسارات زوار موقع بايثون العربي والذي يتسأل عن إمكانية إستخدام الرموز التعبيرية في تطبيقات بايثون وهل توجد مكتبات أو حزم تساعد على ذلك .

دعونا نكتشف ذلك :

إليك ما سنغطيه في هذا الدرس :

  1. البحث عن الحزم
  2. مالذي يجب أن نتأكد منه قبل إختيار الحزم
  3. تثبيت الحزمة بواسطة PIP
  4. إلغاء تثبيت حزم بايثون بواسطة PIP

البحث عن حزم بايثون  

دعونا نستعمل الرموز التعبيرية كمثال، ولقد وجدنا حزم متعلقة بالرموز التعبيرية على موقع pypi بعد البحث عن emoji عن طريق صندوق البحث الموجود على الموقع نفسه.

وإلى غاية كتابتنا لهذه الأسطر وجدنا حوالي 94 حزمة متعلقة بالرموز التعبيرية وإليكم قائمة تحتوي على بعض منها

لاحظ العمود الأوسط بعنوان Weight الذي يعتبر الجزء الأساسي من المعلومات فقيمة الوزن هو الأساس في سجل البحث ، وعليها يقوم الموقع بترتيب الحزم المشابهة و إدراجها وفق لذلك.

ولكن هل يعني أن الحزمة الموجودة في الأعلى هي الأفضل ؟

لا ليس بالضرورة بل كل مافي الأمر أن مبرمجي تلك الحزم يعانون من الكسل فلا يقومون بملأ الحقول كاملة فيتم تريتبها وفق ذلك (واحد من الأسباب فقط.)

عملية البحث عن الحزم مازالت جارية بين مختلف الحزم المعروضة حتى نجد الحزمة المطلوبة إستنادا على الإستخدام النهائي الذي نريده وحتى هذه اللحظة السؤال الرئيسي هو :

ماهي البيئة التي تريد تنفيذ الرموز التعبرية عليها: تطبيق يعمل على الطرفية (سطر الأوامر) أو ربما تطبيق ويب (جانغو إلخ….)

إذا كنت تريد إستعمال الرموز التعبيرية على تطبيق جانغو  فمن الأفضل أن تستعمل الحزمة رقم 10 package django-emoji 2.2.0

ولكن في حالتنا نحن الأن سنقوم سنفترض أننا نملك تطبيق يعمل على واجهة الأوامر ونريد إستعمال الرموز التعبيرية على الطرفية .

دعونا نتفحص الحزمة الأولى الموجودة في القائمة بالضغط package emoji 0.4.5

مالذي تبحث عنه في حزمة بايثون؟

إليك أهم الخصائص الذي ينبغي توفرها في أي حزمة قبل تحميلها وإستعمالها :

  1. الوثائق اللائقة : بمجرد قراءتك للوثائق يمكنك التعرف هل لهذه الحزمة تفي بالغرض أم لا .
  2. النضج والإستقرار:حزمة لديها بعض الوقت في السوق وأثبتت أنها يمكن أن تعيش مع عشرات الحزم المنافسة .
  3. عدد المساهمين :كل ما كثر عدد المساهمين كثرت معها فرص التطورات و إمكانية الرد بسرعة على إستفسارات المستخدمين .
  4. الصيانة :تخضع للصيانة بشكل منتظم فنحن نعيش في عالم يتطور بإستمرار .

على الرغم من أننا سنتحقق من ذلك إلا أننا لن نتعتمد كثيرا على حالة التطوير المدرجة لكل حزمة.

الحزمة التي قمنا بإختيارها تبدو الوثائق الخاصة بها لائقة وفي أعلى الصفحة حصلنا على إشارة رسومية خاصة بالحزمة في مترجم بايثون (أنظر للصورة في الأسفل)

الوثائق الخاصة بحزمتنا ترشدنا أيضا إلى طريقة التثبيت، وكيفية المساهمة فيها أيضا إلخ … كما يوجد أيضا رابط صفحة الحزمة على موقع Github أي تتواجد الكثير من المعلومات المفيدة .

وبزيارتنالصفحةالحزمة على موقع Github يمكننا الملاحظة أن الحزمة تتواجد في الموقع منذ حوالي سنتين و أن أخر تعديل للحزمة تم منذ شهرين، وأكثر من 300 تقييم و10 مساهمين

يبدو الوضع جيد أليس كذلك ؟ فلقد قمنا بإختيار حزمة جيدة حتى نقوم بدمج الرموز التعبيرية في تطبيقنا الذي يعمل على الطرفية .

أما الأن سنتعلم كيفية تثبيت الحزمة

تثبيت حزم بايثون بواسطة أداة إذارة الحزم PIP

أنا أفترض أنك قد قمت مسبقا بتثبيت بايثون على جهازك فلا داعي لشرح تلك العملية وفي حالة العكس فكل ماعليك القيام به هو عملية بحث سريعة على محرك البحث قوقل وستجد عشرات النتائح لتحقيق ذلك .

بعد الإنتهاء من تلك العملية (تثبيت بايثون) يمكنك التحقق من إذا كانت أداة pip مثبتة أم لا بكتابة الأمر التالي على الطرفية :

pip –version

شخصيا حصلت على الناتج التالي :


$ pip --version
pip 9.0.1 from /Library/Frameworks/Python.framework/↵
Versions/3.5/lib/python3.5/site-packages (python 3.5)

منذ النسخة 3.4 أصبحت بايثون تأتي مع أداة pip أما في حالة عدم ذلك يمكنك تثبيتها بإتباع الخطوات التالية .

كما أنصح بإستخدام البيئة الإفتراضية ولمزيد عن هذه الأخيرة أرجوا زيارة الرابط التالي 

في هذا الدرس قمت بإنشاء بيئة إفتراضية تحت إسم pip-tutorial وذلك من أجل حسن إدارة المشاريع المختلفة وعدم الخلط بينها .

من أجل التعرف على جميع خيارات الأمر Pip قم بتنفيذها من دون أي خيار وسنحصل على قائمة بجميع الخيارات الممكنة .

ولمزيد من الشرح حول كل خيار يمكن تنفيذ الأمر pip install --help  لقراءة مالذي يفعله الأمر Install ومالذي يجب تحديده لتنفيذ الأمر وطبعا فإن قراءة وثائق pip هو أمر أخر مفيد ومفروغ منه .


$ pip install --help

Usage:
pip install [options] <requirement specifier> [package-index-options] ...
pip install [options] -r <requirements file> [package-index-options] ...
pip install [options] [-e] <vcs project url> ...
pip install [options] [-e] <local project path> ...
pip install [options] <archive url/path> ...

Description:
Install packages from:

- PyPI (and other indexes) using requirement specifiers.
- VCS project urls.
- Local project directories.
- Local or remote source archives.

pip also supports installing from "requirements files", which provide
an easy way to specify a whole environment to be installed.

Install Options:
...

دعونا الأ، ننتقل إلى الأمر freeze ونركز عليه قليلا والذي سيكون عنصرا مهما في التعامل مع الأمر Pip، نقوم بتنفيذ الأمر pip freeze وستظهر قائمة تحتوي على جميع المكتبات والحزم المثتبة و إذا قمت تنفيذها على البيئة الإفتراضية التي قمنا بإنشاءها مؤخرا ستعطينا قائمة فارغة طبعا .

الأن سنقوم بفتح مترجم بايثون بفتح الطرفية وكتابة بايثون بعد ذلك سنقوم بمحاولة إستدعاء مكتبة emoji لنتفاجئ بأن بايثون لا يعرف هذه المكتبة وهذا أمر بديهي لأننا لم نقم بتثبيتها أصلا .


$ python
Python 3.5.0 (default)
[GCC 4.2.1 Compatible Apple LLVM 8.1.0 (clang-802.0.38)] on darwin
Type "help", "copyright", "credits" or "license" for more information.
>>> import emoji
Traceback (most recent call last):
File "<stdin>", line 1, in <module>
ModuleNotFoundError: No module named 'emoji'

الأن سنقوم بتثبيت وحدة emoji بكتابة الأمر  pip install emoji على الطرفية وسنحصل على النتائج التالية :


$ pip install emoji==0.4.5
Collecting emoji==0.4.5
Installing collected packages: emoji
Successfully installed emoji-0.4.5


🚫الحصول على خطأ invalid syntax

إخواني الكرام إعلموا أن الأمر pip install  يتم تنفيذه على الطرفية وليس على مترجم بايثون لأن الأمر Pip عبارة عن برنامج يتم من خلاله تثبيت وحدات بايثون من خلال الطرفية ولكن يمكنك إستدعاء تلك الوحدات من مترجم بايثون.

وإذا كنت مصرا على تثبيت حزمة بواسطة pip داخل مترجم بايثون أو من خلال الشيل قم بزيارة الصفحة التالية 

عندما نقوم بتثبيت حزم بايثون مع pip يمكننا إجبار هذه الأخيرة بتثبيت نسخ معينة بإستخدام العوامل الرياضية التالية :

نسخة محددة من الحزمة (==)


$ pip install emoji==0.4.1

نسخة أخرى بدلا من المحددة (!=)


$ pip install emoji!=0.4.1

نسخة مماثلة أو أحدث (>=)


$ pip install emoji>=0.4.0

نسخة من الحزمة في النطاق المحدد (>=X.Y.T, <=X.Y.Z)


$ pip install emoji>=0.4.0, <=0.4.9

في حالة لم نقم بإجبار الأمر pip بتثبيت نسخة معينة فإنه سيقوم إفتراضيا بتثبيت أخر نسخة متوفرة .

بعد تثبيت وحدة  emoji سنقوم بتنفيذ أمر  pip freezeلنتأكد من وجوده ضمن قائمة الحزم المثبتة


$ pip freeze
emoji==0.4.5

وكما توقعنا فإن حزمة emoji مع رقم النسخة موجودة ضمن قائمة  pip freeze .

الأن نعود إلى مترجم بايثون ونقوم بإستدعاء حزمة  emoji وسنلاحظ عدم ظهور خطأ كما رأينا في السابق وهذا أمر جيد يدل على نجاح عملية التثبيت .

مبروك قمنا بعمل رائع .

حذف حزم بايثون بإستخدام pip

في هذا الجزء سنتعلم كيفية حذف حزم بايثون كل على حدى سواء  كانت على البيئة اللإفتراضية أو على دليل بابيون الرئيسي كما سنرى أيضا كيفية حذف مجموعة من الحزم بأمر واحد بالإضافة إلى حذف جميع الحزم الموجودة على الجهاز .

حذف كل حزمة على حدى 

يمكن فعل ذلك بإستخدام الأمر pip uninstall alembic (حزمة alembic على سبيل المثال)


$ pip uninstall alembic
Uninstalling alembic-0.6.0:
/Users/puma/.virtualenvs/pip-tutorial/bin/alembic
... a bunch on other files ...
/Users/puma/.virtualenvs/pip-tutorial/lib/python3.5/site-packages/alembic/util.py
Proceed (y/n)? y
Successfully uninstalled alembic-0.6.0

ولتقوم بالتحقق قم بتنفيذ أمر pip freeze

حذف مجموعة من الحزم

يمكن حذف مجموعة معينة من الحزم بإستخدام أمر واحد


$ pip uninstall package1 package2 ...

حذف جميع حزم بايثون 

إذا قررت حذف جميع حزم بايثون سواء كانت على البيئة اللإتراضية أو غير ذلك لسبب من الأسباب يمكنك تنفيذ الأمر التالي :


$ pip freeze | xargs pip uninstall -y

إلى هنا أكون قد إنتهيت من هذا الدرس وهذا لايعني أن الأمر إنتهى هنا حيث هناك الكثير لنكتشفه معا حول أداة pip في المستقبل .


NumFOCUS: 2017 GSoC Students Complete Work on NumFOCUS Projects

$
0
0
The summer has come to an end and so have the internships of our GSoC students. Ten students have finished their projects successfully and now continue to contribute to our open source community! FEniCS: Ivan Yashchuk has implemented quadrilateral and hexahedral meshes for finite element methods. Michal Habera has added support for the XDMF format.   […]

Mike Driscoll: Malicious Libraries Found on Python Package Index (PyPI)

$
0
0

Malicious code has been found on the Python Package Index (PyPI), the most popular location for sharing Python packages. This was reported by Slovak National Security Office which was then picked up by Bleeping Computer among other places (i.e. Reddit). The attack vector used typosquatting, which is basically someone uploading a package with a misspelled name of a popular package, for example lmxl instead of lxml.

You can see the original report from Slovak National Security Office here: http://www.nbu.gov.sk/skcsirt-sa-20170909-pypi/

I saw this vector talked about last August in this blog post which a lot of people seemed to think little of. It’s interesting that now people are getting a lot more excited about the issue.

This also reminded me of the controversy over a startup called Kite which basically inserted adware / spyware into plugins, such as Atom, autocomplete-python, etc.

Packaging in Python needs some help. I like how much better it is now then it was 10 years ago, but there are still a lot of issues.

Weekly Python StackOverflow Report: (xci) stackoverflow python report

$
0
0

Python Insider: Python 2.7.14 released


Import Python: Import Python 142

$
0
0
Worthy Read

This free reference guide will take you back to the basics. You’ll find visuals and definitions on key concepts and questions you need to answer about your teams to determine your readiness for continuous delivery. Download and share with your team.
GoCD
,
advert

This article explains the new features in Python 3.7, compared to 3.6.
new release

If you read data science articles, you may have already stumbled upon FiveThirtyEight’s content. Naturally, you were impressed by their awesome visualizations. You wanted to make your own awesome visualizations and so asked Quora and Reddit how to do it. You received some answers, but they were rather vague. You still can’t get the graphs done yourself. In this post, we’ll help you. Using Python’s matplotlib and pandas, we’ll see that it’s rather easy to replicate the core parts of any FiveThirtyEight (FTE) visualization.
graph
,
FiveThirtyEight

This post is about how to set up multiple Python versions and environments on a development machine (and why I don’t use conda).
environment
,
pyenv

It is much much easier to run PySpark with docker now, especially using an image from the repository of Jupyter. When you just want to try or learn Python. it is very convenient to use Jupyter Notebook for an interactive developing environment. The same reason makes me want to run Spark through PySpark in Jupyter Notenook.
docker
,
spark
,
jypyter

How Do You Compare?
advert

How to profile your python code to improve performance?
performance

Content based image retrieval (CBIR) systems enable to find similar images to a query image among an image dataset. The most famous CBIR system is the search per image feature of Google search. This article is a keras tutorial that demonstrates how to create a CBIR system on MNIST dataset. Our CBIR system will be based on a convolutional denoising autoencoder. It is a class of unsupervised deep learning algorithms.
machine learning
,
image processing

You need to iterate over an infinite series of numbers, breaking when a condition is met.
code snippets

Test the API for free.
advert

I thought it would be nice to show how one can leverage Python’s Pandas library to get stock ticker symbols from Wikipedia.
scraping
,
codesnippets

tweet

In this article we will. Extract twitter data using tweepy and learn how to handle it using pandas. Do some basic statistics and visualizations with numpy, matplotlib and seaborn. Do sentiment analysis of extracted (Trump's) tweets using textblob.
machine learning
,
sentiment analysis

Django Girls Foundation is an initiative that aims to introduce women and girls who never coded before to the world of technology and increase the diversity of the tech industry. We achieve this by organising one-day workshops and inviting women to come and learn how to build the internet using HTML, CSS, Python and Django. Django Girls is a volunteer run organisation with volunteers all over the world. Django Girls has two part-time paid staff members and the support team (six awesome ladies who are also volunteers) to help provide support to all other volunteers.
django-girls

Logistic regression can be used to solve problems like classifying images.
machine learning

A recent article by Jason Goldstein expressed the author’s difficulty understanding and using Asyncio, especially in a Flask context. Asyncio in a Flask context is the exact experience I have with Quart, so I hope I can add something to the conversation this author started.
asyncio
,
code snippets


Projects

future-fstrings - 80 Stars, 2 Fork
A backport of fstrings to python<3.6

python-switch - 57 Stars, 4 Fork
Adds switch blocks to Python.

socksmon - 31 Stars, 3 Fork
Monitor arbitrary TCP traffic using your HTTP interception proxy of choice.

s3tk - 30 Stars, 0 Fork
A security toolkit for Amazon S3.

Octomender - 22 Stars, 0 Fork
Get repo recommendation based on your GitHub star history.

web-traffic-forecasting - 13 Stars, 3 Fork
Kaggle | Web Traffic Forecasting.

list_dict_DB - 13 Stars, 0 Fork
In-Memory noSQL-like data structure.

pyprof-timer - 0 Stars, 0 Fork
A timer for profiling a Python function or snippet.

Jeff Hinrichs: Hello World on a naked ESP32-DevKitC Board using MicroPython

$
0
0

Every now and again, I get the bug to build something. Lately, I’ve been following MicroPython and the microcontrollers that it supports. The new hotness is the Expressif ESP32 chip. These are available from a number of different sources, many supplying a breakout board. Prices are all over the place from 20+ to 8+ depending on where you shop and how patient you are.

I went with the dev board from Expressif. I got a pair of them for about 15 each from Amazon. I like the trade off of delivery time, supplier and cost. You can see and order it here: 2 PACK Espressif ESP32 ESP32-DEVKITC inc ESP-WROOM-32 soldered dils CE FCC Rev 1 Silicon

$ esptool.py  -p /dev/ttyUSB0 flash_id
esptool.py v2.1
Connecting.....
Detecting chip type... ESP32
Chip is ESP32D0WDQ6 (revision 1)
Uploading stub...
Running stub...
Stub running...
Manufacturer: c8
Device: 4016
Detected flash size: 4MB
Hard resetting...

With just a bit of searching, you’ll find that you need the latest Micropython for ESP32 and the esptool.py

pip install esptool

. Then after you connect your Board to your computer, you can load up the MicroPython firmware.

esptool.py --chip esp32 --port /dev/ttyUSB0 write_flash -z 0x1000 images/esp32-20170916-v1.9.2-272-g0d183d7f.bin

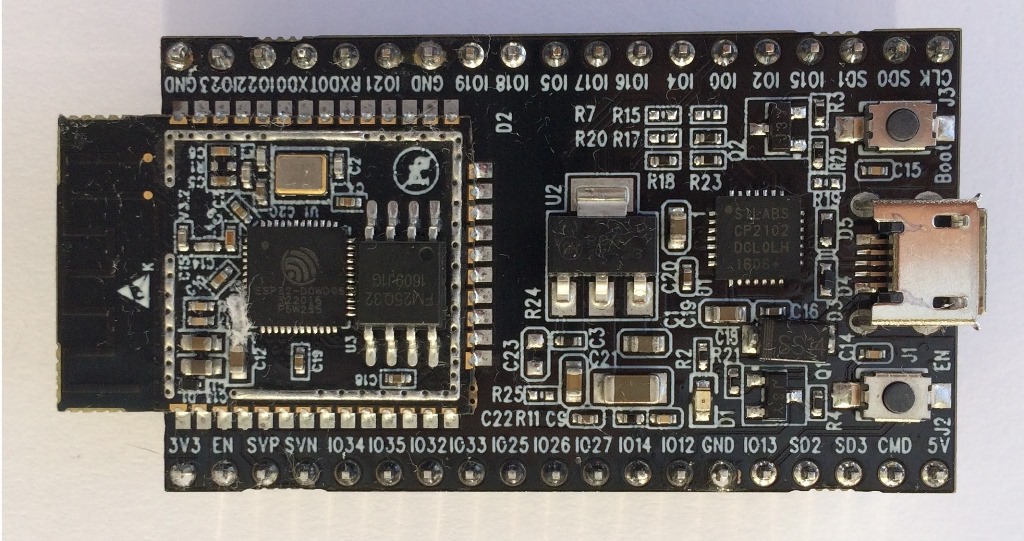
Now in the world of microcontrollers, blinking an LED is the “Hello World” program. However, the boards I purchased only had an LED that lit if the board was receiving power. No other LEDs on the board connected to a GPIO pin like some other breakout boards. It does have 2 switches, one of which, Switch 1(SW1) is connected to the GPIO0 pin.
ESP32 In the image, SW1 is the button on the top right, labeled boot.

So I write some code to figure out the initial state of GPIO and then toggle the button a couple times.

"""sw1_1.py - look at initial state of GPIO0 and then record it toggling"""
from machine import Pin


def main():
    # setup
    sw1p0 = Pin(0, Pin.IN)  # switch sw1 connected to logical Pin0
    state_changes = 0       # loop control
    prior_value = sw1p0.value() # sw1p0 previous state, initially unknown
    print("sw1p0 initial value is %s" % prior_value) # report initial state

    # main loop
    while state_changes < 4:    # press, release, press, release
        new_value = sw1p0.value()   # cache value, as inputs can change
        if new_value != prior_value:    # has state changed?
            print('sw1p0 was %s is now %s' % (prior_value, new_value))
            prior_value = new_value # update prior_value for next loop
            state_changes += 1


if __name__ == '__main__':
    main()

I did sort some of this out using the serial REPL, but for this post, I wrote up a script to demonstrate my findings.

Using the adafruit ampy tool, we’ll run the code.

pip install adafruit-ampy

Note: you will need to press sw1 twice before you see anything after the ampy cmd.

$ ampy -p /dev/ttyUSB0 run sw1_1.py 
sw1p0 initial value is 1
sw1p0 was 1 is now 0
sw1p0 was 0 is now 1
sw1p0 was 1 is now 0
sw1p0 was 0 is now 1

As you can see from the results, the initial state of GPIO0 was high(or 1). When sw1 is pressed/closed it goes low(0) and goes back high(1) when it is released/open. If you look at the board schematic, in the Switch Button section, you’ll see that when sw1 is closed, it shorts out GPIO0 to ground. This would indicate that you were pulling it low from a high state. So our observations match the schematic.

If you look at the schematic, you will see a capacitor from R3 to Ground that is used to debounce the switch. You should assume that all mechanical switches bounce and that bouncing needs to be dealt with in either the circuit or code. Life is much easier if you debounce the circuit with hardware.

Conclusions:

  1. Success! While we don’t have an onboard LED to blink, we can do something with the board without extraneous components, a Hello World app.
  2. The app is very naive since it uses polling to monitor state changes and spins in a tight loop most of the time. Often the reason for using a microprocessor has a power element to it. Sitting and spinning would be counter to a goal of low power usage.
  3. We covered a lot of ground in this article, skipping or very lightly going over how to load MicroPython and the other tools I used. There are lots of very good resources for them on the interwebs.
  4. If you liked this article, and you want to get an ESP32 board, you can use the Amazon affiliate link above as an expression of your support.

In an upcoming article, I’ll rework the example to be more energy conscious by using an interrupt to signal the state change.

May the Zen of Python be with you!

Reuven Lerner: My favorite terrible Python error message

$
0
0

Students in my Python classes occasionally get the following error message:

TypeError: object() takes no parameters

This error message is technically true, as I’ll explain in a moment. But it’s surprising and confusing for people who are new to Python, because it doesn’t point to the source of the actual problem.

Here’s the basic idea: Python methods are attributes, which means that when we invoke methods, Python needs to search for the attribute we’ve named. In other words, if I invoke:

o.m()

then Python will first look for the “m” attribute on the “o” object. If “o” has an attribute named “m” (i.e., if hasattr(o, ‘m’) returns True) then it retrieves the attribute’s value, and tries to call it.

However, Python methods aren’t defined on individual objects. They’re defined on classes. Which means that in almost all cases, if “m” is an actual method that can be invoked on “o”, there won’t be any “m” attribute on “o”.  Instead, we’ll need to look at type(o), the class to which “o” belongs, and look there.

And indeed, that’s how attributes work in Python: First search on the named object. If the attribute isn’t there, then look at the object’s class.  So we look for “m” on o’s class.  If the attribute is there, then it is invoked.  That’s what happens in normal method calls.

But say that the attribute isn’t on the class, either. What then? Python continues its search, looking next at the class from which type(o) inherits — which is located on the attribute type(o).__bases__.  This is a tuple, because Python classes can inherit from more than one parent; let’s ignore that for now.

Most classes inherit from the base object in the Python universe, known as “object”.  In Python 3, if you don’t specify “object” as the base from which you inherit, then it’s done for you automatically. In Python 2, failing to specify that a class inherits from “object” means that you have an “old-style class,” which will operate differently. I continue to specify “object” in my Python 3 classes, partly out of habit, partly because I think it looks nicer, and partly because I want my code to be compatible across versions as much as possible.

What happens if the attribute doesn’t exist on “object”?  Then we get an “attribute error,” with Python telling us that the attribute doesn’t exist.

However, this isn’t what happens in the case of the error message I showed:

TypeError: object() takes no parameters

This error message happens when you try to create a new instance of a class. For example:

class Foo(object):
    pass

If I say

f = Foo()

then I don’t get any error message. But if I say

f = Foo(10)

then I get the TypeError.  Why?

Because Python objects are created in two stages: First, the object is created in the __new__ method. This is a method that we almost never want to write; let Python take care of the allocation and creation of new objects.

However, __new__ doesn’t immediately return the object that it has created. Rather, it first searches for an __init__ method, whose job is to add new attributes to the newly created object. How does it look for (and then invoke) __init__?  It turns to the new object, which I’ll call “o” here, and invokes

o.__init__()

So, what happens now? Python looks for “__init__” on “o”, but doesn’t find it.  It looks for “__init__” on type(o), aka the “Foo” class, and doesn’t find it.  So it keeps searching, and looks on “object” for an “__init__” attribute.

Good news: object.__init__ exists!  Moreover, it’s a method!  So Python tries to invoke it, passing the argument that I handed to Foo (i.e., 10).  But object.__init__ doesn’t take any arguments. And thus we get the error message

TypeError: object() takes no parameters

What’s especially confusing, for me and many of my students, is that Python doesn’t say, “object.__init__()” takes no parameters. So they’re not sure how object figures into this, or where their mistake might be.

After reading this, though, I’m hoping that you can guess what it means: Simply put, this error message says, “You forgot to define an __init__ method on your object.”  This can be out of forgetfulness, but I’ve also seen people forget one or more of the underscores on either side of “__init__”, or even (my favorite) define a method called “__int__”, which is great for converting objects into integers, but not for initializing attributes.

So, is the error message wrong? No, it’s perfectly logical. But as with many “perfectly logical” things, it makes sense after you are steeped in the overall logic of the system, and tends to confuse those who most need the help.

The post My favorite terrible Python error message appeared first on Lerner Consulting Blog.

Simple is Better Than Complex: A Complete Beginner's Guide to Django - Part 3

$
0
0

Introduction

In this tutorial, we are going to dive deep into two fundamental concepts: URLs and Forms. In the process, we are going to explore many other concepts like creating reusable templates and installing third-party libraries. We are also going to write plenty of unit tests.

If you are following this tutorial series since the first part, coding your project and following the tutorial step by step, you may need to update your models.py before starting:

boards/models.py

classTopic(models.Model):# other fields...# Add `auto_now_add=True` to the `last_updated` fieldlast_updated=models.DateTimeField(auto_now_add=True)classPost(models.Model):# other fields...# Add `null=True` to the `updated_by` fieldupdated_by=models.ForeignKey(User,null=True,related_name='+')

Now run the commands with the virtualenv activated:

python manage.py makemigrations
python manage.py migrate

If you already have null=True in the updated_by field and the auto_now_add=True in the last_updated field, you can safely ignore the instructions above.

If you prefer to use my source code as a starting point, you can grab it on GitHub.

The current state of the project can be found under the release tag v0.2-lw. The link below will take you to the right place:

https://github.com/sibtc/django-beginners-guide/tree/v0.2-lw

The development will follow from here.


URLs

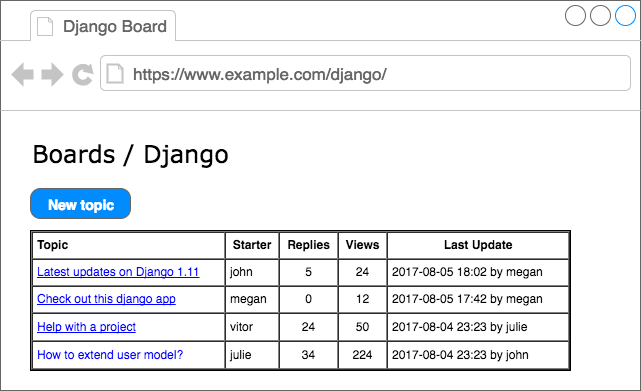
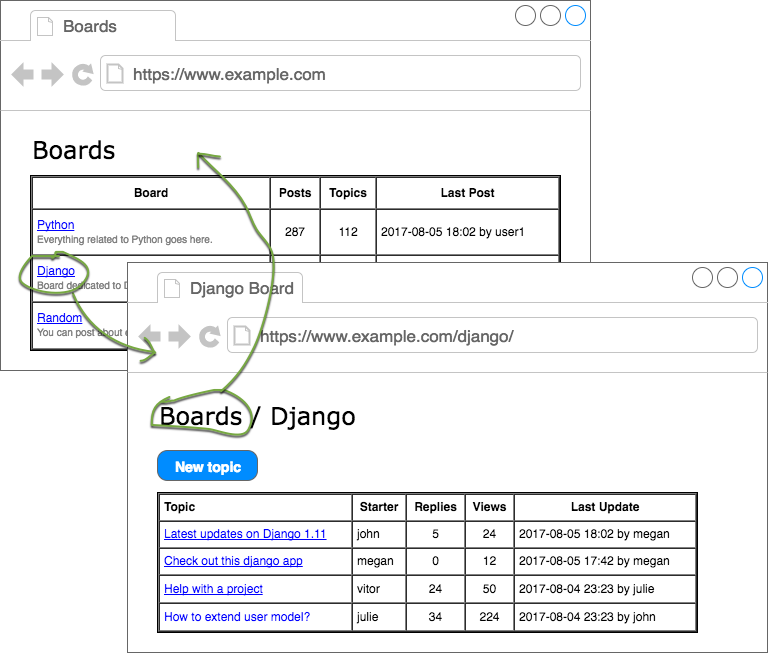
Proceeding with the development of our application, now we have to implement a new page to list all the topics that belong to a given Board. Just to recap, below you can see the wireframe we draw in the previous tutorial:

Wireframe Topics

Figure 1: Boards project wireframe listing all topics in the Django board.

We will start by editing the urls.py inside the myproject folder:

myproject/urls.py

fromdjango.conf.urlsimporturlfromdjango.contribimportadminfromboardsimportviewsurlpatterns=[url(r'^$',views.home,name='home'),url(r'^boards/(?P<pk>\d+)/$',views.board_topics,name='board_topics'),url(r'^admin/',admin.site.urls),]

This time let’s take a moment and analyze the urlpatterns and url.

The URL dispatcher and URLconf (URL configuration) are fundamental parts of a Django application. In the beginning, it can look confusing; I remember having a hard time when I first started developing with Django.

In fact, right now the Django Developers are working on a proposal to make simplified routing syntax. But for now, as per the version 1.11, that’s what we have. So let’s try to understand how it works.

A project can have many urls.py distributed among the apps. But Django needs a url.py to use as a starting point. This special urls.py is called root URLconf. It’s defined in the settings.py file.

myproject/settings.py

ROOT_URLCONF='myproject.urls'

It already comes configured, so you don’t need to change anything here.

When Django receives a request, it starts searching for a match in the project’s URLconf. It starts with the first entry of the urlpatterns variable, and test the requested URL against each url entry.

If Django finds a match, it will pass the request to the view function, which is the second parameter of the url. The order in the urlpatterns matters, because Django will stop searching as soon as it finds a match. Now, if Django doesn’t find a match in the URLconf, it will raise a 404 exception, which is the error code for Page Not Found.

This is the anatomy of the url function:

defurl(regex,view,kwargs=None,name=None):# ...
  • regex: A regular expression for matching URL patterns in strings. Note that these regular expressions do not search GET or POST parameter. In a request to http://127.0.0.1:8000/boards/?page=2 only /boards/ will be processed.
  • view: A view function used to process the user request for a matched URL. It also accepts the return of the django.conf.urls.include function, which is used to reference an external urls.py file. You can, for example, use it to define a set of app specific URLs, and include it in the root URLconf using a prefix. We will explore more on this concept later on.
  • kwargs: Arbitrary keyword arguments that’s passed to the target view. It is normally used to do some simple customization on reusable views. We don’t use it very often.
  • name: A unique identifier for a given URL. This is a very important feature. Always remember to name your URLs. With this, you can change a specific URL in the whole project by just changing the regex. So it’s important to never hard code URLs in the views or templates, and always refer to the URLs by its name.

Matching URL patterns

Basic URLs

Basic URLs are very simple to create. It’s just a matter of matching strings. For example, let’s say we wanted to create an “about” page, it could be defined like this:

fromdjango.conf.urlsimporturlfromboardsimportviewsurlpatterns=[url(r'^$',views.home,name='home'),url(r'^about/$',views.about,name='about'),]

We can also create deeper URL structures:

fromdjango.conf.urlsimporturlfromboardsimportviewsurlpatterns=[url(r'^$',views.home,name='home'),url(r'^about/$',views.about,name='about'),url(r'^about/company/$',views.about_company,name='about_company'),url(r'^about/author/$',views.about_author,name='about_author'),url(r'^about/author/vitor/$',views.about_vitor,name='about_vitor'),url(r'^about/author/erica/$',views.about_erica,name='about_erica'),url(r'^privacy/$',views.privacy_policy,name='privacy_policy'),]

Those are some examples of simple URL routing. For all the examples above, the view function will follow this structure:

defabout(request):# do something...returnrender(request,'about.html')defabout_company(request):# do something else...# return some data along with the view...returnrender(request,'about_company.html',{'company_name':'Simple Complex'})
Advanced URLs

A more advanced usage of URL routing is achieved by taking advantage of the regex to match certain types of data and create dynamic URLs.

For example, to create a profile page, like many services do like github.com/vitorfs or twitter.com/vitorfs, where “vitorfs” is my username, we can do the following:

fromdjango.conf.urlsimporturlfromboardsimportviewsurlpatterns=[url(r'^$',views.home,name='home'),url(r'^(?P<username>[\w.@+-]+)/$',views.user_profile,name='user_profile'),]

This will match all valid usernames for a Django User model.

Now observe that the example above is a very permissive URL. That means it will match lot’s of URL patterns because it is defined in the root of the URL, with no prefix like /profile/<username>/. In this case, if we wanted to define a URL named /about/, we would have do define it before the username URL pattern:

fromdjango.conf.urlsimporturlfromboardsimportviewsurlpatterns=[url(r'^$',views.home,name='home'),url(r'^about/$',views.about,name='about'),url(r'^(?P<username>[\w.@+-]+)/$',views.user_profile,name='user_profile'),]

If the “about” page was defined after the username URL pattern, Django would never find it, because the word “about” would match the username regex, and the view user_profile would be processed instead of the about view function.

There are some side effects to that. For example, from now on, we would have to treat “about” as a forbidden username, because if a user picked “about” as their username, this person would never see their profile page.

URL routing order matters

Sidenote: If you want to design cool URLs for user profiles, the easiest solution to avoid URL collision is by adding a prefix like /u/vitorfs/, or like Medium does /@vitorfs/, where "@" is the prefix.

If you want no prefix at all, consider using a list of forbidden names like this: github.com/shouldbee/reserved-usernames. Or another example is an application I developed when I was learning Django; I created my list at the time: github.com/vitorfs/parsifal/.

Those collisions are very common. Take GitHub for example; they have this URL to list all the repositories you are currently watching: github.com/watching. Someone registered a username on GitHub with the name "watching," so this person can't see his profile page. We can see a user with this username exists by trying this URL: github.com/watching/repositories which was supposed to list the user's repositories, like mine for example github.com/vitorfs/repositories.

The whole idea of this kind of URL routing is to create dynamic pages where part of the URL will be used as an identifier for a certain resource, that will be used to compose a page. This identifier can be an integer ID or a string for example.

Initially, we will be working with the Board ID to create a dynamic page for the Topics. Let’s read again the example I gave at the beginning of the URLs section:

url(r'^boards/(?P<pk>\d+)/$',views.board_topics,name='board_topics')

The regex \d+ will match an integer of arbitrary size. This integer will be used to retrieve the Board from the database. Now observe that we wrote the regex as (?P<pk>\d+), this is telling Django to capture the value into a keyword argument named pk.

Here is how we write a view function for it:

defboard_topics(request,pk):# do something...

Because we used the (?P<pk>\d+) regex, the keyword argument in the board_topics must be named pk.

If we wanted to use any name, we could do it like this:

url(r'^boards/(\d+)/$',views.board_topics,name='board_topics')

Then the view function could be defined like this:

defboard_topics(request,board_id):# do something...

Or like this:

defboard_topics(request,id):# do something...

The name wouldn’t matter. But it’s a good practice to use named parameters because when we start composing bigger URLs capturing multiple IDs and variables, it will be easier to read.

Sidenote: PK or ID?

PK stands for Primary Key. It's a shortcut for accessing a model's primary key. All Django models have this attribute.

For the most cases, using the pk property is the same as id. That's because if we don't define a primary key for a model, Django will automatically create an AutoField named id, which will be its primary key.

If you defined a different primary key for a model, for example, let's say the field email is your primary key. To access it you could either use obj.email or obj.pk.

Using the URLs API

It’s time to write some code. Let’s implement the topic listing page (see Figure 1) I mentioned at the beginning of the URLs section.

First, edit the urls.py adding our new URL route:

myproject/urls.py

fromdjango.conf.urlsimporturlfromdjango.contribimportadminfromboardsimportviewsurlpatterns=[url(r'^$',views.home,name='home'),url(r'^boards/(?P<pk>\d+)/$',views.board_topics,name='board_topics'),url(r'^admin/',admin.site.urls),]

Now let’s create the view function board_topics:

boards/views.py

fromdjango.shortcutsimportrenderfrom.modelsimportBoarddefhome(request):# code suppressed for brevitydefboard_topics(request,pk):board=Board.objects.get(pk=pk)returnrender(request,'topics.html',{'board':board})

In the templates folder, create a new template named topics.html:

templates/topics.html

{%loadstatic%}<!DOCTYPE html><html><head><metacharset="utf-8"><title>{{board.name}}</title><linkrel="stylesheet"href="{%static'css/bootstrap.min.css'%}"></head><body><divclass="container"><olclass="breadcrumb my-4"><liclass="breadcrumb-item">Boards</li><liclass="breadcrumb-item active">{{board.name}}</li></ol></div></body></html>

Note: For now we are simply creating new HTML templates. No worries, in the following section I will show you how to create reusable templates.

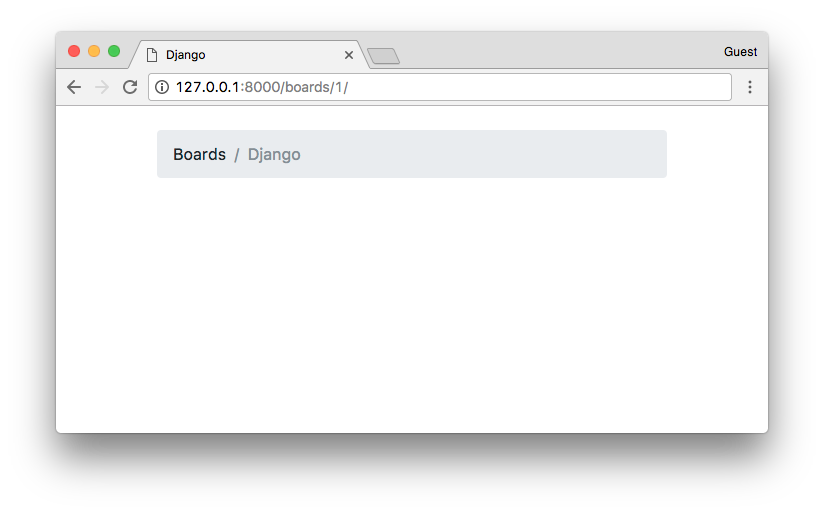
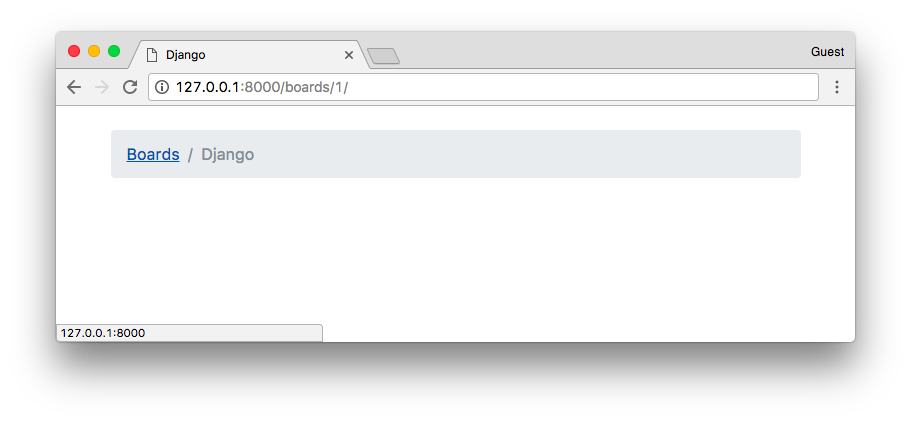
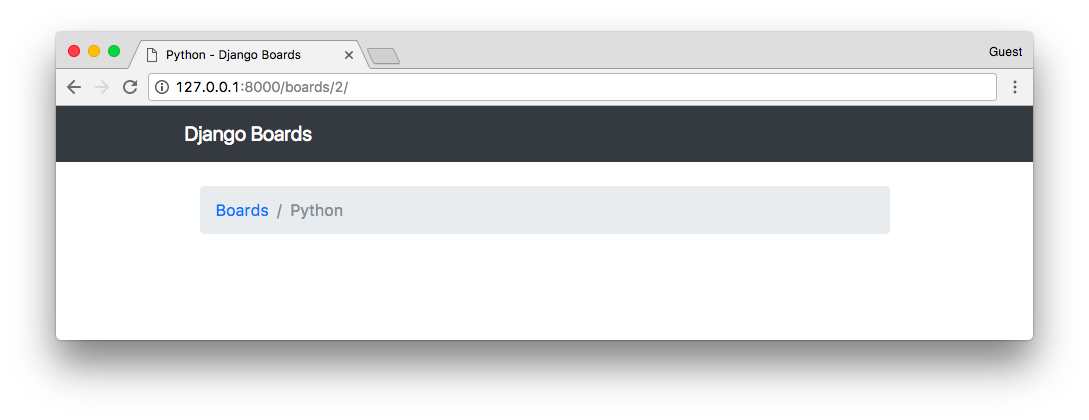
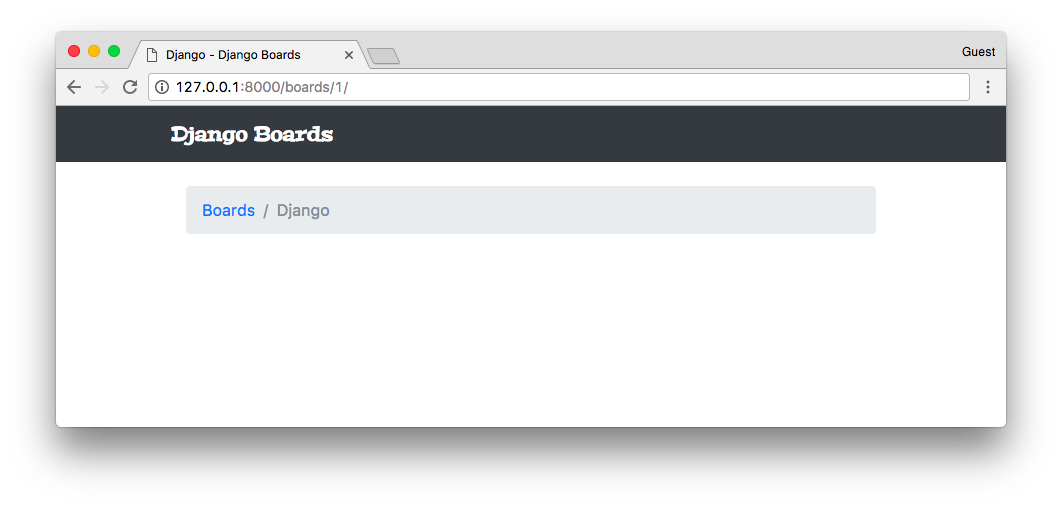
Now check the URL http://127.0.0.1:8000/boards/1/ in a web browser. The result should be the following page:

Topics Page

Time to write some tests! Edit the tests.py file and add the following tests in the bottom of the file:

boards/tests.py

fromdjango.core.urlresolversimportreversefromdjango.urlsimportresolvefromdjango.testimportTestCasefrom.viewsimporthome,board_topicsfrom.modelsimportBoardclassHomeTests(TestCase):# ...classBoardTopicsTests(TestCase):defsetUp(self):Board.objects.create(name='Django',description='Django board.')deftest_board_topics_view_success_status_code(self):url=reverse('board_topics',kwargs={'pk':1})response=self.client.get(url)self.assertEquals(response.status_code,200)deftest_board_topics_view_not_found_status_code(self):url=reverse('board_topics',kwargs={'pk':99})response=self.client.get(url)self.assertEquals(response.status_code,404)deftest_board_topics_url_resolves_board_topics_view(self):view=resolve('/boards/1/')self.assertEquals(view.func,board_topics)

A few things to note here. This time we used the setUp method. In the setup method, we created a Board instance, so to use it in the tests. We have to do that because the Django testing suite doesn’t run your tests against the current database. To run the tests Django creates a new database on the fly, apply all the model migrations, run the tests, and when it’s done, it destroys the testing database.

So in the setUp method, we prepare the environment to run the tests, so to simulate a scenario.

  • The test_board_topics_view_success_status_code method: is testing if Django is returning a status code 200 (success) for an existing Board.
  • The test_board_topics_view_not_found_status_code method: is testing if Django is returning a status code 404 (page not found) for a Board that doesn’t exist in the database.
  • The test_board_topics_url_resolves_board_topics_view method: is testing if Django is using the correct view function to render the topics.

Now it’s time to run the tests:

python manage.py test

And the output:

Creating test database for alias 'default'...
System check identified no issues (0 silenced).
.E...
======================================================================
ERROR: test_board_topics_view_not_found_status_code (boards.tests.BoardTopicsTests)
----------------------------------------------------------------------
Traceback (most recent call last):
# ...
boards.models.DoesNotExist: Board matching query does not exist.

----------------------------------------------------------------------
Ran 5 tests in 0.093s

FAILED (errors=1)
Destroying test database for alias 'default'...

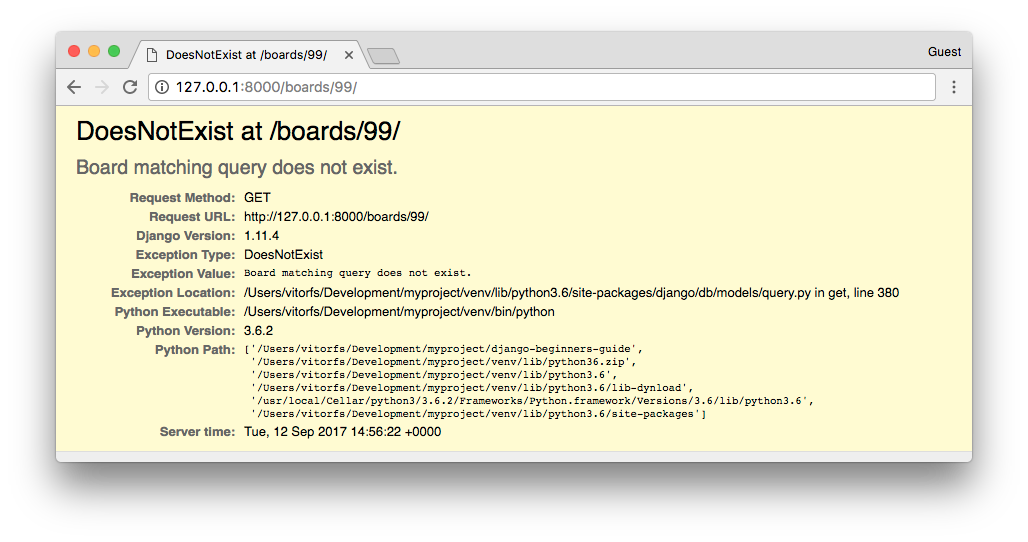
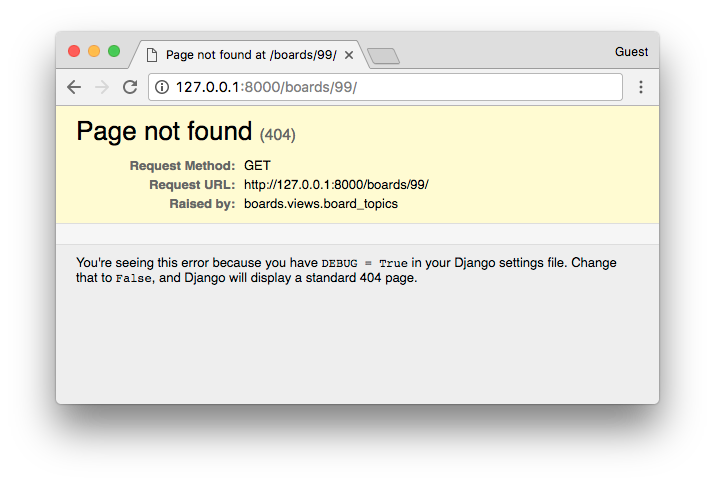
The test test_board_topics_view_not_found_status_code failed. We can see in the Traceback it returned an exception “boards.models.DoesNotExist: Board matching query does not exist.”

Topics Error 500 Page

In production with DEBUG=False, the visitor would see a 500 Internal Server Error page. But that’s not the behavior we want.

We want to show a 404 Page Not Found. So let’s refactor our view:

boards/views.py

fromdjango.shortcutsimportrenderfromdjango.httpimportHttp404from.modelsimportBoarddefhome(request):# code suppressed for brevitydefboard_topics(request,pk):try:board=Board.objects.get(pk=pk)exceptBoard.DoesNotExist:raiseHttp404returnrender(request,'topics.html',{'board':board})

Let’s test again:

python manage.py test
Creating test database for alias 'default'...
System check identified no issues (0 silenced).
.....
----------------------------------------------------------------------
Ran 5 tests in 0.042s

OK
Destroying test database for alias 'default'...

Yay! Now it’s working as expected.

Topics Error 404 Page

This is the default page Django show while with DEBUG=False. Later on, we can customize the 404 page to show something else.

Now that’s a very common use case. In fact, Django has a shortcut to try to get an object, or return a 404 with the object does not exist.

So let’s refactor the board_topics view again:

fromdjango.shortcutsimportrender,get_object_or_404from.modelsimportBoarddefhome(request):# code suppressed for brevitydefboard_topics(request,pk):board=get_object_or_404(Board,pk=pk)returnrender(request,'topics.html',{'board':board})

Changed the code? Test it.

python manage.py test
Creating test database for alias 'default'...
System check identified no issues (0 silenced).
.....
----------------------------------------------------------------------
Ran 5 tests in 0.052s

OK
Destroying test database for alias 'default'...

Didn’t break anything. We can proceed with the development.

The next step now is to create the navigation links in the screens. The homepage should have a link to take the visitor to the topics page of a given Board. Similarly, the topics page should have a link back to the homepage.

Wireframe Links

We can start by writing some tests for the HomeTests class:

boards/tests.py

classHomeTests(TestCase):defsetUp(self):self.board=Board.objects.create(name='Django',description='Django board.')url=reverse('home')self.response=self.client.get(url)deftest_home_view_status_code(self):self.assertEquals(self.response.status_code,200)deftest_home_url_resolves_home_view(self):view=resolve('/')self.assertEquals(view.func,home)deftest_home_view_contains_link_to_topics_page(self):board_topics_url=reverse('board_topics',kwargs={'pk':self.board.pk})self.assertContains(self.response,'href="{0}"'.format(board_topics_url))

Observe that now we added a setUp method for the HomeTests as well. That’s because now we are going to need a Board instance and also we moved the url and response to the setUp, so we can reuse the same response in the new test.

The new test here is the test_home_view_contains_link_to_topics_page. Here we are using the assertContains method to test if the response body contains a given text. The text we are using in the test, is the href part of an a tag. So basically we are testing if the response body has the text href="/boards/1/".

Let’s run the tests:

python manage.py test
Creating test database for alias 'default'...
System check identified no issues (0 silenced).
....F.
======================================================================
FAIL: test_home_view_contains_link_to_topics_page (boards.tests.HomeTests)
----------------------------------------------------------------------
# ...

AssertionError: False is not true : Couldn't find 'href="/boards/1/"' in response

----------------------------------------------------------------------
Ran 6 tests in 0.034s

FAILED (failures=1)
Destroying test database for alias 'default'...

Now we can write the code that will make this test pass.

Edit the home.html template:

templates/home.html

<!-- code suppressed for brevity --><tbody>{%forboardinboards%}<tr><td><ahref="{%url'board_topics'board.pk%}">{{board.name}}</a><smallclass="text-muted d-block">{{board.description}}</small></td><tdclass="align-middle">0</td><tdclass="align-middle">0</td><td></td></tr>{%endfor%}</tbody><!-- code suppressed for brevity -->

So basically we changed the line:

{{board.name}}

To:

<ahref="{%url'board_topics'board.pk%}">{{board.name}}</a>

Always use the {%url%} template tag to compose the applications URLs. The first parameter is the name of the URL (defined in the URLconf, i.e., the urls.py), then you can pass an arbitrary number of arguments as needed.

If it were a simple URL, like the homepage, it would be just {%url'home'%}.

Save the file and run the tests again:

python manage.py test
Creating test database for alias 'default'...
System check identified no issues (0 silenced).
......
----------------------------------------------------------------------
Ran 6 tests in 0.037s

OK
Destroying test database for alias 'default'...

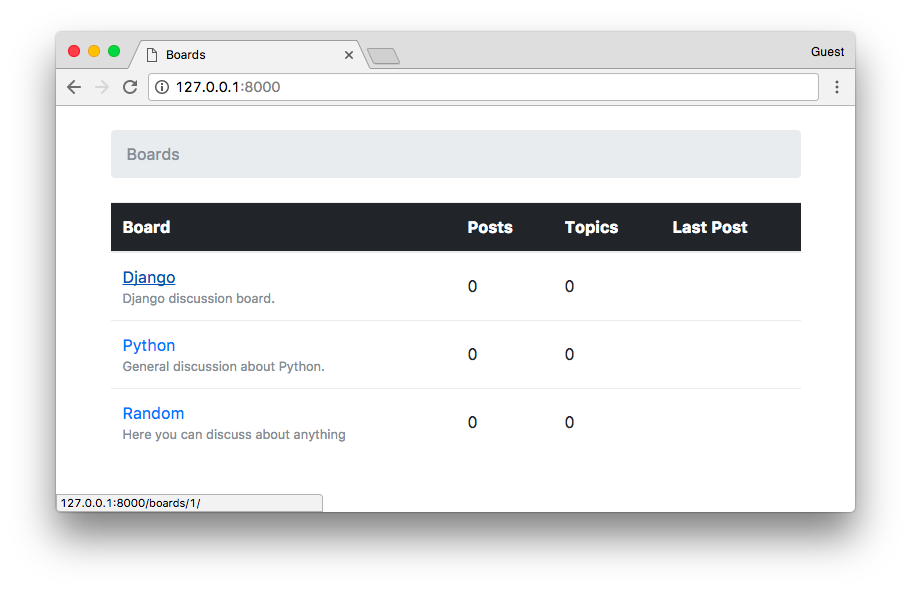
Good! Now we can check how it looks like in the web browser:

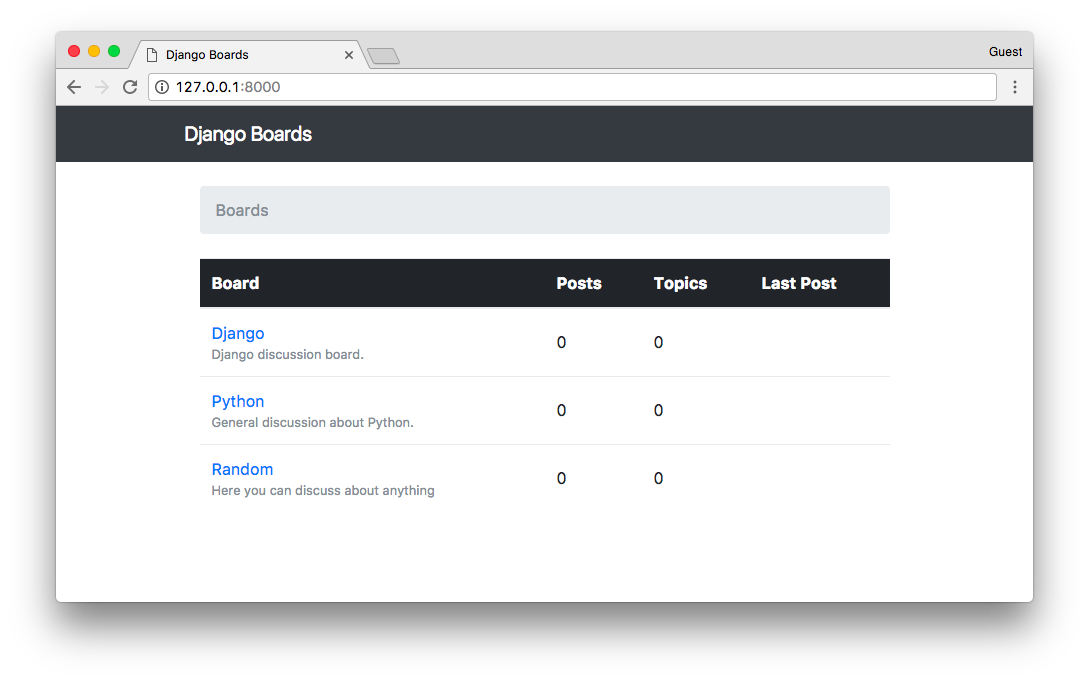
Boards with Link

Now the link back. We can write the test first:

boards/tests.py

classBoardTopicsTests(TestCase):# code suppressed for brevity...deftest_board_topics_view_contains_link_back_to_homepage(self):board_topics_url=reverse('board_topics',kwargs={'pk':1})response=self.client.get(board_topics_url)homepage_url=reverse('home')self.assertContains(response,'href="{0}"'.format(homepage_url))

Run the tests:

python manage.py test
Creating test database for alias 'default'...
System check identified no issues (0 silenced).
.F.....
======================================================================
FAIL: test_board_topics_view_contains_link_back_to_homepage (boards.tests.BoardTopicsTests)
----------------------------------------------------------------------
Traceback (most recent call last):
# ...

AssertionError: False is not true : Couldn't find 'href="/"' in response

----------------------------------------------------------------------
Ran 7 tests in 0.054s

FAILED (failures=1)
Destroying test database for alias 'default'...

Update the board topics template:

templates/topics.html

{%loadstatic%}<!DOCTYPE html><html><head><!-- code suppressed for brevity --></head><body><divclass="container"><olclass="breadcrumb my-4"><liclass="breadcrumb-item"><ahref="{%url'home'%}">Boards</a></li><liclass="breadcrumb-item active">{{board.name}}</li></ol></div></body></html>

Run the tests:

python manage.py test
Creating test database for alias 'default'...
System check identified no issues (0 silenced).
.......
----------------------------------------------------------------------
Ran 7 tests in 0.061s

OK
Destroying test database for alias 'default'...

Board Topics with Link

As I mentioned before, URL routing is a fundamental part of a web application. With this knowledge, we should be able to proceed with the development. Next, to complete the section about URLs, you will find a summary of useful URL patterns.

List of Useful URL Patterns

The trick part is the regex. So I prepared a list of the most used URL patterns. You can always refer to this list when you need a specific URL.

Primary Key AutoField
Regex(?P<pk>\d+)
Exampleurl(r'^questions/(?P<pk>\d+)/$', views.question, name='question')
Valid URL/questions/934/
Captures{'pk': '934'}
Slug Field
Regex(?P<slug>[-\w]+)
Exampleurl(r'^posts/(?P<slug>[-\w]+)/$', views.post, name='post')
Valid URL/posts/hello-world/
Captures{'slug': 'hello-world'}
Slug Field with Primary Key
Regex(?P<slug>[-\w]+)-(?P<pk>\d+)
Exampleurl(r'^blog/(?P<slug>[-\w]+)-(?P<pk>\d+)/$', views.blog_post, name='blog_post')
Valid URL/blog/hello-world-159/
Captures{'slug': 'hello-world', 'pk': '159'}
Django User Username
Regex(?P<username>[\w.@+-]+)
Exampleurl(r'^profile/(?P<username>[\w.@+-]+)/$', views.user_profile, name='user_profile')
Valid URL/profile/vitorfs/
Captures{'username': 'vitorfs'}
Year
Regex(?P<year>[0-9]{4})
Exampleurl(r'^articles/(?P<year>[0-9]{4})/$', views.year_archive, name='year')
Valid URL/articles/2016/
Captures{'year': '2016'}
Year / Month
Regex(?P<year>[0-9]{4})/(?P<month>[0-9]{2})
Exampleurl(r'^articles/(?P<year>[0-9]{4})/(?P<month>[0-9]{2})/$', views.month_archive, name='month')
Valid URL/articles/2016/01/
Captures{'year': '2016', 'month': '01'}

You can find more details about those patterns in this post: List of Useful URL Patterns.


Reusable Templates

Until now we’ve been copying and pasting HTML repeating several parts of the HTML document, which is not very sustainable in the long run. It’s also a bad practice.

In this section we are going to refactor our HTML templates, creating a master page and only adding the unique part for each template.

Create a new file named base.html in the templates folder:

templates/base.html

{%loadstatic%}<!DOCTYPE html><html><head><metacharset="utf-8"><title>{%blocktitle%}Django Boards{%endblock%}</title><linkrel="stylesheet"href="{%static'css/bootstrap.min.css'%}"></head><body><divclass="container"><olclass="breadcrumb my-4">{%blockbreadcrumb%}{%endblock%}</ol>{%blockcontent%}{%endblock%}</div></body></html>

This is going to be our master page. Every template we create, is going to extend this special template. Observe now we introduced the {%block%} tag. It is used to reserve a space in the template, which a “child” template (which extends the master page) can insert code and HTML within that space.

In the case of the {%blocktitle%} we are also setting a default value, which is “Django Boards.” It will be used if we don’t set a value for the {%blocktitle%} in a child template.

Now let’s refactor our two templates: home.html and topics.html.

templates/home.html

{%extends'base.html'%}{%blockbreadcrumb%}<liclass="breadcrumb-item active">Boards</li>{%endblock%}{%blockcontent%}<tableclass="table"><theadclass="thead-inverse"><tr><th>Board</th><th>Posts</th><th>Topics</th><th>Last Post</th></tr></thead><tbody>{%forboardinboards%}<tr><td><ahref="{%url'board_topics'board.pk%}">{{board.name}}</a><smallclass="text-muted d-block">{{board.description}}</small></td><tdclass="align-middle">0</td><tdclass="align-middle">0</td><td></td></tr>{%endfor%}</tbody></table>{%endblock%}

The first line in the home.html template is {%extends'base.html'%}. This tag is telling Django to use the base.html template as a master page. After that, we are using the the blocks to put the unique content of the page.

templates/topics.html

{%extends'base.html'%}{%blocktitle%}{{board.name}} - {{block.super}}{%endblock%}{%blockbreadcrumb%}<liclass="breadcrumb-item"><ahref="{%url'home'%}">Boards</a></li><liclass="breadcrumb-item active">{{board.name}}</li>{%endblock%}{%blockcontent%}<!-- just leaving it empty for now. we will add core here soon. -->{%endblock%}

In the topics.html template, we are changing the {%blocktitle%} default value. Notice that we can reuse the default value of the block by calling {{block.super}}. So here we are playing with the website title, which we defined in the base.html as “Django Boards.” So for the “Python” board page, the title will be “Python - Django Boards,” for the “Random” board the title will be “Random - Django Boards.”

Now let’s run the tests and see we didn’t break anything:

python manage.py test
Creating test database for alias 'default'...
System check identified no issues (0 silenced).
.......
----------------------------------------------------------------------
Ran 7 tests in 0.067s

OK
Destroying test database for alias 'default'...

Great! Everything is looking good.

Now that we have the base.html template, we can easily add a top bar with a menu:

templates/base.html

{%loadstatic%}<!DOCTYPE html><html><head><metacharset="utf-8"><title>{%blocktitle%}Django Boards{%endblock%}</title><linkrel="stylesheet"href="{%static'css/bootstrap.min.css'%}"></head><body><navclass="navbar navbar-expand-lg navbar-dark bg-dark"><divclass="container"><aclass="navbar-brand"href="{%url'home'%}">Django Boards</a></div></nav><divclass="container"><olclass="breadcrumb my-4">{%blockbreadcrumb%}{%endblock%}</ol>{%blockcontent%}{%endblock%}</div></body></html>

Django Boards Header

Django Boards Header

The HTML I used is part of the Bootstrap 4 Navbar Component.

A nice touch I like to add is to change the font in the “logo” (.navbar-brand) of the page.

Go to fonts.google.com, type “Django Boards” or whatever name you gave to your project then click on apply to all fonts. Browse a bit, find one that you like.

Google Fonts

Add the font in the base.html template:

{%loadstatic%}<!DOCTYPE html><html><head><metacharset="utf-8"><title>{%blocktitle%}Django Boards{%endblock%}</title><linkhref="https://fonts.googleapis.com/css?family=Peralta"rel="stylesheet"><linkrel="stylesheet"href="{%static'css/bootstrap.min.css'%}"><linkrel="stylesheet"href="{%static'css/app.css'%}"></head><body><!-- code suppressed for brevity --></body></html>

Now create a new CSS file named app.css inside the static/css folder:

static/css/app.css

.navbar-brand{font-family:'Peralta',cursive;}

Django Boards Logo


Forms

Forms are used to deal with user input. It’s a very common task in any web application or website. The standard way to do it is through HTML forms, where the user input some data, submit it to the server, and then the server does something with it.

All input is evil

Form processing is a fairly complex task because it involves interacting with many layers of an application. There are also many issues to take care. For example, all data submitted to the server comes in a string format, so we have to transform it into a proper data type (integer, float, date, etc.) before doing anything with it. We have to validate the data regarding the business logic of the application. We also have to clean, sanitize the data properly so to avoid security issues such as SQL Injection and XSS attacks.

Good news is that the Django Forms API makes the whole process a lot easier, automating a good chunk of this work. Also, the final result is a much more secure code than most programmers would be able to implement by themselves. So, no matter how simple the HTML form is, always use the forms API.

How Not Implement a Form

At first, I thought about jumping straight to the forms API. But I think it would be a good idea for us to spend some time trying to understand the underlying details of form processing. Otherwise, it will end up looking like magic, which is a bad thing, because when things go wrong, you have no idea where to look for the problem.

With a deeper understanding of some programming concepts, we can feel more in control of the situation. Being in control is important because it let us write code with more confidence. The moment we know exactly what is going on, it’s much easier to implement a code of predictable behavior. It’s also a lot easier to debug and find errors because you know where to look at.

Anyway, let’s start by implementing the form below:

Wireframe New Topic

It’s one of the wireframes we draw in the previous tutorial. I now realize this may be a bad example to start because this particular form involves processing data of two different models: Topic (subject) and Post (message).

There’s another important aspect that we haven’t discussed it so far, which is user authentication. We are only supposed to show this screen for authenticated users. This way we can tell who created a Topic or a Post.

So let’s abstract some details for now and focus on understanding how to save user input in the database.

First thing, let’s create a new URL route named new_topic:

myproject/urls.py

fromdjango.conf.urlsimporturlfromdjango.contribimportadminfromboardsimportviewsurlpatterns=[url(r'^$',views.home,name='home'),url(r'^boards/(?P<pk>\d+)/$',views.board_topics,name='board_topics'),url(r'^boards/(?P<pk>\d+)/new/$',views.new_topic,name='new_topic'),url(r'^admin/',admin.site.urls),]

The way we are building the URL will help us identify the correct Board.

Now let’s create the new_topic view function:

boards/views.py

fromdjango.shortcutsimportrender,get_object_or_404from.modelsimportBoarddefnew_topic(request,pk):board=get_object_or_404(Board,pk=pk)returnrender(request,'new_topic.html',{'board':board})

For now, the new_topic view function is looking exactly the same as the board_topics. That’s on purpose, let’s take a step at a time.

Now we just need a template named new_topic.html to see some code working:

templates/new_topic.html

{%extends'base.html'%}{%blocktitle%}Start a New Topic{%endblock%}{%blockbreadcrumb%}<liclass="breadcrumb-item"><ahref="{%url'home'%}">Boards</a></li><liclass="breadcrumb-item"><ahref="{%url'board_topics'board.pk%}">{{board.name}}</a></li><liclass="breadcrumb-item active">New topic</li>{%endblock%}{%blockcontent%}{%endblock%}

For now we just have the breadcrumb assuring the navigation. Observe that we included the URL back to the board_topics view.

Open the URL http://127.0.0.1:8000/boards/1/new/. The result, for now, is the following page:

Start a New Topic

We still haven’t implemented a way to reach this new page, but if we change the URL to http://127.0.0.1:8000/boards/2/new/, it should take us to the Python Board:

Start a New Topic

Note:

The result may be different for you if you haven't followed the steps from the previous tutorial. In my case, I have three Board instances in the database, being Django = 1, Python = 2, and Random = 3. Those numbers are the IDs from the database, used from the URL to identify the right resource.

We can already add some tests:

boards/tests.py

fromdjango.core.urlresolversimportreversefromdjango.urlsimportresolvefromdjango.testimportTestCasefrom.viewsimporthome,board_topics,new_topicfrom.modelsimportBoardclassHomeTests(TestCase):# ...classBoardTopicsTests(TestCase):# ...classNewTopicTests(TestCase):defsetUp(self):Board.objects.create(name='Django',description='Django board.')deftest_new_topic_view_success_status_code(self):url=reverse('new_topic',kwargs={'pk':1})response=self.client.get(url)self.assertEquals(response.status_code,200)deftest_new_topic_view_not_found_status_code(self):url=reverse('new_topic',kwargs={'pk':99})response=self.client.get(url)self.assertEquals(response.status_code,404)deftest_new_topic_url_resolves_new_topic_view(self):view=resolve('/boards/1/new/')self.assertEquals(view.func,new_topic)deftest_new_topic_view_contains_link_back_to_board_topics_view(self):new_topic_url=reverse('new_topic',kwargs={'pk':1})board_topics_url=reverse('board_topics',kwargs={'pk':1})response=self.client.get(new_topic_url)self.assertContains(response,'href="{0}"'.format(board_topics_url))

A quick summary of the tests of our new class NewTopicTests:

  • setUp: creates a Board instance to be used during the tests
  • test_new_topic_view_success_status_code: check if the request to the view is successful
  • test_new_topic_view_not_found_status_code: check if the view is raising a 404 error when the Board does not exist
  • test_new_topic_url_resolves_new_topic_view: check if the right view is being used
  • test_new_topic_view_contains_link_back_to_board_topics_view: ensure the navigation back to the list of topics

Run the tests:

python manage.py test
Creating test database for alias 'default'...
System check identified no issues (0 silenced).
...........
----------------------------------------------------------------------
Ran 11 tests in 0.076s

OK
Destroying test database for alias 'default'...

Good, now it’s time to start creating the form.

templates/new_topic.html

{%extends'base.html'%}{%blocktitle%}Start a New Topic{%endblock%}{%blockbreadcrumb%}<liclass="breadcrumb-item"><ahref="{%url'home'%}">Boards</a></li><liclass="breadcrumb-item"><ahref="{%url'board_topics'board.pk%}">{{board.name}}</a></li><liclass="breadcrumb-item active">New topic</li>{%endblock%}{%blockcontent%}<formmethod="post">{%csrf_token%}<divclass="form-group"><labelfor="id_subject">Subject</label><inputtype="text"class="form-control"id="id_subject"name="subject"></div><divclass="form-group"><labelfor="id_message">Message</label><textareaclass="form-control"id="id_message"name="message"rows="5"></textarea></div><buttontype="submit"class="btn btn-success">Post</button></form>{%endblock%}

This is a raw HTML form created by hand using the CSS classes provided by Bootstrap 4. It looks like this:

Start a New Topic

In the <form> tag, we have to define the method attribute. This instructs the browser on how we want to communicate with the server. The HTTP spec defines several request methods (verbs). But for the most part, we will only be using GET and POST request types.

GET is perhaps the most common request type. It’s used to retrieve data from the server. Every time you click on a link or type a URL directly into the browser, you are creating a GET request.

POST is used when we want to change data on the server. So, generally speaking, every time we send data to the server that will result in a change in the state of a resource, we should always send it via POST request.

Django protects all POST requests using a CSRF Token (Cross-Site Request Forgery Token). It’s a security measure to avoid external sites or applications to submit data to our application. Every time the application receives a POST, it will first look for the CSRF Token. If the request has no token, or the token is invalid, it will discard the posted data.

The result of the csrf_token template tag:

{%csrf_token%}

Is a hidden field that’s submitted along with the other form data:

<inputtype="hidden"name="csrfmiddlewaretoken"value="jG2o6aWj65YGaqzCpl0TYTg5jn6SctjzRZ9KmluifVx0IVaxlwh97YarZKs54Y32">

Another thing, we have to set the name of the HTML inputs. The name will be used to retrieve the data on the server side.

<inputtype="text"class="form-control"id="id_subject"name="subject"><textareaclass="form-control"id="id_message"name="message"rows="5"></textarea>

Here is how we retrieve the data:

subject=request.POST['subject']message=request.POST['message']

So, a naïve implementation of a view that grabs the data from the HTML and start a new topic can be written like this:

fromdjango.contrib.auth.modelsimportUserfromdjango.shortcutsimportrender,redirect,get_object_or_404from.modelsimportBoard,Topic,Postdefnew_topic(request,pk):board=get_object_or_404(Board,pk=pk)ifrequest.method=='POST':subject=request.POST['subject']message=request.POST['message']user=User.objects.first()# TODO: get the currently logged in usertopic=Topic.objects.create(subject=subject,board=board,starter=user)post=Post.objects.create(message=message,topic=topic,created_by=user)returnredirect('board_topics',pk=board.pk)# TODO: redirect to the created topic pagereturnrender(request,'new_topic.html',{'board':board})

This view is only considering the happy path, which is receiving the data and saving it into the database. But there are some missing parts. We are not validating the data. The user could submit an empty form or a subject that’s bigger than 255 characters.

So far we are hard-coding the User fields because we haven’t implemented the authentication yet. But there’s an easy way to identify the logged in user. We will get to that part in the next tutorial. Also, we haven’t implemented the view where we will list all the posts within a topic, so upon success, we are redirecting the user to the page where we list all the board topics.

Start a New Topic

Submitted the form clicking on the Post button:

Topics

It looks like it worked. But we haven’t implemented the topics listing yet, so there’s nothing to see here. Let’s edit the templates/topics.html file to do a proper listing:

templates/topics.html

{%extends'base.html'%}{%blocktitle%}{{board.name}} - {{block.super}}{%endblock%}{%blockbreadcrumb%}<liclass="breadcrumb-item"><ahref="{%url'home'%}">Boards</a></li><liclass="breadcrumb-item active">{{board.name}}</li>{%endblock%}{%blockcontent%}<tableclass="table"><theadclass="thead-inverse"><tr><th>Topic</th><th>Starter</th><th>Replies</th><th>Views</th><th>Last Update</th></tr></thead><tbody>{%fortopicinboard.topics.all%}<tr><td>{{topic.subject}}</td><td>{{topic.starter.username}}</td><td>0</td><td>0</td><td>{{topic.last_updated}}</td></tr>{%endfor%}</tbody></table>{%endblock%}

Topics

Yep! The Topic we created is here.

Two new concepts here:

We are using for the first time the topics property in the Board model. The topics property is created automatically by Django using a reverse relationship. In the previous steps, we created a Topic instance:

defnew_topic(request,pk):board=get_object_or_404(Board,pk=pk)# ...topic=Topic.objects.create(subject=subject,board=board,starter=user)

In the line board=board, we set the board field in Topic model, which is a ForeignKey(Board). With that, now our Board instance is aware that it has an Topic instance associated with it.

The reason why we used board.topics.all instead of just board.topics is because board.topics is a Related Manager, which is pretty much similar to a Model Manager, usually available on the board.objects property. So, to return all topics associated with a given board, we have to run board.topics.all(). To filter some data, we could do board.topics.filter(subject__contains='Hello').

Another important thing to note is that, inside a Python code, we have to use parenthesis: board.topics.all(), because all() is a method. When writing code using the Django Template Language, in an HTML template file, we don’t use parenthesis, so it’s just board.topics.all.

The second thing is that we are making use of a ForeignKey:

{{topic.starter.username}}

Just create a path through the property using dots. We can pretty much access any property of the User model. If we wanted the user’s email, we could use topic.starter.email.

Since we are already modifying the topics.html template, let’s create the button that takes us to the new topic screen:

templates/topics.html

{%blockcontent%}<divclass="mb-4"><ahref="{%url'new_topic'board.pk%}"class="btn btn-primary">New topic</a></div><tableclass="table"><!-- code suppressed for brevity --></table>{%endblock%}

Topics

We can include a test to make sure the user can reach the New topic view from this page:

boards/tests.py

classBoardTopicsTests(TestCase):# ...deftest_board_topics_view_contains_navigation_links(self):board_topics_url=reverse('board_topics',kwargs={'pk':1})homepage_url=reverse('home')new_topic_url=reverse('new_topic',kwargs={'pk':1})response=self.client.get(board_topics_url)self.assertContains(response,'href="{0}"'.format(homepage_url))self.assertContains(response,'href="{0}"'.format(new_topic_url))

Basically here I renamed the old test_board_topics_view_contains_link_back_to_homepage method and add an extra assertContains. This test is now responsible for making sure our view contains the required navigation links.

Testing The Form View

Before we code the previous form example in a Django way, let’s write some tests for the form processing:

boards/tests.py

classNewTopicTests(TestCase):defsetUp(self):Board.objects.create(name='Django',description='Django board.')User.objects.create_user(username='john',email='john@doe.com',password='123')# <- included this line here# ...deftest_csrf(self):url=reverse('new_topic',kwargs={'pk':1})response=self.client.get(url)self.assertContains(response,'csrfmiddlewaretoken')deftest_new_topic_valid_post_data(self):url=reverse('new_topic',kwargs={'pk':1})data={'subject':'Test title','message':'Lorem ipsum dolor sit amet'}response=self.client.post(url,data)self.assertTrue(Topic.objects.exists())self.assertTrue(Post.objects.exists())deftest_new_topic_invalid_post_data(self):'''
        Invalid post data should not redirect
        The expected behavior is to show the form again with validation errors
        '''url=reverse('new_topic',kwargs={'pk':1})response=self.client.post(url,{})self.assertEquals(response.status_code,200)deftest_new_topic_invalid_post_data_empty_fields(self):'''
        Invalid post data should not redirect
        The expected behavior is to show the form again with validation errors
        '''url=reverse('new_topic',kwargs={'pk':1})data={'subject':'','message':''}response=self.client.post(url,data)self.assertEquals(response.status_code,200)self.assertFalse(Topic.objects.exists())self.assertFalse(Post.objects.exists())

First thing, the tests.py file is already starting to get big. We will improve it soon, breaking the tests into several files. But for now, let’s keep working on it.

  • setUp: included the User.objects.create_user to create a User instance to be used in the tests
  • test_csrf: since the CSRF Token is a fundamental part of processing POST requests, we have to make sure our HTML contains the token.
  • test_new_topic_valid_post_data: sends a valid combination of data and check if the view created a Topic instance and a Post instance.
  • test_new_topic_invalid_post_data: here we are sending an empty dictionary to check how the application is behaving.
  • test_new_topic_invalid_post_data_empty_fields: similar to the previous test, but this time we are sending some data. The application is expected to validate and reject empty subject and message.

Let’s run the tests:

python manage.py test
Creating test database for alias 'default'...
System check identified no issues (0 silenced).
........EF.....
======================================================================
ERROR: test_new_topic_invalid_post_data (boards.tests.NewTopicTests)
----------------------------------------------------------------------
Traceback (most recent call last):
...
django.utils.datastructures.MultiValueDictKeyError: "'subject'"

======================================================================
FAIL: test_new_topic_invalid_post_data_empty_fields (boards.tests.NewTopicTests)
----------------------------------------------------------------------
Traceback (most recent call last):
  File "/Users/vitorfs/Development/myproject/django-beginners-guide/boards/tests.py", line 115, in test_new_topic_invalid_post_data_empty_fields
    self.assertEquals(response.status_code, 200)
AssertionError: 302 != 200

----------------------------------------------------------------------
Ran 15 tests in 0.512s

FAILED (failures=1, errors=1)
Destroying test database for alias 'default'...

We have one failing test and one error. Both related to invalid user input. Instead of trying to fix it with the current implementation, let’s make those tests pass using the Django Forms API.

Creating Forms The Right Way

So, we came a long way since we started working with Forms. Finally, it’s time to use the Forms API.

The Forms API is available in the module django.forms. Django works with two types of forms: forms.Form and forms.ModelForm. The Form class is a general purpose form implementation. We can use it to process data that are not directly associated with a model in our application. A ModelForm is a subclass of Form, and it’s associated with a model class.

Let’s create a new file named forms.py inside the boards’ folder:

boards/forms.py

fromdjangoimportformsfrom.modelsimportTopicclassNewTopicForm(forms.ModelForm):message=forms.CharField(widget=forms.Textarea(),max_length=4000)classMeta:model=Topicfields=['subject','message']

This is our first form. It’s a ModelForm associated with the Topic model. The subject in the fields list inside the Meta class is referring to the subject field in the Topic class. Now observe that we are defining an extra field named message. This refers to the message in the Post we want to save.

Now we have to refactor our views.py:

boards/views.py

fromdjango.contrib.auth.modelsimportUserfromdjango.shortcutsimportrender,redirect,get_object_or_404from.formsimportNewTopicFormfrom.modelsimportBoard,Topic,Postdefnew_topic(request,pk):board=get_object_or_404(Board,pk=pk)user=User.objects.first()# TODO: get the currently logged in userifrequest.method=='POST':form=NewTopicForm(request.POST)ifform.is_valid():topic=form.save(commit=False)topic.board=boardtopic.starter=usertopic.save()post=Post.objects.create(message=form.cleaned_data.get('message'),topic=topic,created_by=user)returnredirect('board_topics',pk=board.pk)# TODO: redirect to the created topic pageelse:form=NewTopicForm()returnrender(request,'new_topic.html',{'board':board,'form':form})

This is how we use the forms in a view. Let me remove the extra noise so we can focus on the core of the form processing:

ifrequest.method=='POST':form=NewTopicForm(request.POST)ifform.is_valid():topic=form.save()returnredirect('board_topics',pk=board.pk)else:form=NewTopicForm()returnrender(request,'new_topic.html',{'form':form})

First we check if the request is a POST or a GET. If the request came from a POST, it means the user is submitting some data to the server. So we instantiate a form instance passing the POST data to the form: form = NewTopicForm(request.POST).

Then, we ask Django to verify the data, check if the form is valid if we can save it in the database: if form.is_valid():. If the form was valid, we proceed to save the data in the database using form.save(). The save() method returns an instance of the Model saved into the database. So, since this is a Topic form, it will return the Topic that was created: topic = form.save(). After that, the common path is to redirect the user somewhere else, both to avoid the user re-submit the form by pressing F5 and also to keep the flow of the application.

Now, if the data was invalid, Django will add a list of errors to the form. After that, the view does nothing and return in the last statement: return render(request, 'new_topic.html', {'form': form}). That means we have to update the new_topic.html to display errors properly.

If the request was a GET, we just initialize a new and empty form using form = NewTopicForm().

Let’s run the tests and see how is everything:

python manage.py test
Creating test database for alias 'default'...
System check identified no issues (0 silenced).
...............
----------------------------------------------------------------------
Ran 15 tests in 0.522s

OK
Destroying test database for alias 'default'...

We even fixed the last two tests.

The Django Forms API does much more than processing and validating the data. It also generates the HTML for us.

Let’s update the new_topic.html template to fully use the Django Forms API:

templates/new_topic.html

{%extends'base.html'%}{%blocktitle%}Start a New Topic{%endblock%}{%blockbreadcrumb%}<liclass="breadcrumb-item"><ahref="{%url'home'%}">Boards</a></li><liclass="breadcrumb-item"><ahref="{%url'board_topics'board.pk%}">{{board.name}}</a></li><liclass="breadcrumb-item active">New topic</li>{%endblock%}{%blockcontent%}<formmethod="post">{%csrf_token%}{{form.as_p}}<buttontype="submit"class="btn btn-success">Post</button></form>{%endblock%}

The form have three rendering options: form.as_table, form.as_ul, and form.as_p. It’s a quick way to render all the fields of a form. As the name suggests, the as_table uses table tags to format the inputs, the as_ul creates an HTML list of inputs, etc.

Let’s see how it looks like:

Start a New Topic

Well, our previous form was looking better, right? We are going to fix it in a moment.

It can look broken right now but trust me; there’s a lot of things behind it right now. And it’s extremely powerful. For example, if our form had 50 fields, we could render all the fields just by typing {{form.as_p}}.

And more, using the Forms API, Django will validate the data and add error messages to each field. Let’s try submitting an empty form:

Form Validation

Note:

If you see something like this: Please fill out this field. when you submit the form, that's not Django. It's your browser doing a pre-validation. To disable it add the novalidate attribute to your form tag: <form method="post" novalidate>

You can keep it; there's no problem with it. It's just because our form is very simple right now, and we don't have much data validation to see.

Another important thing to note is that: there is no such a thing as "client-side validation." JavaScript validation or browser validation is just for usability purpose. And also to reduce the number of requests to the server. Data validation should always be done on the server side, where we have full control over the data.

It also handles help texts, which can be defined both in a Form class or in a Model class:

boards/forms.py

fromdjangoimportformsfrom.modelsimportTopicclassNewTopicForm(forms.ModelForm):message=forms.CharField(widget=forms.Textarea(),max_length=4000,help_text='The max length of the text is 4000.')classMeta:model=Topicfields=['subject','message']

Help Text

We can also set extra attributes to a form field:

boards/forms.py

fromdjangoimportformsfrom.modelsimportTopicclassNewTopicForm(forms.ModelForm):message=forms.CharField(widget=forms.Textarea(attrs={'rows':5,'placeholder':'What is in your mind?'}),max_length=4000,help_text='The max length of the text is 4000.')classMeta:model=Topicfields=['subject','message']

Form Placeholder

Rendering Bootstrap Forms

Alright, so let’s make things pretty again.

When working with Bootstrap or any other Front-End library, I like to use a Django package called django-widget-tweaks. It gives us more control over the rendering process, keeping the defaults and just adding extra customizations on top of it.

Let’s start off by installing it:

pip install django-widget-tweaks

Now add it to the INSTALLED_APPS:

myproject/settings.py

INSTALLED_APPS=['django.contrib.admin','django.contrib.auth','django.contrib.contenttypes','django.contrib.sessions','django.contrib.messages','django.contrib.staticfiles','widget_tweaks','boards',]

Now let’s take it into use:

templates/new_topic.html

{%extends'base.html'%}{%loadwidget_tweaks%}{%blocktitle%}Start a New Topic{%endblock%}{%blockbreadcrumb%}<liclass="breadcrumb-item"><ahref="{%url'home'%}">Boards</a></li><liclass="breadcrumb-item"><ahref="{%url'board_topics'board.pk%}">{{board.name}}</a></li><liclass="breadcrumb-item active">New topic</li>{%endblock%}{%blockcontent%}<formmethod="post"novalidate>{%csrf_token%}{%forfieldinform%}<divclass="form-group">{{field.label_tag}}{%render_fieldfieldclass="form-control"%}{%iffield.help_text%}<smallclass="form-text text-muted">{{field.help_text}}</small>{%endif%}</div>{%endfor%}<buttontype="submit"class="btn btn-success">Post</button></form>{%endblock%}

Bootstrap Form

There it is! So, here we are using the django-widget-tweaks. First, we load it in the template by using the {%loadwidget_tweaks%} template tag. Then the usage:

{%render_fieldfieldclass="form-control"%}

The render_field tag is not part of Django; it lives inside the package we installed. To use it we have to pass a form field instance as the first parameter, and then after we can add arbitrary HTML attributes to complement it. It will be useful because then we can assign classes based on certain conditions.

Some examples of the render_field template tag:

{%render_fieldform.subjectclass="form-control"%}{%render_fieldform.messageclass="form-control"placeholder=form.message.label%}{%render_fieldfieldclass="form-control"placeholder="Write a message!"%}{%render_fieldfieldstyle="font-size: 20px"%}

Now to implement the Bootstrap 4 validation tags, we can change the new_topic.html template:

templates/new_topic.html

<formmethod="post"novalidate>{%csrf_token%}{%forfieldinform%}<divclass="form-group">{{field.label_tag}}{%ifform.is_bound%}{%iffield.errors%}{%render_fieldfieldclass="form-control is-invalid"%}{%forerrorinfield.errors%}<divclass="invalid-feedback">{{error}}</div>{%endfor%}{%else%}{%render_fieldfieldclass="form-control is-valid"%}{%endif%}{%else%}{%render_fieldfieldclass="form-control"%}{%endif%}{%iffield.help_text%}<smallclass="form-text text-muted">{{field.help_text}}</small>{%endif%}</div>{%endfor%}<buttontype="submit"class="btn btn-success">Post</button></form>

The result is this:

Bootstrap Form Invalid

Bootstrap Form Partially Valid

So, we have three different rendering states:

  • Initial state: the form has no data (is not bound)
  • Invalid: we add the .is-invalid CSS class and add error messages in an element with a class .invalid-feedback. The form field and the messages are rendered in red.
  • Valid: we add the .is-valid CSS class so to paint the form field in green, giving feedback to the user that this field is good to go.
Reusable Forms Templates

The template code looks a little bit complicated, right? Well, the good news is that we can reuse this snippet across the project.

In the templates folder, create a new folder named includes:

myproject/
 |-- myproject/
 |    |-- boards/
 |    |-- myproject/
 |    |-- templates/
 |    |    |-- includes/    <-- here!
 |    |    |-- base.html
 |    |    |-- home.html
 |    |    |-- new_topic.html
 |    |    +-- topics.html
 |    +-- manage.py
 +-- venv/

Now inside the includes folder, create a file named form.html:

templates/includes/form.html

{%loadwidget_tweaks%}{%forfieldinform%}<divclass="form-group">{{field.label_tag}}{%ifform.is_bound%}{%iffield.errors%}{%render_fieldfieldclass="form-control is-invalid"%}{%forerrorinfield.errors%}<divclass="invalid-feedback">{{error}}</div>{%endfor%}{%else%}{%render_fieldfieldclass="form-control is-valid"%}{%endif%}{%else%}{%render_fieldfieldclass="form-control"%}{%endif%}{%iffield.help_text%}<smallclass="form-text text-muted">{{field.help_text}}</small>{%endif%}</div>{%endfor%}

Now we change our new_topic.html template:

templates/new_topic.html

{%extends'base.html'%}{%blocktitle%}Start a New Topic{%endblock%}{%blockbreadcrumb%}<liclass="breadcrumb-item"><ahref="{%url'home'%}">Boards</a></li><liclass="breadcrumb-item"><ahref="{%url'board_topics'board.pk%}">{{board.name}}</a></li><liclass="breadcrumb-item active">New topic</li>{%endblock%}{%blockcontent%}<formmethod="post"novalidate>{%csrf_token%}{%include'includes/form.html'%}<buttontype="submit"class="btn btn-success">Post</button></form>{%endblock%}

As the name suggests, the {%include%} is used to include HTML templates in another template. It’s a very useful way to reuse HTML components in a project.

The next form we implement, we can simply use {%include'includes/form.html'%} to render it.

Adding More Tests

Now we are using Django Forms; we can add more tests to make sure it is running smoothly:

boards/tests.py

# ... other importsfrom.formsimportNewTopicFormclassNewTopicTests(TestCase):# ... other testsdeftest_contains_form(self):# <- new testurl=reverse('new_topic',kwargs={'pk':1})response=self.client.get(url)form=response.context.get('form')self.assertIsInstance(form,NewTopicForm)deftest_new_topic_invalid_post_data(self):# <- updated this one'''
        Invalid post data should not redirect
        The expected behavior is to show the form again with validation errors
        '''url=reverse('new_topic',kwargs={'pk':1})response=self.client.post(url,{})form=response.context.get('form')self.assertEquals(response.status_code,200)self.assertTrue(form.errors)

Now we are using the assertIsInstance method for the first time. Basically we are grabbing the form instance in the context data, and checking if it is a NewTopicForm. In the last test, we added the self.assertTrue(form.errors) to make sure the form is showing errors when the data is invalid.


Conclusions

In this tutorial, we focused on URLs, Reusable Templates, and Forms. As usual, we also implement several test cases. That’s how we develop with confidence.

Our tests file is starting to get big, so in the next tutorial, we are going to refactor it to improve the maintainability so to sustain the growth of our code base.

We are also reaching a point where we need to interact with the logged in user. In the next tutorial, we are going to learn everything about authentication and how to protect our views and resources.

I hope you enjoyed the third part of this tutorial series! The forth part is coming out next week, on Sep 25, 2017. If you would like to get notified when the forth part is out, you can subscribe to our mailing list.

The source code of the project is available on GitHub. The current state of the project can be found under the release tag v0.3-lw. The link below will take you to the right place:

https://github.com/sibtc/django-beginners-guide/tree/v0.3-lw


Matthew Rocklin: Dask on HPC - Initial Work

$
0
0

This work is supported by Anaconda Inc. and the NSF EarthCube program.

We recently announced a collaboration between the National Center for Atmospheric Research (NCAR), Columbia University, and Anaconda Inc to accelerate the analysis of atmospheric and oceanographic data on high performance computers (HPC) with XArray and Dask. The full text of the proposed work is available here. We are very grateful to the NSF EarthCube program for funding this work, which feels particularly relevant today in the wake (and continued threat) of the major storms Harvey, Irma, and Jose.

This is a collaboration of academic scientists (Columbia), infrastructure stewards (NCAR), and software developers (Anaconda and Columbia and NCAR) to scale current workflows with XArray and Jupyter onto big-iron HPC systems and peta-scale datasets. In the first week after the grant closed a few of us focused on the quickest path to get science groups up and running with XArray, Dask, and Jupyter on these HPC systems. This blogpost details what we achieved and some of the new challenges that we’ve found in that first week. We hope to follow this blogpost with many more to come in the future. Today we cover the following topics:

  1. Deploying Dask with MPI
  2. Interactive deployments on a batch job scheduler, in this case PBS
  3. The virtues of JupyterLab in a remote system
  4. Network performance and 3GB/s infiniband
  5. Modernizing XArray’s interactions with Dask’s distributed scheduler

A video walkthrough deploying Dask on XArray on an HPC system is available on YouTube and instructions for atmospheric scientists with access to the Cheyenne Supercomputer is available here.

Now lets start with technical issues:

Deploying Dask with MPI

HPC systems use job schedulers like SGE, SLURM, PBS, LSF, and others. Dask has been deployed on all of these systems before either by academic groups or financial companies. However every time we do this it’s a little different and generally tailored to a particular cluster.

We wanted to make something more general. This started out as a GitHub issue on PBS scripts that tried to make a simple common template that people could copy-and-modify. Unfortunately, there were significant challenges with this. HPC systems and their job schedulers seem to focus and easily support only two common use cases:

  1. Embarrassingly parallel “run this script 1000 times” jobs. This is too simple for what we have to do.
  2. MPI jobs. This seemed like overkill, but is the approach that we ended up taking.

Deploying dask is somewhere between these two. It falls into the master-slave pattern (or perhaps more appropriately coordinator-workers). We ended up building an MPI4Py program that launches Dask. MPI is well supported, and more importantly consistently supported, by all HPC job schedulers so depending on MPI provides a level of stability across machines. Now dask.distributed ships with a new dask-mpi executable:

mpirun --np 4 dask-mpi

To be clear, Dask isn’t using MPI for inter-process communication. It’s still using TCP. We’re just using MPI to launch a scheduler and several workers and hook them all together. In pseudocode the dask-mpi executable looks something like this:

frommpi4pyimportMPIcomm=MPI.COMM_WORLDrank=comm.Get_rank()ifrank==0:start_dask_scheduler()else:start_dask_worker()

Socially this is useful because every cluster management team knows how to support MPI, so anyone with access to such a cluster has someone they can ask for help. We’ve successfully translated the question “How do I start Dask?” to the question “How do I run this MPI program?” which is a question that the technical staff at supercomputer facilities are generally much better equipped to handle.

Working Interactively on a Batch Scheduler

Our collaboration is focused on interactive analysis of big datasets. This means that people expect to open up Jupyter notebooks, connect to clusters of many machines, and compute on those machines while they sit at their computer.

Unfortunately most job schedulers were designed for batch scheduling. They will try to run your job quickly, but don’t mind waiting for a few hours for a nice set of machines on the super computer to open up. As you ask for more time and more machines, waiting times can increase drastically. For most MPI jobs this is fine because people aren’t expecting to get a result right away and they’re certainly not interacting with the program, but in our case we really do want some results right away, even if they’re only part of what we asked for.

Handling this problem long term will require both technical work and policy decisions. In the short term we take advantage of two facts:

  1. Many small jobs can start more quickly than a few large ones. These take advantage of holes in the schedule that are too small to be used by larger jobs.
  2. Dask doesn’t need to be started all at once. Workers can come and go.

And so I find that if I ask for several single machine jobs I can easily cobble together a sizable cluster that starts very quickly. In practice this looks like the following:

$ qsub start-dask.sh      # only ask for one machine
$ qsub add-one-worker.sh  # ask for one more machine

Our main job has a wall time of about an hour. The workers have shorter wall times. They can come and go as needed throughout the computation as our computational needs change.

Jupyter Lab and Web Frontends

Our scientific collaborators enjoy building Jupyter notebooks of their work. This allows them to manage their code, scientific thoughts, and visual outputs all at once and for them serves as an artifact that they can share with their scientific teams and collaborators. To help them with this we start a Jupyter server on the same machine in their allocation that is running the Dask scheduler. We then provide them with SSH-tunneling lines that they can copy-and-paste to get access to the Jupyter server from their personal computer.

We’ve been using the new Jupyter Lab rather than the classic notebook. This is especially convenient for us because it provides much of the interactive experience that they lost by not working on their local machine. They get a file browser, terminals, easy visualization of textfiles and so on without having to repeatedly SSH into the HPC system. We get all of this functionality on a single connection and with an intuitive Jupyter interface.

For now we give them a script to set all of this up. It starts Jupyter Lab using Dask and then prints out the SSH-tunneling line.

fromdask.distributedimportClientclient=Client(scheduler_file='scheduler.json')importsockethost=client.run_on_scheduler(socket.gethostname)defstart_jlab(dask_scheduler):importsubprocessproc=subprocess.Popen(['jupyter','lab','--ip',host,'--no-browser'])dask_scheduler.jlab_proc=procclient.run_on_scheduler(start_jlab)print("ssh -N -L 8787:%s:8787 -L 8888:%s:8888 -L 8789:%s:8789 cheyenne.ucar.edu"%(host,host,host))

Long term we would like to switch to an entirely point-and-click interface (perhaps something like JupyterHub) but this will requires additional thinking about deploying distributed resources along with the Jupyter server instance.

Network Performance on Infiniband

The intended computations move several terabytes across the cluster. On this cluster Dask gets about 1GB/s simultaneous read/write network bandwidth per machine using the high-speed Infiniband network. For any commodity or cloud-based system this is very fast (about 10x faster than what I observe on Amazon). However for a super-computer this is only about 30% of what’s possible (see hardware specs).

I suspect that this is due to byte-handling in Tornado, the networking library that Dask uses under the hood. The following image shows the diagnostic dashboard for one worker after a communication-heavy workload. We see 1GB/s for both read and write. We also see 100% CPU usage.

Network performance is a big question for HPC users looking at Dask. If we can get near MPI bandwidth then that may help to reduce concerns for this performance-oriented community.

How do I use Infiniband network with Dask?

XArray and Dask.distributed

XArray was the first major project to use Dask internally. This early integration was critical to prove out Dask’s internals with user feedback. However it also means that some parts of XArray were designed well before some of the newer parts of Dask, notably the asynchronous distributed scheduling features.

XArray can still use Dask on a distributed cluster, but only with the subset of features that are also available with the single machine scheduler. This means that persisting data in distributed RAM, parallel debugging, publishing shared datasets, and so on all require significantly more work today with XArray than they should.

To address this we plan to update XArray to follow a newly proposed Dask interface. This is complex enough to handle all Dask scheduling features, but light weight enough not to actually require any dependence on the Dask library itself. (Work by Jim Crist.)

We will also eventually need to look at reducing overhead for inspecting several NetCDF files, but we haven’t yet run into this, so I plan to wait.

Future Work

We think we’re at a decent point for scientific users to start playing with the system. We have a Getting Started with Dask on Cheyenne wiki page that our first set of guinea pig users have successfully run through without much trouble. We’ve also identified a number of issues that the software developers can work on while the scientific teams spin up.

  1. Zero copy Tornado writes to improve network bandwidth
  2. Enable Dask.distributed features in XArray by formalizing dask’s expected interface
  3. Dynamic deployments on batch job schedulers

We would love to engage other collaborators throughout this process. If you or your group work on related problems we would love to hear from you. This grant isn’t just about serving the scientific needs of researchers at Columbia and NCAR, but about building long-term systems that can benefit the entire atmospheric and oceanographic community. Please engage on the Pangeo GitHub issue tracker.

Catalin George Festila: YARA python module - part 002 .

$
0
0
This is another part of YARA python tutorial and the goal of this part is install the yara modules.
The YARA modules provides extending features to allow us to define data structures and functions which can be used in your rules to express more complex conditions.
You can also write your own modules.
Some known modules used by YARA are:
  • PE
  • ELF
  • Cuckoo
  • Magic
  • Hash
  • Math
First you need to install or reinstall YARA to the last version:
>>> yara.__version__
'3.6.3'
The Cuckoo module enables you to create YARA rules based on behavioral information generated by a Cuckoo sandbox.
C:\Python27\Scripts>pip install yara-python
Collecting yara-python
Downloading yara_python-3.6.3-cp27-cp27m-win32.whl (606kB)
100% |################################| 614kB 1.3MB/s
Installing collected packages: yara-python
Successfully installed yara-python-3.6.3
pip install cuckoo
Collecting cuckoo
Downloading Cuckoo-2.0.4.4.tar.gz (3.1MB)
100% |################################| 3.1MB 255kB/s
...
Successfully installed Mako-1.0.7 alembic-0.8.8 androguard-3.0.1 beautifulsoup4-4.5.3
capstone-windows-3.0.4 chardet-2.3.0 click-6.6 colorama-0.3.7 cuckoo-2.0.4.4 django-1.8.4 
django-extensions-1.6.7 dpkt-1.8.7 ecdsa-0.13 egghatch-0.2.1 elasticsearch-5.3.0 
flask-sqlalchemy-2.1 httpreplay-0.2.1 jsbeautifier-1.6.2 jsonschema-2.6.0 olefile-0.43 
oletools-0.42 peepdf-0.3.6 pefile2-1.2.11 pillow-3.2.0 pyelftools-0.24 pymisp-2.4.54 
pymongo-3.0.3 python-dateutil-2.4.2 python-editor-1.0.3 python-magic-0.4.12 pythonaes-1.0 
requests-2.13.0 sflock-0.2.16 sqlalchemy-1.0.8 tlslite-ng-0.6.0 unicorn-1.0.1 wakeonlan-0.2.2
Let's test this python module:
>>> import cuckoo
>>> from cuckoo import *
>>> dir(cuckoo)
['__builtins__', '__doc__', '__file__', '__name__', '__package__', '__path__', '__version__',
 'auxiliary', 'common', 'compat', 'core', 'machinery', 'misc', 'plugins', 'processing', 
'reporting', 'signatures', 'web']
Let's test some yara modules:
>>> import yara
>>> rule = yara.compile(source='import \"pe\"')
>>> rule = yara.compile(source='import \"elf\"')
>>> rule = yara.compile(source='import \"cuckoo\"')
>>> rule = yara.compile(source='import \"math\"')
I could not use the YARA modules: hash and magic.
I will solve this problem in the future.
You can also write your own modules ( see this webpage ).

Django Weekly: DjangoWeekly 56 - Free continuous delivery eBook from GoCD, A Complete Beginner's Guide to Django 2

$
0
0
Worthy Read

This free reference guide will take you back to the basics. You’ll find visuals and definitions on key concepts and questions you need to answer about your teams to determine your readiness for continuous delivery. Download and share with your team.
advert
,
GoCD

Welcome to the second part of our Django Tutorial! In the previous lesson, we installed everything that we needed. Hopefully, you are all setup with Python 3.6 installed and Django 1.11 running inside a Virtual Environment. We already created the project we are going to play around. In this lesson, we are going to keep writing code in the same project.
tutorial

LocustIO, an open source tool written in python, is used for load testing of web applications. It is simple and easy to use with web UI to view the test results. It is scalable and can be distributed over multiple machines. This article demonstrates an example to use locust for load testing of our django web application.
django

This Impact Report aims to celebrate achievements of the Django Girls community in the past two years, and showcase the incredible growth of the organization. For the first time ever, we're also presenting results of a survey we conducted with almost 600 past Django Girls attendees to see if Django Girls Foundation actually achieves the goal of our mission: to bring more women into tech industry!
django-girls

In this article you will learn how to build a simple REST API using Django REST Framework. The code in this article was written with Python 3.6, Django 1.11 and DRF 3.6 in mind.
DRF

In my case, I wanted to use my existing Django Rest Framework (DRF) Token authentication endpoints alongside GraphQL. I'll be using a class-based view approach for Django, DRF, and Graphene.
GraphQL
,
token auth

Writing resilient code that can handle task failure is important for maintaining modern functional systems. We’ll be going over how to retry asynchronous tasks with celery in python, commonly used in django applications.
celery

The Indian Edition of the awesome Two Scoops of Django 1.11 is now on Flipkart and Amazon. Rejoice Django Developers from Indian.
book

How do you compare?
advert

Test the API for free.
advert

In this article, I'm going to walk through deploying a Django application to AWS using Nanobox. Nanobox uses Docker to provision local development environments, local staging environments, and scalable, highly-available production environments on AWS.
deployment

Suppose you want to build a new SaaS (Software as a Service) application. Suppose your application will store sensitive data from your customers. What is the best way to guarantee the isolation of the data and make sure information from one client does not leak to the other? The answer to that is: it depends. It depends on the number of customers you are planning to have. It depends on the size of your company. It depends on the technical skills of the developers working on the platform. And it depends on how sensitive the data is. In this article, I'll go over some of the architectures you can adopt in your application to tackle this problem and how to apply them in Django.
multitenancy

The book is available both for free and for money. It's all about TDD and Web programming. Read it here!.
test driven development

multiprocessing

Django Rest Framework(DRF) provide a extremely convenience way to develop RESTful apps. Such as generics module, which contains many useful APIView based on the request method.
DRF

A description, step by step of how I builded my docker django image, how i loaded it on docker hub and how can be use it and customized.
docker
,
dockerfile


Projects

django-clever-cache - 0 Stars, 0 Fork
Django cache backend with automatic granular invalidation.

django-simple-affiliate - 0 Stars, 0 Fork
This is a very simple library that can be used to provide affiliate links in your django application. It is intentionally very lightweight, allowing your application to do whatever it wants with the data.


Mike Driscoll: PyDev of the Week: Daniel Roseman

$
0
0

This week we welcome Daniel Roseman as our PyDev of the Week. I stumbled across Daniel on StackOverflow via some of the Python answers he has given. He is in the top 0.01% overall on StackOverflow, which is pretty impressive. He also has an old blog with a few interesting Python related articles in it. You can see what he’s been up to lately over on Github. Let’s take a few moments to get to know Daniel better!

Can you tell us a little about yourself (hobbies, education, etc):

I’m a self-taught programmer – my degree is actually in French – and I spent ten years working as a journalist and sub-editor before finally making the move into professional web development.

Since then I’ve worked at Global Radio, Glasses Direct, Google, and now the UK’s Government Digital Service, where I’m currently a technical architect on the publishing platform for the GOV.UK website.

Outside of work I’m a singer in various amateur choirs. I’ve also been running a Code Club at a local primary school for several years, helping ten and eleven year olds with their first introduction to programming using Scratch and later Python itself.

Why did you start using Python?

I got involved in helping out with a website for a charity, which was originally written in Python using Zope 2. Until then I’d never done any Python, and one of the original developers (thanks, Yoz!) helped me get started and pointed me towards Dive Into Python, which was an excellent resource for learning the language.

The charity site was quite basic at that time and didn’t have a proper CMS, so I looked around for technologies to make it more usable. That’s how I discovered Django, which was just then beginning to make an impact; this was around the time of the earliest open-source releases, version 0.90 or so. I fell in love with Django and was quickly able to use it to rebuild the site completely, and I’ve never looked back.

What other programming languages do you know and which is your favorite?

Most of my current team’s work is in Ruby, so professionally I’ve been mainly doing that for the last three years or so. There’s also some Go, although I haven’t done much there myself.

Python definitely remains my favourite. Although I do like a lot of things that Ruby brings, Python is still the language that fits my brain best.

What projects are you working on now?

I don’t get a lot of time for real open-source work because of family stuff and other commitments, so I tend to just contribute various bug fixes and minor features when I can.

One current project though is to see if I can use my experience with Code Club to write an introduction for kids to web development with Django. There are a few kids’ programming tutorials using Python, but nothing specifically focused on the web. It’s mainly inspired by the fantastic Django Girls tutorial, but I want to see if it’s possible to do an introduction from the ground up to all the relevant technologies for a much younger age group. It’s a long-term project though, so it’ll be a while before there’s anything ready to show.

Which Python libraries are your favorite (core or 3rd party)?

Obviously I’d put Django high up there on my list of favourites. It’s what got me properly into Python, and helped me find my first jobs in web development. There’s a great mix of usability and functionality, as well as a huge amount of third-party packages for just about anything.

How did you end up becoming one of the top “gurus” on StackOverflow for Python?

Persistence, and more than a little of “Someone is wrong on the Internet” syndrome. Like many programmers I do like to help and share my knowledge, and contributing to SO has been a really good way for me to do that: hopefully I’ve helped many many people there. And I get a lot of satisfaction from helping people who are trying their best to make something work, but have somehow misunderstood a concept or struggle to see why things aren’t doing what they think they should.

On top of that, I do like to write, but I rarely get the opportunity to sit down and write long articles or blog posts; but answering a question on SO with an explanation or code snippet takes only a minute or so. In effect, helping people on StackOverflow is my main contribution to the open source community.

For those wondering how I manage to answer so many questions, the feed of most recent Python and Django questions is in my RSS reader; so I often encounter a question I’d like to answer while I’m just browsing on the train to work, for example. I’ve become quite good at entering code examples using my phone keyboard.

What do you like the most about StackOverflow versus other tech help websites?

Mainly the direct focus on actual programming questions and answers. There’s a very clear idea of what is on- and off-topic there, and anything that isn’t an actual question about how to solve a specific programming problem quickly gets closed. Similarly, it enables and encourages posters to go back and edit their questions to post relevant details they may have missed out, making them more relevant and clearer.

Of course, the flip side of this is that it does cause it does sometimes appear unwelcoming to newcomers, who often don’t know exactly how to ask questions and get defensive when asked for more details. I’ve given a short talk at a couple of meetups about what exactly does make a good question and how to maximise the possibility you’ll get an answer; the slides are here: https://www.slideshare.net/danielroseman/asking-good-questions-53621064

On the other hand, there are a few things I don’t like. One of them, perhaps surprisingly, is the points system; I have far too many points. While that is to a certain extent because I contribute a lot, it’s also not insignificantly due to the fact that I joined early and wrote some “canonical” answers that get voted up a lot, even years later. Some of those answers aren’t even very good, but they continue to get votes precisely because they already have votes. I’m not really sure how this could be improved, though.

Thanks for doing the interview!

Doug Hellmann: gc — Garbage Collector — PyMOTW 3

$
0
0
gc exposes the underlying memory management mechanism of Python, the automatic garbage collector. The module includes functions for controlling how the collector operates and to examine the objects known to the system, either pending collection or stuck in reference cycles and unable to be freed. Read more… This post is part of the Python Module …

DataCamp: DataCamp and Springboard Are Working Together To Get You a Data Science Job!

$
0
0

DataCamp and Springboard are coming together to advance learning and career outcomes for aspiring data scientists.  

Joining forces was an obvious choice. Springboard’s human-centered approach to online learning perfectly complemented DataCamp’s expertise in interactive learning exercises. Together, we’ve created the Data Science Career Track, the first mentor-led data science bootcamp to come with a job guarantee. 

Each student in the Data Science Career Track will be assigned a personal industry mentor who’ll advise them on technical skills, project execution, and career advancement. Springboard’s expert-curated data science curriculum will be paired with DataCamp’s interactive exercises for a seamless learning experience. Finally, a career coach will work with students on interview skills, resume building, and personalized job searches to help them find the ideal data science position. 

The course is selective: about 18% of applicants are allowed to enroll after going through the admission process.

For eligible students, the course guarantees that you’ll find a job within six months after graduation or your money back.  

For a limited time only (until October 16th), you can use the code LOVEDATA to get $200 off if the Data Science Career Track. Click here for more information

Possbility and Probability: The curse of knowledge: Finding os.getenv()

DataCamp: How Not To Plot Hurricane Predictions

$
0
0

Visualizations help us make sense of the world and allow us to convey large amounts of complex information, data and predictions in a concise form. Expert predictions that need to be conveyed to non-expert audiences, whether they be the path of a hurricane or the outcome of an election, always contain a degree of uncertainty. If this uncertainty is not conveyed in the relevant visualizations, the results can be misleading and even dangerous.

Here, we explore the role of data visualization in plotting the predicted paths of hurricanes. We explore different visual methods to convey the uncertainty of expert predictions and the impact on layperson interpretation. We connect this to a broader discussion of best practices with respect to how news media outlets report on both expert models and scientific results on topics important to the population at large.

No Spaghetti Plots?

We have recently seen the damage wreaked by tropical storm systems in the Americas. News outlets such as the New York Times have conveyed a great deal of what has been going on using interactive visualizations for Hurricanes Harvey and Irma, for example. Visualizations include geographical visualisation of percentage of people without electricity, amount of rainfall, amount of damage and number of people in shelters, among many other things.

One particular type of plot has understandably been coming up recently and raising controversy: how to plot the predicted path of a hurricane, say, over the next 72 hours. There are several ways to visualize predicted paths, each way with its own pitfalls and misconceptions. Recently, we even saw an article in Ars Technica called Please, please stop sharing spaghetti plots of hurricane models, directed at Nate Silver and fivethirtyeight.

In what follows, I'll compare three common ways, explore their pros and cons and make suggestions for further types of plots. I'll also delve into why these types are important, which will help us decide which visual methods and techniques are most appropriate.

Disclaimer: I am definitively a non-expert in metereological matters and hurricane forecasting. But I have thought a lot about visual methods to convey data, predictions and models. I welcome and actively encourage the feedback of experts, along with that of others.

Visualizing Predicted Hurricane Paths

There are three common ways of creating visualizations for predicted hurricane paths. Before talking about at them, I want you to look at them and consider what information you can get from each of them. Do your best to interpret what each of them is trying to tell you, in turn, and then we'll delve into what their intentions are, along with their pros and cons:

The Cone of Uncertainty

From the National Hurricane Center

Spaghetti Plots (Type I)

From South Florida Water Management District via fivethirtyeight

Spaghetti Plots (Type II)

From The New York Times. Surrounding text tells us 'One of the best hurricane forecasting systems is a model developed by an independent intergovernmental organization in Europe, according to Jeff Masters, a founder of the Weather Underground. The system produces 52 distinct forecasts of the storm’s path, each represented by a line [above].'

Interpretation and Impact of Visualizations of Hurricanes' Predicted Paths

The Cone of Uncertainty

The cone of uncertainty, a tool used by the National Hurricane Center (NHC) and communicated by many news outlets, shows us the most likely path of the hurricane over the next five days, given by the black dots in the cone. It also shows how certain they are of this path. As time goes on, the prediction is less certain and this is captured by the cone, in that there is an approximately 66.6% chance that the centre of the hurricane will fall in the bounds of the cone.

Was this apparent from the plot itself?

It wasn't to me initially and I gathered this information from the plot itself, the NHC's 'about the cone of uncertainty' page and weather.com's demystification of the cone post. There are three more salient points, all of which we'll return to:

  • It is a common initial misconception that the widening of the cone over time suggests that the storm will grow;
  • The plot contains no information about the size of the storm, only about the potential path of its centre, and so is of limited use in telling us where to expect, for example, hurricane-force winds;
  • There is essential information contained in the text that accompanies the visualization, as well as the visualization itself, such as the note placed prominently at the top, '[t]he cone contains the probable path of the storm center but does not show the size of the storm...'; when judging the efficacy of a data visualization, we'll need to take into consideration all its properties, including text (and whether we can actually expect people to read it!); note that interactivity is a property that these visualizations do not have (but maybe should).

Spaghetti Plots (Type I)

Type I spaghetti plots show several predictions in one plot. One any given Type I spaghetti plot, the visualized trajectories are predictions from models from different agencies (NHC, the National Oceanic and Atmospheric Administration and the UK Met Office, for example). They are useful in that, like the cone of uncertainty, they inform us of the general region that may be in the hurricane's path. They are wonderfully unuseful and actually misleading in the fact that they weight each model (or prediction) equally.

In the Type I spaghetti plot above, there are predictions with varying degrees of uncertaintly from agencies that have previously made predictions with variable degrees of success. So some paths are more likely than others, given what we currently know. This information is not present. Even more alarmingly, some of the paths are barely even predictions. Take the black dotted line XTRP, which is a straight-line prediction given the storm's current trajectory. This is not even a model. Eric Berger goes into more detail in this Ars Technica article.

Essentially, Type I spaghetti plots provide an ensemble model (compare with aggregate polling). Yet, a key aspect of ensemble models is that each model is given an appropriate weight and these weights need be communicated in any data visualization. We'll soon see how to do this using a variation on Type I.

Spaghetti Plots (Type II)

Type II spaghetti plots show many, say 50, different realizations of any given model. The point is that if we simulate (run) a model several times, it will given a different trajectory each time. Why? Nate Cohen put it well in The Upshot:

"It’s really tough to forecast exactly when a storm will make a turn. Even a 15- or 20-mile difference in when it turns north could change whether Miami is hit by the eye wall, the fierce ring of thunderstorms that include the storm’s strongest winds and surround the calmer eye."

These are perhaps my favourite of the three for several reasons:

  • By simulating multiple runs of the model, they provide an indication of the uncertainty underlying each model;
  • They give a picture of relative likelihood of the storm centre going through any given location. Put simply, if more of the plotted trajectories go through location A than through location B, then under the current model it is more likely that the centre of the storm will go through location A;
  • They are unlikely to be misinterpreted (at least compared to the cone of uncertainty and Type I spaghetti plots). All the words required on the visualization are 'Each line represents one forecast of Irma's path'.

One con of Type II is that they are not representative of multiple models but, as we'll see, this can be altered by combining them with Type I spaghetti plots. Another con is that they, like the others, only communicate the path of the centre of the storm and say nothing about its size. Soon we'll also see how we can remedy this. Note that the distinction between Type I and Type II spaghetti plots is not one that I have found in the literature, but one that I created because these plots have such different interpretations and effects.

For the time being, however, note that we've been discussing the efficacy of certain types of plots without explicitly discussing their purpose, that is, why we need them at all. Before going any further, let's step back a bit and try to answer the question 'What is the purpose of visualizing the predicted path of a hurricane?' Performing such ostensibly naive tasks is often illuminating.

Why Plot Predicted Paths of Hurricanes?

Why are we trying to convey the predicted path of a tropical storm? I'll provide several answers to this in a minute.

But first, let me say what these visualizations are not intended for. We are not using these visualizations to help people decide whether or not to evacuate their homes or towns. Ordering or advising evacuation is something that is done by local authorities, after repeated consultation with experts, scientists, modelers and other key stakeholders.

The major point of this type of visualization is to allow the general populace to be as well-informed as possible about the possible paths of the hurricane and allow them to prepare for the worst if there's a chance that where they are or will be is in the path of destruction. It is not to unduly scare people. As weather.com states with respect to the function of the cone of uncertainty, '[e]ach tropical system is given a forecast cone to help the public better understand where it's headed' and '[t]he cone is designed to show increasing forecast uncertainty over time.'

To this end, I think that an important property would be for a reader to be able to look at it and say 'it is very likely/likely/50% possible/not likely/very unlikely' that my house (for example) will be significantly damaged by the hurricane.

Even better, to be able to say "There's a 30-40% chance, given the current state-of-the-art modeling, that my house will be significantly damaged".

Then we have a hierarchy of what we want our visualization to communicate:

  • At a bare minimum, we want civilians to be aware of the possible paths of the hurricane.
  • Then we would like civilians to be able to say whether it is very likely, likely, unlikely or very unlikely that their house, for example, is in the path.
  • Ideally, a civilian would look at the visualization and be able to read off quantatively what the probability (or range of probabilities) of their house being in the hurricane's path is.

On top of this, we want our visualizations to be neither misleading nor easy to misinterpret.

The Cone of Uncertainty versus Spaghetti Plots

All three methods perform the minimum required function, to alert civilians to the possible paths of the hurricane. The cone of uncertainty does a pretty good job at allowing a civilian to say how likely it is that a hurricane goes through a particular location (within the cone, it's about two-thirds likely). At least qualitatively, Type II spaghetti plots also do a good job here, as described above, 'if more of the trajectories go through location A than through location B, then under the current model it is more likely that the centre of the storm will go through location A'.

If you plot 50 trajectories, you get a sense of where the centre of the storm will likely be, that is, if around half of the trajectories go through a location, then there's an approximately 50% chance (according to our model) that the centre of the storm will hit that location. None of these methods yet perform the 3rd function and we'll see below how combining Type I and Type II spaghetti plots will allow us to do this.

The major problem with the cone of uncertainty and Type I spaghetti models is that the cone of uncertainty is easy to misinterpret (in that many people interpret the cone as a growing storm and do not appreciate the role of uncertainty) and that the Type I spaghetti models are misleading (they make all models look equally believable). These models then don't satisfy the basic requirement that 'we want our visualizations to be neither misleading nor easy to misinterpret.'

Best Practices for Visualizing Hurricane Prediction Paths

Type II spaghetti plots are the most descriptive and the least open to misinterpretation. But they do fail at presenting the results of all models. That is, they don't aggregate over multiple models like we saw in Type I.

So what if we combined Type I and Type II spaghetti plots?

To answer this, I did a small experiment using python, folium and numpy. You can find all the code here.

I first took one the NHC's Hurricane Irma's prediction paths from last week, added some random noise and plotted 50 trajectories. Note that, once again, I am a non-expert in all matters meteorological. The noise that I generated and added to the predicted signal/path was not based on any models and, in a real use case, would come from the models themselves (if you're interested, I used Gaussian noise). For the record, I also found it difficult to find data concerning any of the predicted paths reported in the media. The data I finally used I found here.

Here's a simple Type II spaghetti plot with 50 trajectories:

But these are possible trajectories generated by a single model. What if we had multiple models from different agencies? Well, we can plot 50 trajectories from each:

One of the really cool aspects of Type II spaghetti plots is that, if we plot enough of them, each trajectory becomes indistinct and we begin to see a heatmap of where the centre of the hurricane is likely to be. All this means is that the more blue in a given region, the more likely it is for the path to go through there. Zoom in to check it out.

Moreover, if we believe that one model is more likely than another (if, for example, the experts who produced that model have produced far more accurate models previously), we can weight these models accordingly via, for example, transparency of the trajectories, as we do below. Note that weighting these models is a task for an expert and an essential part of this process of aggregate modeling.

What the above does is solve the tasks required by the first two properties that we want our visualizations to have. To achieve the 3rd, a reader being able to read off that it's, say 30-40% likely for the centre of a hurricane to pass through a particular location, there are two solutions:

  • to alter the heatmap so that it moves between, say, red and blue and include a key that says, for example, red means a probability of greater than 90%;
  • To transform the heatmap into a contour map that shows regions in which the probability takes on certain values.

Also do note that this will tell somebody the probability that a given location will be hit by the hurricane's center. You could combine (well, convolve) this with information about the size of the hurricane to transform the heatmap into one of the probability of a location being hit by hurricane-force winds. If you'd like to do this, go and hack around the code that I wrote to generate the plots above (I plan to write a follow-up post doing this and walking through the code).

Visualizing Uncertainty and Data Journalism

What can we take away from this? We have explored several types of visualization methods for predicted hurricane paths, discussed the pros and cons of each and suggested a way forward for more informative and less misleading plots of such paths, plots that communicate not only the results but also the uncertainty around the models.

This is part of a broader conversation that we need to be having about reporting uncertainty in visualizations and data journalism, in general. We need to actively participate in conversations about how experts report uncertainty to civilians via news media outlets. Here's a great piece from The Upshot demonstrating what the jobs report could look like due to statistical noise, even if jobs were steady. Here's another Upshot piece showing the role of noise and uncertainty in interpreting polls. I'm well aware that we need headlines to sell news and the role of click-bait in the modern news media landscape, but we need to be communicating not merely results, but uncertainty around those results so as not mislead the general public and potentially ourselves. Perhaps more importantly, the education system needs to shift and equip all civilians with levels of data literacy and statistical literacy in order to deal with this movement into the data-driven age. We can all contribute to this.

Viewing all 23144 articles
Browse latest View live


<script src="https://jsc.adskeeper.com/r/s/rssing.com.1596347.js" async> </script>