Quantcast
Channel: Planet Python
Viewing all 22864 articles
Browse latest View live

Peter Bengtsson: Fastest Python function to slugify a string

$
0
0

In MDN I noticed a function that turns a piece of text (Python 2 unicode) into a slug. It looks like this:

non_url_safe=['"','#','$','%','&','+',',','/',':',';','=','?','@','[','\\',']','^','`','{','|','}','~',"'"]defslugify(self,text):"""        Turn the text content of a header into a slug for use in an ID"""non_safe=[cforcintextifcinself.non_url_safe]ifnon_safe:forcinnon_safe:text=text.replace(c,'')# Strip leading, trailing and multiple whitespace, convert remaining whitespace to _text=u'_'.join(text.split())returntext

The code is 7-8 years old and relates to a migration when MDN was created as a Python fork from an existing PHP solution.

I couldn't help but to react to the fact that it's a list and it's looped over every single time. Twice, in a sense. Python has built-in tools for this kinda stuff. Let's see if I can make it faster.

The candidates

translate_table={ord(char):u''forcharinnon_url_safe}non_url_safe_regex=re.compile(r'[{}]'.format(''.join(re.escape(x)forxinnon_url_safe)))def_slugify1(self,text):non_safe=[cforcintextifcinself.non_url_safe]ifnon_safe:forcinnon_safe:text=text.replace(c,'')text=u'_'.join(text.split())returntextdef_slugify2(self,text):text=text.translate(self.translate_table)text=u'_'.join(text.split())returntextdef_slugify3(self,text):text=self.non_url_safe_regex.sub('',text).strip()text=u'_'.join(re.split(r'\s+',text))returntext

I wrote a thing that would call each one of the candidates, assert that their outputs always match and store how long each one took.

The results

The slowest is fast enough. But if you're still reading, here are the results:

_slugify1 0.101ms
_slugify2 0.019ms
_slugify3 0.033ms

So using a translate table is 5 times faster. And a regex 3 times faster. But they're all sufficiently fast.

Conclusion

This is the least of your problems in a world of real I/O such as databases and other genuinely CPU intense stuff. Well, it was fun little side-trip.

Also, aren't there better solutions that just blacklist all control characters?


Roberto Alsina: Episodio 7: Python 1000x más rápido!

$
0
0

¿Es posible agarrar código al azar y hacer que funcione 1000 veces más rápido?

La verdad es que casi nunca. Pero a veces sí.

Stack Abuse: Solving Sequence Problems with LSTM in Python's Keras Library

$
0
0

In this article, you will learn how to perform time series forecasting that is used to solve sequence problems.

Time series forecasting refers to the type of problems where we have to predict an outcome based on time dependent inputs. A typical example of time series data is stock market data where stock prices change with time. Similarly, the hourly temperature of a particular place also changes and can also be considered as time series data. Time series data is basically a sequence of data, hence time series problems are often referred to as sequence problems.

Recurrent Neural Networks (RNN) have been proven to efficiently solve sequence problems. Particularly, Long Short Term Memory Network (LSTM), which is a variation of RNN, is currently being used in a variety of domains to solve sequence problems.

Types of Sequence Problems

Sequence problems can be broadly categorized into the following categories:

  1. One-to-One: Where there is one input and one output. Typical example of a one-to-one sequence problems is the case where you have an image and you want to predict a single label for the image.
  2. Many-to-One: In many-to-one sequence problems, we have a sequence of data as input and we have to predict a single output. Text classification is a prime example of many-to-one sequence problems where we have an input sequence of words and we want to predict a single output tag.
  3. One-to-Many: In one-to-many sequence problems, we have single input and a sequence of outputs. A typical example is an image and its corresponding description.
  4. Many-to-Many: Many-to-many sequence problems involve a sequence input and a sequence output. For instance, stock prices of 7 days as input and stock prices of next 7 days as outputs. Chatbots are also an example of many-to-many sequence problems where a text sequence is an input and another text sequence is the output.

This article is part 1 of the series. In this article, we will see how LSTM and its different variants can be used to solve one-to-one and many-to-one sequence problems. In the next part, we will see how to solve one-to-many and many-to-many sequence problems. We will be working with Python's Keras library.

After reading this article, you will be able solve problems like stock price prediction, weather prediction, etc., based on historic data. Since, text is also a sequence of words, the knowledge gained in this article can also be used to solve natural language processing tasks such as text classification, language generation, etc.

One-to-One Sequence Problems

As I said earlier, in one-to-one sequence problems, there is a single input and a single output. In this section we will see two types of sequence problems. First we will see how to solve one-to-one sequence problems with a single feature and then we will see how to solve one-to-one sequence problems with multiple features.

One-to-One Sequence Problems with a Single Feature

In this section, we will see how to solve one-to-one sequence problem where each time-step has a single feature.

Let's first import the required libraries that we are going to use in this article:

from numpy import array
from keras.preprocessing.text import one_hot
from keras.preprocessing.sequence import pad_sequences
from keras.models import Sequential
from keras.layers.core import Activation, Dropout, Dense
from keras.layers import Flatten, LSTM
from keras.layers import GlobalMaxPooling1D
from keras.models import Model
from keras.layers.embeddings import Embedding
from sklearn.model_selection import train_test_split
from keras.preprocessing.text import Tokenizer
from keras.layers import Input
from keras.layers.merge import Concatenate
from keras.layers import Bidirectional

import pandas as pd
import numpy as np
import re

import matplotlib.pyplot as plt
Creating the Dataset

In this next step, we will prepare the dataset that we are going to use for this section.

X = list()
Y = list()
X = [x+1 for x in range(20)]
Y = [y * 15 for y in X]

print(X)
print(Y)

In the script above, we create 20 inputs and 20 outputs. Each input consists of one time-step, which in turn contains a single feature. Each output value is 15 times the corresponding input value. If you run the above script, you should see the input and output values as shown below:

[1, 2, 3, 4, 5, 6, 7, 8, 9, 10, 11, 12, 13, 14, 15, 16, 17, 18, 19, 20]
[15, 30, 45, 60, 75, 90, 105, 120, 135, 150, 165, 180, 195, 210, 225, 240, 255, 270, 285, 300]

The input to LSTM layer should be in 3D shape i.e. (samples, time-steps, features). The samples are the number of samples in the input data. We have 20 samples in the input. The time-steps is the number of time-steps per sample. We have 1 time-step. Finally, features correspond to the number of features per time-step. We have one feature per time-step.

We can reshape our data via the following command:

X = array(X).reshape(20, 1, 1)
Solution via Simple LSTM

Now we can create our simple LSTM model with one LSTM layer.

model = Sequential()
model.add(LSTM(50, activation='relu', input_shape=(1, 1)))
model.add(Dense(1))
model.compile(optimizer='adam', loss='mse')
print(model.summary())

In the script above, we create an LSTM model with one LSTM layer of 50 neurons and relu activation functions. You can see the input shape is (1,1) since our data has one time-step with one feature. Executing the above script prints the following summary:

Layer (type)                 Output Shape              Param #
=================================================================
lstm_16 (LSTM)               (None, 50)                10400
_________________________________________________________________
dense_15 (Dense)             (None, 1)                 51
=================================================================
Total params: 10,451
Trainable params: 10,451
Non-trainable params: 0

Let's now train our model:

model.fit(X, Y, epochs=2000, validation_split=0.2, batch_size=5)

We train our model for 2000 epochs with a batch size of 5. You can choose any number. Once the model is trained, we can make predictions on a new instance.

Let's say we want to predict the output for an input of 30. The actual output should be 30 x 15 = 450. Let's see what value do we get. First, we need to convert our test data to the right shape i.e. 3D shape, as expected by LSTM. The following script predicts the output for the number 30:

test_input = array([30])
test_input = test_input.reshape((1, 1, 1))
test_output = model.predict(test_input, verbose=0)
print(test_output)

I got an output value of 437.86 which is slightly less than 450.

Note: It is important to mention that the outputs that you obtain by running the scripts will different from mine. This is because the LSTM neural network initializes weights with random values and your values. But overall, the results should not differ much.

Solution via Stacked LSTM

Let's now create a stacked LSTM and see if we can get better results. The dataset will remain the same, the model will be changed. Look at the following script:

model = Sequential()
model.add(LSTM(50, activation='relu', return_sequences=True, input_shape=(1, 1)))
model.add(LSTM(50, activation='relu'))
model.add(Dense(1))
model.compile(optimizer='adam', loss='mse')
print(model.summary())

In the above model, we have two LSTM layers. Notice, the first LSTM layer has parameter return_sequences, which is set to True. When the return sequence is set to True, the output of the hidden state of each neuron is used as an input to the next LSTM layer. The summary of the above model is as follows:

_________________________________________________________________
Layer (type)                 Output Shape              Param #
=================================================================
lstm_33 (LSTM)               (None, 1, 50)             10400
_________________________________________________________________
lstm_34 (LSTM)               (None, 50)                20200
_________________________________________________________________
dense_24 (Dense)             (None, 1)                 51
=================================================================
Total params: 30,651
Trainable params: 30,651
Non-trainable params: 0
________________________

Next, we need to train our model as shown in the following script:

history = model.fit(X, Y, epochs=2000, validation_split=0.2, verbose=1, batch_size=5)

Once the model is trained, we will again make predictions on the test data point i.e. 30.

test_input = array([30])
test_input = test_input.reshape((1, 1, 1))
test_output = model.predict(test_input, verbose=0)
print(test_output)

I got an output of 459.85 which is better than 437, the number that we achieved via single LSTM layer.

One-to-One Sequence Problems with Multiple Features

In the last section, each input sample had one time-step, where each time-step had one feature. In this section we will see how to solve one-to-one sequence problem where input time-steps have multiple features.

Creating the Dataset

Let's first create our dataset. Look at the following script:

nums = 25

X1 = list()
X2 = list()
X = list()
Y = list()

X1 = [(x+1)*2 for x in range(25)]
X2 = [(x+1)*3 for x in range(25)]
Y = [x1*x2 for x1,x2 in zip(X1,X2)]

print(X1)
print(X2)
print(Y)

In the script above, we create three lists: X1, X2, and Y. Each list has 25 elements, which means that that the total sample size is 25. Finally, Y contains the output. X1, X2, and Y lists have been printed below:

[2, 4, 6, 8, 10, 12, 14, 16, 18, 20, 22, 24, 26, 28, 30, 32, 34, 36, 38, 40, 42, 44, 46, 48, 50]
[3, 6, 9, 12, 15, 18, 21, 24, 27, 30, 33, 36, 39, 42, 45, 48, 51, 54, 57, 60, 63, 66, 69, 72, 75]
[6, 24, 54, 96, 150, 216, 294, 384, 486, 600, 726, 864, 1014, 1176, 1350, 1536, 1734, 1944, 2166, 2400, 2646, 2904, 3174, 3456, 3750]

Each element in the output list, is basically the product of the corresponding elements in the X1 and X2 lists. For instance, the second element in the output list is 24, which is the product of the second element in list X1 i.e. 4, and the second element in the list X2 i.e. 6.

The input will consist of the combination of X1 and X2 lists, where each list will be represented as a column. The following script creates the final input:

X = np.column_stack((X1, X2))
print(X)

Here is the output:

[[ 2  3]
 [ 4  6]
 [ 6  9]
 [ 8 12]
 [10 15]
 [12 18]
 [14 21]
 [16 24]
 [18 27]
 [20 30]
 [22 33]
 [24 36]
 [26 39]
 [28 42]
 [30 45]
 [32 48]
 [34 51]
 [36 54]
 [38 57]
 [40 60]
 [42 63]
 [44 66]
 [46 69]
 [48 72]
 [50 75]]

Here the X variable contains our final feature set. You can see it contains two columns i.e. two features per input. As we discussed earlier, we need to convert the input into 3-dimensional shape. Our input has 25 samples, where each sample consist of 1 time-step and each time-step consists of 2 features. The following script reshapes the input.

X = array(X).reshape(25, 1, 2)
Solution via Simple LSTM

We are now ready to train our LSTM models. Let's first develop a single LSTM layer model as we did in the previous section:

model = Sequential()
model.add(LSTM(80, activation='relu', input_shape=(1, 2)))
model.add(Dense(10, activation='relu'))
model.add(Dense(1))
model.compile(optimizer='adam', loss='mse')
print(model.summary())

Here our LSTM layer contains 80 neurons. We have two dense layers where first layer contains 10 neurons and the second dense layer, which also acts as the output layer, contains 1 neuron. The summary of the model is as follows:

Layer (type)                 Output Shape              Param #
=================================================================
lstm_38 (LSTM)               (None, 80)                26560
_________________________________________________________________
dense_29 (Dense)             (None, 10)                810
_________________________________________________________________
dense_30 (Dense)             (None, 1)                 11
=================================================================
Total params: 27,381
Trainable params: 27,381
Non-trainable params: 0
_________________________________________________________________
None

The following script trains the model:

model.fit(X, Y, epochs=2000, validation_split=0.2, batch_size=5)

Let's test our trained model on a new data point. Our data point will have two features i.e. (55,80) the actual output should be 55 x 80 = 4400. Let's see what our algorithm predicts. Execute the following script:

test_input = array([55,80])
test_input = test_input.reshape((1, 1, 2))
test_output = model.predict(test_input, verbose=0)
print(test_output)

I got 3263.44 in the output, which is far from the actual output.

Solution via Stacked LSTM

Let's now create a more complex LSTM with multiple LSTM and dense layers and see if we can improve our answer:

model = Sequential()
model.add(LSTM(200, activation='relu', return_sequences=True, input_shape=(1, 2)))
model.add(LSTM(100, activation='relu', return_sequences=True))
model.add(LSTM(50, activation='relu', return_sequences=True))
model.add(LSTM(25, activation='relu'))
model.add(Dense(20, activation='relu'))
model.add(Dense(10, activation='relu'))
model.add(Dense(1))
model.compile(optimizer='adam', loss='mse')
print(model.summary())

The model summary is as follows:

_________________________________________________________________
Layer (type)                 Output Shape              Param #
=================================================================
lstm_53 (LSTM)               (None, 1, 200)            162400
_________________________________________________________________
lstm_54 (LSTM)               (None, 1, 100)            120400
_________________________________________________________________
lstm_55 (LSTM)               (None, 1, 50)             30200
_________________________________________________________________
lstm_56 (LSTM)               (None, 25)                7600
_________________________________________________________________
dense_43 (Dense)             (None, 20)                520
_________________________________________________________________
dense_44 (Dense)             (None, 10)                210
_________________________________________________________________
dense_45 (Dense)             (None, 1)                 11
=================================================================
Total params: 321,341
Trainable params: 321,341
Non-trainable params: 0

The next step is to train our model and test it on the test data point i.e. (55,80).

To improve the accuracy, we will reduce the batch size, and since our model is more complex now we can also reduce the number of epochs. The following script trains the LSTM model and makes prediction on the test datapoint.

history = model.fit(X, Y, epochs=1000, validation_split=0.1, verbose=1, batch_size=3)

test_output = model.predict(test_input, verbose=0)
print(test_output)

In the output, I got a value of 3705.33 which is still less than 4400, but is much better than the previously obtained value of 3263.44 using single LSTM layer. You can play with different combination of LSTM layers, dense layers, batch size and the number of epochs to see if you get better results.

Many-to-One Sequence Problems

In the previous sections we saw how to solve one-to-one sequence problems with LSTM. In a one-to-one sequence problem, each sample consists of single time-step of one or multiple features. Data with single time-step cannot be considered sequence data in a real sense. Densely connected neural networks have been proven to perform better with single time-step data.

Real sequence data consists of multiple time-steps, such as stock market prices of past 7 days, a sentence containing multiple words, and so on.

In this section, we will see how to solve many-to-one sequence problems. In many-to-one sequence problems, each input sample has more than one time-step, however the output consists of a single element. Each time-step in the input can have one or more features. We will start with many-to-one sequence problems having one feature, and then we will see how to solve many-to-one problems where input time-steps have multiple features.

Many-to-One Sequence Problems with a Single Feature

Let's first create the dataset. Our dataset will consist of 15 samples. Each sample will have 3 time-steps where each time-step will consist of a single feature i.e. a number. The output for each sample will be the sum of the numbers in each of the three time-steps. For instance, if our sample contains a sequence 4,5,6 the output will be 4 + 5 + 6 = 10.

Creating the Dataset

Let's first create a list of integers from 1 to 45. Since we want 15 samples in our dataset, we will reshape the list of integers containing the first 45 integers.

X = np.array([x+1 for x in range(45)])
print(X)

In the output, you should see the first 45 integers:

[ 1  2  3  4  5  6  7  8  9 10 11 12 13 14 15 16 17 18 19 20 21 22 23 24
 25 26 27 28 29 30 31 32 33 34 35 36 37 38 39 40 41 42 43 44 45]

We can reshape it into number of samples, time-steps and features using the following function:

X = X.reshape(15,3,1)
print(X)

The above script converts the list X into 3-dimensional shape with 15 samples, 3 time-steps, and 1 feature. The script above also prints the reshaped data.

[[[ 1]
  [ 2]
  [ 3]]

 [[ 4]
  [ 5]
  [ 6]]

 [[ 7]
  [ 8]
  [ 9]]

 [[10]
  [11]
  [12]]

 [[13]
  [14]
  [15]]

 [[16]
  [17]
  [18]]

 [[19]
  [20]
  [21]]

 [[22]
  [23]
  [24]]

 [[25]
  [26]
  [27]]

 [[28]
  [29]
  [30]]

 [[31]
  [32]
  [33]]

 [[34]
  [35]
  [36]]

 [[37]
  [38]
  [39]]

 [[40]
  [41]
  [42]]

 [[43]
  [44]
  [45]]]

We have converted our input data into the right format, let's now create our output vector. As I said earlier, each element in the output will be equal to the sum of the values in the time-steps in the corresponding input sample. The following script creates the output vector:

Y = list()
for x in X:
    Y.append(x.sum())

Y = np.array(Y)
print(Y)

The output array Y looks like this:

[  6  15  24  33  42  51  60  69  78  87  96 105 114 123 132]
Solution via Simple LSTM

Let's now create our model with one LSTM layer.

model = Sequential()
model.add(LSTM(50, activation='relu', input_shape=(3, 1)))
model.add(Dense(1))
model.compile(optimizer='adam', loss='mse')

The following script trains our model:

history = model.fit(X, Y, epochs=1000, validation_split=0.2, verbose=1)

Once the model is trained, we can use it to make predictions on the test data points. Let's predict the output for the number sequence 50,51,52. The actual output should be 50 + 51 + 52 = 153. The following script converts our test points into a 3-dimensional shape and then predicts the output:

test_input = array([50,51,52])
test_input = test_input.reshape((1, 3, 1))
test_output = model.predict(test_input, verbose=0)
print(test_output)

I got 145.96 in the output, which is around 7 points less than the actual output value of 153.

Solution via Stacked LSTM

Let's now create a complex LSTM model with multiple layers and see if we can get better results. Execute the following script to create and train a complex model with multiple LSTM and dense layers:

model = Sequential()
model.add(LSTM(200, activation='relu', return_sequences=True, input_shape=(3, 1)))
model.add(LSTM(100, activation='relu', return_sequences=True))
model.add(LSTM(50, activation='relu', return_sequences=True))
model.add(LSTM(25, activation='relu'))
model.add(Dense(20, activation='relu'))
model.add(Dense(10, activation='relu'))
model.add(Dense(1))
model.compile(optimizer='adam', loss='mse')

history = model.fit(X, Y, epochs=1000, validation_split=0.2, verbose=1)

Let's now test our model on the test sequence i.e. 50,51,52:

test_output = model.predict(test_input, verbose=0)
print(test_output)

The answer I got here is 155.37, which is better than the 145.96 result that we got earlier. In this case, we have a difference of only 2 points from 153, which is the actual answer.

Solution via Bidirectional LSTM

Bidirectional LSTM is a type of LSTM which learns from the input sequence from both forward and backward directions. The final sequence interpretation is the concatenation of both forward and backward learning passes. Let's see if we can get better results with bidirectional LSTMs.

The following script creates a bidirectional LSTM model with one bidirectional layer and one dense layer which acts as the output of the model.

from keras.layers import Bidirectional

model = Sequential()
model.add(Bidirectional(LSTM(50, activation='relu'), input_shape=(3, 1)))
model.add(Dense(1))
model.compile(optimizer='adam', loss='mse')

The following script trains the model and makes predictions on the test sequence which is 50, 51, and 52.

history = model.fit(X, Y, epochs=1000, validation_split=0.2, verbose=1)
test_output = model.predict(test_input, verbose=0)
print(test_output)

The result I got is 152.26 which is just a fraction short of the actual result. Therefore, we can conclude that for our dataset, bidirectional LSTM with single layer outperforms both the single layer and stacked unidirectional LSTMs.

Many-to-one Sequence Problems with Multiple Features

In a many-to-one sequence problem we have an input where each time-steps consists of multiple features. The output can be a single value or multiple values, one per feature in the input time step. We will cover both the cases in this section.

Creating the Dataset

Our dataset will contain 15 samples. Each sample will consist of 3 time-steps. Each time-steps will have two features.

Let's create two lists. One will contain multiples of 3 until 135 i.e. 45 elements in total. The second list will contain multiples of 5, from 1 to 225. The second list will also contain 45 elements in total. The following script creates these two lists:

X1 = np.array([x+3 for x in range(0, 135, 3)])
print(X1)

X2 = np.array([x+5 for x in range(0, 225, 5)])
print(X2)

You can see the contents of the list in the following output:

[  3   6   9  12  15  18  21  24  27  30  33  36  39  42  45  48  51  54
  57  60  63  66  69  72  75  78  81  84  87  90  93  96  99 102 105 108
 111 114 117 120 123 126 129 132 135]
[  5  10  15  20  25  30  35  40  45  50  55  60  65  70  75  80  85  90
  95 100 105 110 115 120 125 130 135 140 145 150 155 160 165 170 175 180
 185 190 195 200 205 210 215 220 225]

Each of the above list represents one feature in the time sample. The aggregated dataset can be created by joining the two lists as shown below:

X = np.column_stack((X1, X2))
print(X)

The output shows the aggregated dataset:

 [  6  10]
 [  9  15]
 [ 12  20]
 [ 15  25]
 [ 18  30]
 [ 21  35]
 [ 24  40]
 [ 27  45]
 [ 30  50]
 [ 33  55]
 [ 36  60]
 [ 39  65]
 [ 42  70]
 [ 45  75]
 [ 48  80]
 [ 51  85]
 [ 54  90]
 [ 57  95]
 [ 60 100]
 [ 63 105]
 [ 66 110]
 [ 69 115]
 [ 72 120]
 [ 75 125]
 [ 78 130]
 [ 81 135]
 [ 84 140]
 [ 87 145]
 [ 90 150]
 [ 93 155]
 [ 96 160]
 [ 99 165]
 [102 170]
 [105 175]
 [108 180]
 [111 185]
 [114 190]
 [117 195]
 [120 200]
 [123 205]
 [126 210]
 [129 215]
 [132 220]
 [135 225]]

We need to reshape our data into three dimensions so that it can be used by LSTM. We have 45 rows in total and two columns in our dataset. We will reshape our dataset into 15 samples, 3 time-steps, and two features.

X = array(X).reshape(15, 3, 2)
print(X)

You can see the 15 samples in the following output:

[[[  3   5]
  [  6  10]
  [  9  15]]

 [[ 12  20]
  [ 15  25]
  [ 18  30]]

 [[ 21  35]
  [ 24  40]
  [ 27  45]]

 [[ 30  50]
  [ 33  55]
  [ 36  60]]

 [[ 39  65]
  [ 42  70]
  [ 45  75]]

 [[ 48  80]
  [ 51  85]
  [ 54  90]]

 [[ 57  95]
  [ 60 100]
  [ 63 105]]

 [[ 66 110]
  [ 69 115]
  [ 72 120]]

 [[ 75 125]
  [ 78 130]
  [ 81 135]]

 [[ 84 140]
  [ 87 145]
  [ 90 150]]

 [[ 93 155]
  [ 96 160]
  [ 99 165]]

 [[102 170]
  [105 175]
  [108 180]]

 [[111 185]
  [114 190]
  [117 195]]

 [[120 200]
  [123 205]
  [126 210]]

 [[129 215]
  [132 220]
  [135 225]]]

The output will also have 15 values corresponding to 15 input samples. Each value in the output will be the sum of the two feature values in the third time-step of each input sample. For instance, the third time-step of the first sample have features 9 and 15, hence the output will be 24. Similarly, the two feature values in the third time-step of the 2nd sample are 18 and 30; the corresponding output will be 48, and so on.

The following script creates and displays the output vector:

[ 24  48  72  96 120 144 168 192 216 240 264 288 312 336 360]

Let's now solve this many-to-one sequence problem via simple, stacked, and bidirectional LSTMs.

Solution via Simple LSTM
model = Sequential()
model.add(LSTM(50, activation='relu', input_shape=(3, 2)))
model.add(Dense(1))
model.compile(optimizer='adam', loss='mse')
history = model.fit(X, Y, epochs=1000, validation_split=0.2, verbose=1)

The model is trained. We will create a test data point and then will use our model to make prediction on the test point.

test_input = array([[8, 51],
                    [11,56],
                    [14,61]])

test_input = test_input.reshape((1, 3, 2))
test_output = model.predict(test_input, verbose=0)
print(test_output)

The sum of two features of the third time-step of the input is 14 + 61 = 75. Our model with one LSTM layer predicted 73.41, which is pretty close.

Solution via Stacked LSTM

The following script trains a stacked LSTM and makes predictions on test point:

model = Sequential()
model.add(LSTM(200, activation='relu', return_sequences=True, input_shape=(3, 2)))
model.add(LSTM(100, activation='relu', return_sequences=True))
model.add(LSTM(50, activation='relu', return_sequences=True))
model.add(LSTM(25, activation='relu'))
model.add(Dense(20, activation='relu'))
model.add(Dense(10, activation='relu'))
model.add(Dense(1))
model.compile(optimizer='adam', loss='mse')

history = model.fit(X, Y, epochs=1000, validation_split=0.2, verbose=1)

test_output = model.predict(test_input, verbose=0)
print(test_output)

The output I received is 71.56, which is worse than the simple LSTM. Seems like our stacked LSTM is overfitting.

Solution via Bidirectional LSTM

Here is the training script for simple bidirectional LSTM along with code that is used to make predictions on the test data point:

from keras.layers import Bidirectional

model = Sequential()
model.add(Bidirectional(LSTM(50, activation='relu'), input_shape=(3, 2)))
model.add(Dense(1))
model.compile(optimizer='adam', loss='mse')

history = model.fit(X, Y, epochs=1000, validation_split=0.2, verbose=1)
test_output = model.predict(test_input, verbose=0)
print(test_output)

The output is 76.82 which is pretty close to 75. Again, bidirectional LSTM seems to be outperforming the rest of the algorithms.

Till now we have predicted single values based on multiple features values from different time-steps. There is another case of many-to-one sequences where you want to predict one value for each feature in the time-step. For instance, the dataset we used in this section has three time-steps and each time-step has two features. We may want to predict individual value for each feature series. The following example makes it clear, suppose we have the following input:

[[[  3   5]
  [  6  10]
  [  9  15]]

In the output, we want one time-step with two features as shown below:

[12, 20]

You can see the first value in the output is a continuation of the first series and the second value is the continuation of the second series. We can solve such problems by simply changing the number of neurons in the output dense layer to the number of features values that we want in the output. However, first we need to update our output vector Y. The input vector will remain the same:

Y = list()
for x in X:
    new_item = list()
    new_item.append(x[2][0]+3)
    new_item.append(x[2][1]+5)
    Y.append(new_item)

Y = np.array(Y)
print(Y)

The above script creates an updated output vector and prints it on the console, the output looks like this:

[[ 12  20]
 [ 21  35]
 [ 30  50]
 [ 39  65]
 [ 48  80]
 [ 57  95]
 [ 66 110]
 [ 75 125]
 [ 84 140]
 [ 93 155]
 [102 170]
 [111 185]
 [120 200]
 [129 215]
 [138 230]]

Let's now train our simple, stacked and bidirectional LSTM networks on our dataset. The following script trains a simple LSTM:

model = Sequential()
model.add(LSTM(50, activation='relu', input_shape=(3, 2)))
model.add(Dense(2))
model.compile(optimizer='adam', loss='mse')

history = model.fit(X, Y, epochs=1000, validation_split=0.2, verbose=1)

The next step is to test our model on the test data point. The following script creates a test data point:

test_input = array([[20,34],
                    [23,39],
                    [26,44]])

test_input = test_input.reshape((1, 3, 2))
test_output = model.predict(test_input, verbose=0)
print(test_output)

The actual output is [29, 45]. Our model predicts [29.089157, 48.469097], which is pretty close.

Let's now train a stacked LSTM and predict the output for the test data point:

model = Sequential()
model.add(LSTM(100, activation='relu', return_sequences=True, input_shape=(3, 2)))
model.add(LSTM(50, activation='relu', return_sequences=True))
model.add(LSTM(25, activation='relu'))
model.add(Dense(10, activation='relu'))
model.add(Dense(2))
model.compile(optimizer='adam', loss='mse')

history = model.fit(X, Y, epochs=500, validation_split=0.2, verbose=1)

test_output = model.predict(test_input, verbose=0)
print(test_output)

The output is [29.170143, 48.688267], which is again very close to actual output.

Finally, we can train our bidirectional LSTM and make prediction on the test point:

from keras.layers import Bidirectional

model = Sequential()
model.add(Bidirectional(LSTM(50, activation='relu'), input_shape=(3, 2)))
model.add(Dense(2))
model.compile(optimizer='adam', loss='mse')

history = model.fit(X, Y, epochs=1000, validation_split=0.2, verbose=1)
test_output = model.predict(test_input, verbose=0)
print(test_output)

The output is [29.2071, 48.737988].

You can see once again that bidirectional LSTM makes the most accurate prediction.

Conclusion

Simple neural networks are not suitable for solving sequence problems since in sequence problems, in addition to current input, we need to keep track of the previous inputs as well. Neural Networks with some sort of memory are more suited to solving sequence problems. LSTM is one such network.

In this article, we saw how different variants of the LSTM algorithm can be used to solve one-to-one and many-to-one sequence problems. This is the first part of the article. In the second part, we will see how to solve one-to-many and many-to-many sequence problems. We will also study encoder decoder mechanism that is most commonly used to create chatbots. Till then, happy coding :)

Data School: Should you use "dot notation" or "bracket notation" with pandas?

$
0
0

If you've ever used the pandas library in Python, you probably know that there are two ways to select a Series (meaning a column) from a DataFrame:

# dot notation
df.col_name

# bracket notation
df['col_name']

Which method should you use? I'll make the case for each, and then you can decide...

Why use bracket notation?

The case for bracket notation is simple: It always works.

Here are the specific cases in which you must use bracket notation, because dot notation would fail:

# column name includes a space
df['col name']

# column name matches a DataFrame method
df['count']

# column name is stored in a variable
var = 'col_name'
df[var]

# new column is created through assignment
df['new'] = 0

In other words, bracket notation always works, whereas dot notation only works under certain circumstances. That's a pretty compelling case for bracket notation!

As stated in the Zen of Python:

There should be one-- and preferably only one --obvious way to do it.

Why use dot notation?

If you've watched any of my pandas videos, you may have noticed that I use dot notation. Here are four reasons why:

Reason 1: Dot notation is easier to type

Dot notation is three fewer characters to type than bracket notation. And in terms of finger movement, typing a single period is much more convenient than typing brackets and quotes.

This might sound like a trivial reason, but if you're selecting columns dozens (or hundreds) of times a day, it makes a real difference!

Reason 2: Dot notation is easier to read

Most of my pandas code is a made up of chains of selections and methods. By using dot notation, my code is mostly adorned with periods and parentheses (plus an occasional quotation mark):

# dot notation
df.col_one.sum()
df.col_one.isna().sum()
df.groupby('col_two').col_one.sum()

If you instead use bracket notation, your code is adorned with periods and parentheses plus lots of brackets and quotation marks:

# bracket notation
df['col_one'].sum()
df['col_one'].isna().sum()
df.groupby('col_two')['col_one'].sum()

I find the dot notation code easier to read, as well as more aesthetically pleasing.

Reason 3: Dot notation is easier to remember

With dot notation, every component in a chain is separated by a period on both sides. For example, this line of code has 4 components, and thus there are 3 periods separating the individual components:

# dot notation
df.groupby('col_two').col_one.sum()

If you instead use bracket notation, some of your components are separated by periods, and some are not:

# bracket notation
df.groupby('col_two')['col_one'].sum()

With bracket notation, I often forget whether there's supposed to be a period before['col_one'], after['col_one'], or both before and after['col_one'].

With dot notation, it's easier for me to remember the correct syntax.

Reason 4: Dot notation limits the usage of brackets

Brackets can be used for many purposes in pandas:

df[['col_one', 'col_two']]
df.iloc[4, 2]
df.loc['row_label', 'col_one':'col_three']
df.col_one['row_label']
df[(df.col_one > 5) & (df.col_two == 'value')]

If you also use bracket notation for Series selection, you end up with even more brackets in your code:

df['col_one']['row_label']
df[(df['col_one'] > 5) & (df['col_two'] == 'value')]

As you use more brackets, each bracket becomes slightly more ambiguous as to its purpose, imposing a higher mental burden on the person reading the code. By using dot notation for Series selection, you reduce bracket usage to only the essential cases.

Conclusion

If you prefer bracket notation, then you can use it all of the time! However, you still have to be familiar with dot notation in order to read other people's code.

If you prefer dot notation, then you can use it most of the time, as long as you are diligent about renaming columns when they contains spaces or collide with DataFrame methods. However, you still have to use bracket notation when creating new columns.

Which do you prefer? Let me know in the comments!

NumFOCUS: Highlights From The 2019 Pandas Hack

TechBeamers Python: Python Heapq (With Examples)

$
0
0

This tutorial intends to train you on using Python heapq. It is a module in Python which uses the binary heap data structure and implements Heap Queue a.k.a. Priority Queue algorithm. Interestingly, the heapq module uses a regular Python list to create Heap. It supports addition and removal of the smallest element in O(log n) time. Hence, it is an obvious choice for implementing priority queues. The heapq module includes seven functions, the first four of which are used for heap operations. However, you need to provide a list as the heap object itself. Heap data structure has a property

The post Python Heapq (With Examples) appeared first on Learn Programming and Software Testing.

Weekly Python StackOverflow Report: (cxciv) stackoverflow python report

$
0
0

Samuel Sutch: Python Programming Language Is Considered Better Than Other Languages

$
0
0

Python is a high-level scripting language. It is easy to learn and powerful than other languages because of its dynamic nature and simple syntax which allow small lines of code. Included indentation and object-oriented functional programming make it simple. Such advantages of Python makes it different from other languages and that’s why Python is preferred for development in companies mostly. In industries, machine learning using python has become popular. This is because it has standard libraries which are used for scientific and numerical calculations. Also, it can be operated on Linux, Windows, Mac OS and UNIX. Students who want to make future in Python are joining online video training courses and python programming tutorial.

Features of Python: A question to arise is why machine learning using python is preferred over other languages? This is because Python has some features over other programming languages. Here are some basic features of Python making it better than other languages:

  • Python is High-level language. It means the context of Python is user-friendly rather than machine language.
  • The interactive nature of Python makes it simple and attractive for users. In interactive mode, users are able to check the output for each statement.
  • As an Object Oriented Programming language, it allows reuse and recycling of programs.
  • The syntax of Python is extensible through many libraries.

Applications of Python: There are a lot of advantages of Python making it different from others. Its applications have made it a demanded language for software development, web development, graphic designing and other use cases. Its standard libraries which support internet protocols such as HTML, JSON, XML, IMAP, FTP and many more. Libraries are able to support many operations like Data Scraping, NLP and other applications of machine learning. Due to such advantages and uses, students are preferring python programming tutorial rather than other languages. Also, there are many online video training courses available, user or any interested candidate can buy them from any place. No need to worry about location, it can be learned from their home.

How to Learn Python: Since Python has shown its enormous applications and use cases. It is mostly used in Machine Learning and Artificial intelligence companies as a basic programming language. Students who want to start their career in AI and machine learning should have a basic understanding of Python. There are many online video training courses and python programming tutorial available to join. Further, it is an easy programming language to learn as a beginner. Online courses or tutorials can help the beginners to learn Python. It can be learned quickly because user can think like a programmer due to its readable and understandable syntax. With Python we can develop anything by computer programs, only need is to spend time to understand Python and its standard libraries. PyCharm is its IDE which makes interface so easy and comfortable while learning. With the help of debugging feature of PyCharm we can easily analyse the output of each line and the error can be detected easily.

Conclusion: Python is used in many big companies such as Google, Instagram, Dropbox, Reddit and many more which means more job scopes in Python. Due to increasing demand of Python programmers, students and beginners in industries are choosing Python as their core programming language. Also the features of Python make it very easy to learn. It can be concluded that Python is best language for beginners to start as well as a powerful language for development. It is good for scientific and numerical operations. Thus many students are opting online video training courses for python programming tutorial. So, they can learn from anywhere and make their career in Python programming.

Source by Gunjan Dogra


Samuel Sutch: Why Python Has Become an Industry Favorite Among Programmers

$
0
0

With the world stepping towards a new age of technology development, it isn’t hard to imagine a future that will be full of screens. And if so be the case then, demand for people with strong programming skills will definitely rise with more number of people required to develop and support the applications. Python Training is always a good idea for those wishes to be a part of this constantly developing industry. Python language is not only easy to grasp, but emphasizes less on syntax which is why a few mistakes here and there doesn’t give as much trouble as some other languages does.

What Makes Python a Preferred Choice Among Programmers?

Python happens to be an easy programming language which offers its support to various application types starting from education to scientific computing to web development. Tech giants like Google along with Instagram have also made use of Python and its popularity continues to rise. Discussed below are some of the advantages offered by Python:

First Steps in the World of Programming

Aspiring programmers can use Python to enter the programming world. Like several other programming languages such as Ruby, Perl, JavaScript, C#, C++, etc. Python is also object oriented based programming language. People who have thorough knowledge of Python can easily adapt to other environments. It is always recommended to acquire working knowledge so as to become aware of the methodologies that are used across different applications.

Simple and Easy to Understand and Code

Many people will agree to the fact that, learning and understanding a programming language isn’t that exciting as compared to a tense baseball game. But, Python on the other hand was specifically developed keeping in mind newcomers. Even to the eye of a layman, it will seem meaningful and easy to understand. Curly brackets and tiring variable declarations are not part of this programming language thus, making it a lot easier to learn language.

Getting Innovative

Python has helped in bringing real world and computing a lot close with it Raspberry Pi. This inexpensive, card-sized microcomputer helps tech enthusiasts to build various DIY stuffs like video gaming consoles, remote controlled cars and robots. Python happens to be the programming language that powers this microcomputer. Aspirants can select from different DIY projects available online and enhance their skills and motivations by completing such projects.

Python also Supports Web Development

With its huge capabilities, Python is also a favorite among web developers to build various types of web applications. The web application framework, Django has been developed using Python and serves as the foundation for popular websites like ‘The Guardian’, ‘The NY Times’, ‘Pinterest’ and more.

Last Words

Python provides aspiring programmers a solid foundation based on which they can branch out to different fields. Python programming training ensures that students are able to use this highly potential programming language to the best of its capabilities in an exciting and fun way. Those who are keen to make a great career as software programmers are definite to find Python live up to their expectations.

Source by Jiya Kumari Verma

Programiz: How to get current date and time in Python?

$
0
0
In this article, you will learn to get today's date and current date and time in Python. We will also format the date and time in different formats using strftime() method.

Mike Driscoll: PyDev of the Week: Veronica Hanus

$
0
0

This week we welcome Veronica Hanus (@veronica_hanus) as our PyDev of the Week! Veronica is a regular tech speaker at Python and other tech conferences and meetups. You can see some of her talks and her schedule on her website. She has been active in the Python community for the past few years. Let’s take a few moments to get to know her better!

Can you tell us a little about yourself (hobbies, education, etc):

I enjoy writing and taking pictures. For me, the challenge is to help someone feel what I was feeling when I decided the moment was picture- or story-worthy, and both take a combination of skill-that-you-can-study and plain-old-caring that I find immensely rewarding. Photo-taking excursions are one of my favorite ways to spend time with friends, because they’re a nice combination of “quiet, contemplative side-by-side activity” and “let’s get out and do something”!

I once carved out time to take silly pictures with a new conference friend in a funny upside-down room at the conference venue. It amazed me how nice it felt to be fussed over after the stress of my first conference talk. As I started speaking more, I started offering to take pictures of conference attendees and many shared the same sentiment. Many people find conferences overwhelming and it’s nice to take a few minutes and relax, make a new friend, and maybe go home with new headshots.

My education often surprises people because it violates many people’s expectations: I don’t hold a CS degree, and I never attended a bootcamp. In college, I studied Geology with a combined geochemical and planetary science twist. Since shifting into software, I have heard countless times “Geology!? That must have been such a… change”. Even today, comments like that feel challenging and exclusionary and early in my career shift it felt terrible. We hear again and again that having folks from diverse backgrounds help teams innovate, but when meeting someone who doesn’t fit our expectations, most of us still do a double-take. If I get that as a white degree-touting former-scientist, imagine the uncomfortable responses folks in groups with more bias encounter when we express our surprise!

It turns out that my winding path toward programming has allowed me to make some of my most useful contributions. We don’t talk about it enough, but many use programming skills even if they haven’t written a line of code. If you’re considering development but are wondering how you will fit in, I encourage you to take a peek at communities like Write the Docs (their Slack), #CodeNewbie (their Twitter), or send me a hello via my Twitter or email.

How has your background in science influenced your programming career?

It wasn’t until I was doing research at JPL that I started to understand what programming was. There was a fair bit of “grit” need: I needed to learn MATLAB the semester before my internship so I found the one professor whose research relied on MATLAB and set up an independent study with him. The licensed computer was in the basement of a building across campus. He allowed me to practice during his office hours, so I hoofed it over there twice a week to learn as much MATLAB as I could. When my summer research mentor was from a code-heavy tech-school and when he saw me stumbling, he commented “and I thought you went to a good school.”

I didn’t learn to program that summer, but I started acting as a liaison between our team’s developer and the other interns who were testing his program by hand. During those meetings, we busted many of my personal programming myths. For example, up until that time I believed that proficient programmers would write a program in the same way I would write a letter to a friend, mostly top to bottom (maybe going back for a misspelling or two). That programs could be made from libraries of existing code and some “glue” blew my mind. I started reading our program and soon was pointing and suggesting changes. I started to compare the modules in our program to the processes we might run in the lab environment I was used to. Working in a programming-adjacent field made programming more accessible, even if I did need to beg my way into someone’s basement lab along the way!

Why did you start using Python?

Two things drew me to the Python community: Python’s proximity to so many fields of science (with so many libraries developed for specific applications) and their welcoming community.

Everyone I spoke to as I was deciding to explore programming underscored the importance of a welcoming community and recommended I start with Python. Python got themselves a new “lifer”. While I found many of the general “programming” communities overwhelming (I may never carve out a place for myself on Stack Overflow), I quickly found my place at Boston Python (they had weekend-long tutorials running and I both attended and TA-ed with them). The email list of the Harvard Astro group, whose research questions sometimes overlapped with my interests, became my place to lurk and see how those who relied on Python used the language to solve their problems. There are lots of different ways to learn!

The interest in Python has only grown and there are a multitude of ways to engage with the community. I encourage you to find the way(s) that make the most sense for your learning and socializing styles. We aren’t all Meetup/conference people!

Online communities/forums: CodeNewbies and dev.to are two of my favorites! They have twitter check-ins, podcasts, blog post. I’m also part of the Recurse Center, lovingly called “the world’s best programming community with a three-month onboarding process” and pop into their chats from time to time.

Meetups: Vary by city, but I have most enjoyed ones that rotate their themes, publicize & support other Meetup communities, and make efforts to document resources. Some have active Slack communities that allow people to communicate easily between meetings!

Conferences: Are wonderful (for me) and each have their own culture. I’ve found the ones intentional about culture-building to give the best experiences for attendees and speakers (if they work to clarify attendees’ needs or explain the PacMan rule, I’m in!)

Informal resources: Having a few folks that you go to for advice is invaluable. Seek out those folks and nurture those relationships.
There are many ways to find support but it takes time to find the spaces you can grow in. Experiment!

What other programming languages do you know and which is your favorite?

I am pretty comfortable with HTML/CSS/JS, Django, and LaTeX. Python and LaTeX are my first loves and will probably always be my favorites. Few folks know about LaTeX, so I’ll share my story there.

LaTeX is a typesetting language created by Donald Knuth, who—besides his seminal work in the analysis of algorithmic complexity—measured kerning and leading space by hand to find the most visually appealing combination and the result is frankly gorgeous. LaTeX is widely used by academics in math and math-heavy subjects (eg. Physics) and appreciated by a few other typesetting nerds. I have run workshops on LaTeX, hoping to interest people in industry to use it. Alas, LaTeX is still waiting to become popular outside of CS and the sciences. At the moment, it remains a gem reserved mostly for academic use.

I dove into LaTeX because at both the internship I had during college and the first job I had after (at Caltech and MIT, respectively), I saw folks typing their homework, papers, and notes (I heard some were skilled enough to typeset even their class notes!) with beautiful results! I was from a liberal arts school and had never seen this before—math became as beautiful as art! I decided if I would put the hours into my math sets that I needed to, I might as well be able to make them look like an artist had arranged the words/symbols on the page! I started typesetting everything, motivated both by the beauty and desire to fit in, and to this day the sight of my resume (designed and typeset by me) brings a smile to my face. Learning LaTeX was the first time I felt the excitement, joy, and mastery of programming.

What projects are you working on now?

My favorite project right now is analyzing results for a 200-person survey on developer use of in-code comments. I was motivated to learn more about commenting practices after I saw so many new programmers encouraged to avoid comments, although they seem useful in many circumstances. I’ve started speaking about the results and will create an open dataset from the responses.

What advice do you have for others who want to speak at conferences?

I felt I “wasn’t the right person” to give talks for years although I wanted to (and I’m not alone! 75% of people avoid public speaking), so I am full of advice!

Brainstorm with friends for a jump start! Everyone has their own favorite method of putting their ideas onto paper and do whatever helps you turn off your self-doubt filter. I’ve found it especially effective to gather some folks who are also brainstorming and, after drawing up a list of broad categories (eg. “What was an interesting bug you’ve had?”), each person writes on their own sheet of paper their answers (as many as you can think of in 1 minute!). Group members swap papers and mark each of the ideas they would like to learn more about. You’ll quickly see not only how interesting your ideas are but hear some helpful suggestions.

Embrace the vulnerability and don’t give into the temptation to undersell your ideas, either to yourself or others! It is common, when asking for help, for folks to share their (often fantastic) idea and then immediately hedge with “oh but I’m not sure it will work”, “sorry to bother you”, etc. Instead, get as far as you can into talk prep–folks are much more willing (and able!) to help when you can provide them with material to give feedback on.

Get yourself a review team. I have five folks who I regularly send writing to and their comments (even just “I like it!”) give me the energy to move forward when I’m struggling.

It wasn’t until I overheard a seasoned speaker (he seemed to speak at every conference I attend!) say that he normally submits at least five proposals to each conference that I realized there’s a lot more to proposal selection than talk quality! Organizers work to curate a talk lineup that will have something for each of their attendees. If your submission is about a hot new piece of tech, it may be compared to several (or dozens!) of other submissions exploring that technology. It may take a while to create multiple proposals that you feel good about, but hopefully knowing that even the most seasoned among us take this precaution will help you push forward regardless of the outcomes of your first submissions!

Join a review committee! Most conferences put out a call for reviewers on Twitter. By reviewing, read enough proposals that you’ll recognize the most common errors (eg. when the author leaves out important information) and see styles you’ll want to emulate in your own proposals. You’ll also be providing support for your favorite conference and being exposed to areas of the field or language new to you.

Remember this secret: There are very, very few “bad talk ideas” and creating a successful talk relies far more on your continued interest and willingness to research, accept feedback, and revise than your idea. Remind yourself of this as many times as you need to put your worst “weird” ideas out there and see what you can make of them.

Anything else you want to say?

Having gone through both the “what, you’re a geologist?” part of my programming transition and the “maybe speaking is for other people” part of my journey to speaking, I’ve seen first-hand just how much who is seen speaking matters. By giving talks, we not only share our programming adventures but have the chance to share our mis-adventures and hearing about the parts of the journey that are difficult can be powerful—for everyone but especially for the folks who relate to us, because of shared experiences or identities. No one can tell your story like you can.

Thanks for doing the interview, Veronica!

The post PyDev of the Week: Veronica Hanus appeared first on The Mouse Vs. The Python.

Reuven Lerner: Last change to join Weekly Python Exercise: Beginner objects

$
0
0

If you have been using Python, but don’t quite understand how and when to write and use the language’s object-oriented facilities, then I have good news and bad news:

  • Good news: The new cohort of WPE: Beginner objects starts tomorrow, and includes 15 weekly exercises about classes, objects, instances, methods, attributes, and other Python object goodies.
  • Bad news: The new cohort of WPE: Beginner objects starts tomorrow, which means that you only have until TONIGHT to join the new cohort.
  • Even worse news: I’ll only be running this version of WPE in about a year, toward the end of 2020. So if you don’t join this cohort, then you’ll have to wait quite some time.

Here’s what people have previously said about Weekly Python Exercise:

  • “What differentiates Reuven’s course from regular online reading, YouTube videos, or other self study mechanisms are context and application.”
  • “It’s totally worth it and a fantastic way to keep my Python skills sharp and learn new things in the process.”
  • “Fully recommend the course to anyone wanting to not only begin with Python, but learn it contextually and apply the learning via best practices.”

Remember, if you’re dissatisfied, then I offer a 100%, no questions asked, refund. 

So, don’t wait: Read more about Weekly Python Exercise (at https://WeeklyPythonExercise.com/). Questions or comments? Just e-mail me at reuven@lerner.co.il, or contact me on Twitter as @reuvenmlerner. I’ll answer your query right away!

The post Last change to join Weekly Python Exercise: Beginner objects appeared first on Reuven Lerner.

Real Python: PyGame: A Primer on Game Programming in Python

$
0
0

When I started learning computer programming late in the last millennium, it was driven by my desire to write computer games. I tried to figure out how to write games in every language and on every platform I learned, including Python. That’s how I discovered pygame and learned how to use it to write games and other graphical programs. At the time, I really wanted a primer on pygame.

By the end of this article, you’ll be able to:

  • Draw items on your screen
  • Play sound effects and music
  • Handle user input
  • Implement event loops
  • Describe how game programming differs from standard procedural Python programming

This primer assumes you have a basic understanding of writing Python programs, including user-defined functions, imports, loops, and conditionals. You should also be familiar with how to open files on your platform. A basic understanding of object-oriented Python is helpful as well. pygame works with most versions of Python, but Python 3.6 is recommended and used throughout this article.

You can get all of the code in this article to follow along:

Clone Repo:Click here to clone the repo you'll use to learn how to use PyGame in this tutorial.

Background and Setup

pygame is a Python wrapper for the SDL library, which stands for Simple DirectMedia Layer. SDL provides cross-platform access to your system’s underlying multimedia hardware components, such as sound, video, mouse, keyboard, and joystick. pygame started life as a replacement for the stalled PySDL project. The cross-platform nature of both SDL and pygame means you can write games and rich multimedia Python programs for every platform that supports them!

To install pygame on your platform, use the appropriate pip command:

$ pip install pygame

You can verify the install by loading one of the examples that comes with the library:

$ python3 -m pygame.examples.aliens

If a game window appears, then pygame is installed properly! If you run into problems, then the Getting Started guide outlines some known issues and caveats for all platforms.

Basic PyGame Program

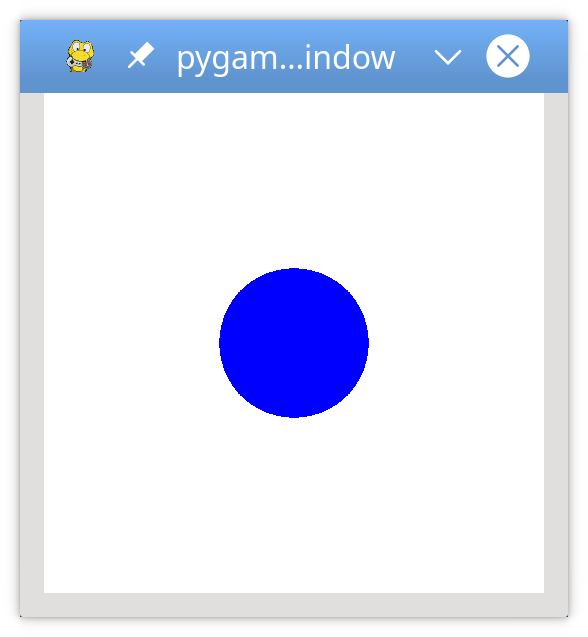
Before getting down to specifics, let’s take a look at a basic pygame program. This program creates a window, fills the background with white, and draws a blue circle in the middle of it:

 1 # Simple pygame program 2  3 # Import and initialize the pygame library 4 importpygame 5 pygame.init() 6  7 # Set up the drawing window 8 screen=pygame.display.set_mode([500,500]) 9 10 # Run until the user asks to quit11 running=True12 whilerunning:13 14 # Did the user click the window close button?15 foreventinpygame.event.get():16 ifevent.type==pygame.QUIT:17 running=False18 19 # Fill the background with white20 screen.fill((255,255,255))21 22 # Draw a solid blue circle in the center23 pygame.draw.circle(screen,(0,0,255),(250,250),75)24 25 # Flip the display26 pygame.display.flip()27 28 # Done! Time to quit.29 pygame.quit()

When you run this program, you’ll see a window that looks like this:

A simple pygame program

Let’s break this code down, section by section:

  • Lines 4 and 5 import and initialize the pygame library. Without these lines, there is no pygame.

  • Line 8 sets up your program’s display window. You provide either a list or a tuple that specifies the width and height of the window to create. This program uses a list to create a square window with 500 pixels on each side.

  • Lines 11 and 12 set up a game loop to control when the program ends. You’ll cover game loops later on in this tutorial.

  • Lines 15 to 17 scan and handle events within the game loop. You’ll get to events a bit later as well. In this case, the only event handled is pygame.QUIT, which occurs when the user clicks the window close button.

  • Line 20 fills the window with a solid color. screen.fill() accepts either a list or tuple specifying the RGB values for the color. Since (255, 255, 255) was provided, the window is filled with white.

  • Line 23 draws a circle in the window, using the following parameters:

    • screen: the window on which to draw
    • (0, 0, 255): a tuple containing RGB color values
    • (250, 250): a tuple specifying the center coordinates of the circle
    • 75: the radius of the circle to draw in pixels
  • Line 26 updates the contents of the display to the screen. Without this call, nothing appears in the window!

  • Line 29 exits pygame. This only happens once the loop finishes.

That’s the pygame version of “Hello, World.” Now let’s dig a little deeper into the concepts behind this code.

PyGame Concepts

As pygame and the SDL library are portable across different platforms and devices, they both need to define and work with abstractions for various hardware realities. Understanding those concepts and abstractions will help you design and develop your own games.

Initialization and Modules

The pygame library is composed of a number of Python constructs, which include several different modules. These modules provide abstract access to specific hardware on your system, as well as uniform methods to work with that hardware. For example, display allows uniform access to your video display, while joystick allows abstract control of your joystick.

After importing the pygame library in the example above, the first thing you did was initialize PyGame using pygame.init(). This function calls the separate init() functions of all the included pygame modules. Since these modules are abstractions for specific hardware, this initialization step is required so that you can work with the same code on Linux, Windows, and Mac.

Displays and Surfaces

In addition to the modules, pygame also includes several Python classes, which encapsulate non-hardware dependent concepts. One of these is the Surface which, at its most basic, defines a rectangular area on which you can draw. Surface objects are used in many contexts in pygame. Later you’ll see how to load an image into a Surface and display it on the screen.

In pygame, everything is viewed on a single user-created display, which can be a window or a full screen. The display is created using .set_mode(), which returns a Surface representing the visible part of the window. It is this Surface that you pass into drawing functions like pygame.draw.circle(), and the contents of that Surface are pushed to the display when you call pygame.display.flip().

Images and Rects

Your basic pygame program drew a shape directly onto the display’s Surface, but you can also work with images on the disk. The image module allows you to load and save images in a variety of popular formats. Images are loaded into Surface objects, which can then be manipulated and displayed in numerous ways.

As mentioned above, Surface objects are represented by rectangles, as are many other objects in pygame, such as images and windows. Rectangles are so heavily used that there is a special Rect class just to handle them. You’ll be using Rect objects and images in your game to draw players and enemies, and to manage collisions between them.

Okay, that’s enough theory. Let’s design and write a game!

Basic Game Design

Before you start writing any code, it’s always a good idea to have some design in place. Since this is a tutorial game, let’s design some basic gameplay for it as well:

  • The goal of the game is to avoid incoming obstacles:
    • The player starts on the left side of the screen.
    • The obstacles enter randomly from the right and move left in a straight line.
  • The player can move left, right, up, or down to avoid the obstacles.
  • The player cannot move off the screen.
  • The game ends either when the player is hit by an obstacle or when the user closes the window.

When he was describing software projects, a former colleague of mine used to say, “You don’t know what you do until you know what you don’t do.” With that in mind, here are some things that won’t be covered in this tutorial:

  • No multiple lives
  • No scorekeeping
  • No player attack capabilities
  • No advancing levels
  • No boss characters

You’re free to try your hand at adding these and other features to your own program.

Let’s get started!

Importing and Initializing PyGame

After you import pygame, you’ll also need to initialize it. This allows pygame to connect its abstractions to your specific hardware:

 1 # Import the pygame module 2 importpygame 3  4 # Import pygame.locals for easier access to key coordinates 5 # Updated to conform to flake8 and black standards 6 frompygame.localsimport( 7 K_UP, 8 K_DOWN, 9 K_LEFT,10 K_RIGHT,11 K_ESCAPE,12 KEYDOWN,13 QUIT,14 )15 16 # Initialize pygame17 pygame.init()

The pygame library defines many things besides modules and classes. It also defines some local constants for things like keystrokes, mouse movements, and display attributes. You reference these constants using the syntax pygame.<CONSTANT>. By importing specific constants from pygame.locals, you can use the syntax <CONSTANT> instead. This will save you some keystrokes and improve overall readability.

Setting Up the Display

Now you need something to draw on! Create a screen to be the overall canvas:

 1 # Import the pygame module 2 importpygame 3  4 # Import pygame.locals for easier access to key coordinates 5 # Updated to conform to flake8 and black standards 6 frompygame.localsimport( 7 K_UP, 8 K_DOWN, 9 K_LEFT,10 K_RIGHT,11 K_ESCAPE,12 KEYDOWN,13 QUIT,14 )15 16 # Initialize pygame17 pygame.init()18 19 # Define constants for the screen width and height20 SCREEN_WIDTH=80021 SCREEN_HEIGHT=60022 23 # Create the screen object24 # The size is determined by the constant SCREEN_WIDTH and SCREEN_HEIGHT25 screen=pygame.display.set_mode((SCREEN_WIDTH,SCREEN_HEIGHT))

You create the screen to use by calling pygame.display.set_mode() and passing a tuple or list with the desired width and height. In this case, the window is 800x600, as defined by the constants SCREEN_WIDTH and SCREEN_HEIGHT on lines 20 and 21. This returns a Surface which represents the inside dimensions of the window. This is the portion of the window you can control, while the OS controls the window borders and title bar.

If you run this program now, then you’ll see a window pop up briefly and then immediately disappear as the program exits. Don’t blink or you might miss it! In the next section, you’ll focus on the main game loop to ensure that your program exits only when given the correct input.

Setting Up the Game Loop

Every game from Pong to Fortnite uses a game loop to control gameplay. The game loop does four very important things:

  1. Processes user input
  2. Updates the state of all game objects
  3. Updates the display and audio output
  4. Maintains the speed of the game

Every cycle of the game loop is called a frame, and the quicker you can do things each cycle, the faster your game will run. Frames continue to occur until some condition to exit the game is met. In your design, there are two conditions that can end the game loop:

  1. The player collides with an obstacle. (You’ll cover collision detection later.)
  2. The player closes the window.

The first thing the game loop does is process user input to allow the player to move around the screen. Therefore, you need some way to capture and process a variety of input. You do this using the pygame event system.

Processing Events

Key presses, mouse movements, and even joystick movements are some of the ways in which a user can provide input. All user input results in an event being generated. Events can happen at any time and often (but not always) originate outside the program. All events in pygame are placed in the event queue, which can then be accessed and manipulated. Dealing with events is referred to as handling them, and the code to do so is called an event handler.

Every event in pygame has an event type associated with it. For your game, the event types you’ll focus on are keypresses and window closure. Keypress events have the event type KEYDOWN, and the window closure event has the type QUIT. Different event types may also have other data associated with them. For example, the KEYDOWN event type also has a variable called key to indicate which key was pressed.

You access the list of all active events in the queue by calling pygame.event.get(). You then loop through this list, inspect each event type, and respond accordingly:

27 # Variable to keep the main loop running28 running=True29 30 # Main loop31 whilerunning:32 # Look at every event in the queue33 foreventinpygame.event.get():34 # Did the user hit a key?35 ifevent.type==KEYDOWN:36 # Was it the Escape key? If so, stop the loop.37 ifevent.key==K_ESCAPE:38 running=False39 40 # Did the user click the window close button? If so, stop the loop.41 elifevent.type==QUIT:42 running=False

Let’s take a closer look at this game loop:

  • Line 28 sets up a control variable for the game loop. To exit the loop and the game, you set running = False. The game loop starts on line 29.

  • Line 31 starts the event handler, walking through every event currently in the event queue. If there are no events, then the list is empty, and the handler won’t do anything.

  • Lines 35 to 38 check if the current event.type is a KEYDOWN event. If it is, then the program checks which key was pressed by looking at the event.key attribute. If the key is the Esc key, indicated by K_ESCAPE, then it exits the game loop by setting running = False.

  • Lines 41 and 42 do a similar check for the event type called QUIT. This event only occurs when the user clicks the window close button. The user may also use any other operating system action to close the window.

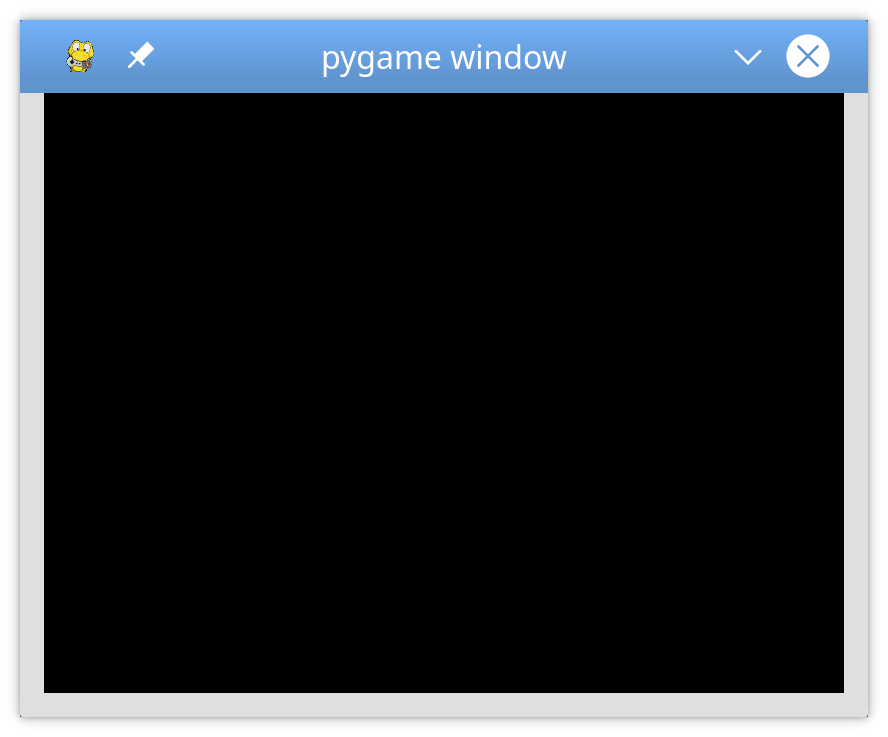
When you add these lines to the previous code and run it, you’ll see a window with a blank or black screen:

An empty, but persistent, pygame window

The window won’t disappear until you press the Esc key, or otherwise trigger a QUIT event by closing the window.

Drawing on the Screen

In the sample program, you drew on the screen using two commands:

  1. screen.fill() to fill the background
  2. pygame.draw.circle() to draw a circle

Now you’ll learn about a third way to draw to the screen: using a Surface.

Recall that a Surface is a rectangular object on which you can draw, like a blank sheet of paper. The screen object is a Surface, and you can create your own Surface objects separate from the display screen. Let’s see how that works:

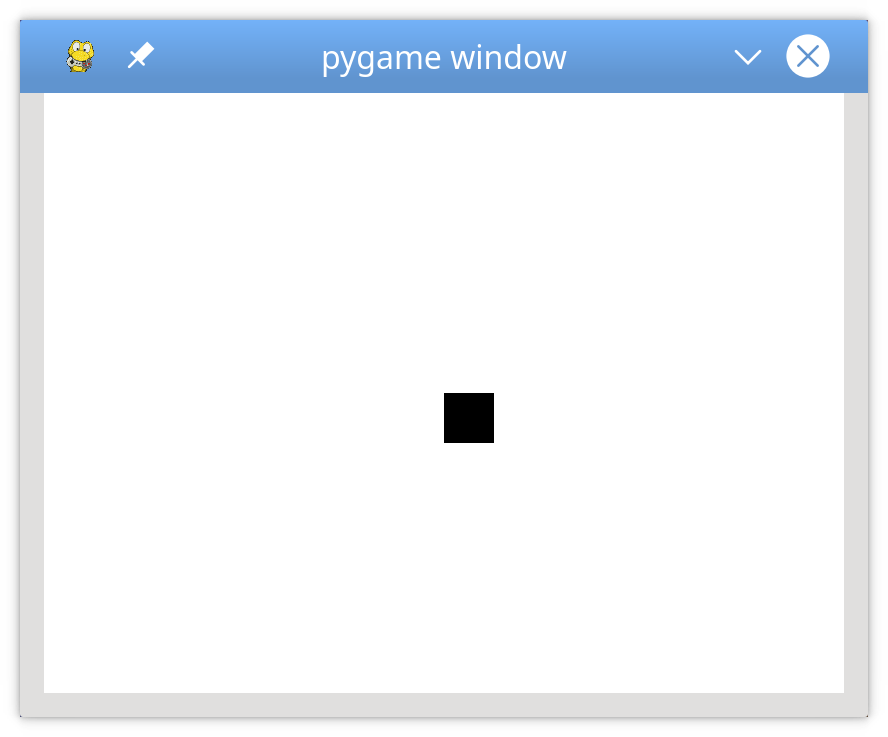
44 # Fill the screen with white45 screen.fill((255,255,255))46 47 # Create a surface and pass in a tuple containing its length and width48 surf=pygame.Surface((50,50))49 50 # Give the surface a color to separate it from the background51 surf.fill((0,0,0))52 rect=surf.get_rect()

After the screen is filled with white on line 45, a new Surface is created on line 48. This Surface is 50 pixels wide, 50 pixels tall, and assigned to surf. At this point, you treat it just like the screen. So on line, 51 you fill it with black. You can also access its underlying Rect using .get_rect(). This is stored as rect for later use.

Using .blit() and .flip()

Just creating a new Surface isn’t enough to see it on the screen. To do that, you need to blit the Surface onto another Surface. The term blit stands for Block Transfer, and .blit() is how you copy the contents of one Surface to another. You can only .blit() from one Surface to another, but since the screen is just another Surface, that’s not a problem. Here’s how you draw surf on the screen:

54 # This line says "Draw surf onto the screen at the center"55 screen.blit(surf,(SCREEN_WIDTH/2,SCREEN_HEIGHT/2))56 pygame.display.flip()

The .blit() call on line 55 takes two arguments:

  1. The Surface to draw
  2. The location at which to draw it on the source Surface

The coordinates (SCREEN_WIDTH/2, SCREEN_HEIGHT/2) tell your program to place surf in the exact center of the screen, but it doesn’t quite look that way:

Blitting a surface onto the screen

The reason why the image looks off-center is that .blit() puts the top-left corner of surf at the location given. If you want surf to be centered, then you’ll have to do some math to shift it up and to the left. You can do this by subtracting the width and height of surf from the width and height of the screen, dividing each by 2 to locate the center, and then passing those numbers as arguments to screen.blit():

54 # Put the center of surf at the center of the display55 surf_center=(56 (SCREEN_WIDTH-surf.get_width())/2,57 (SCREEN_HEIGHT-surf.get_height())/258 )59 60 # Draw surf at the new coordinates61 screen.blit(surf,surf_center)62 pygame.display.flip()

Notice the call to pygame.display.flip() after the call to blit(). This updates the entire screen with everything that’s been drawn since the last flip. Without the call to .flip(), nothing is shown.

Sprites

In your game design, the player starts on the left, and obstacles come in from the right. You can represent all the obstacles with Surface objects to make drawing everything easier, but how do you know where to draw them? How do you know if an obstacle has collided with the player? What happens when the obstacle flies off the screen? What if you want to draw background images that also move? What if you want your images to be animated? You can handle all these situations and more with sprites.

In programming terms, a sprite is a 2D representation of something on the screen. Essentially, it’s a picture. pygame provides a Sprite class, which is designed to hold one or several graphical representations of any game object that you want to display on the screen. To use it, you create a new class that extends Sprite. This allows you to use its built-in methods.

Players

Here’s how you use Sprite objects with the current game to define the player. Insert this code after line 18:

20 # Define a Player object by extending pygame.sprite.Sprite21 # The surface drawn on the screen is now an attribute of 'player'22 classPlayer(pygame.sprite.Sprite):23 def__init__(self):24 super(Player,self).__init__()25 self.surf=pygame.Surface((75,25))26 self.surf.fill((255,255,255))27 self.rect=self.surf.get_rect()

You first define Player by extending pygame.sprite.Sprite on line 22. Then .__init__() uses .super() to call the .__init__() method of Sprite. For more info on why this is necessary, you can read Supercharge Your Classes With Python super().

Next, you define and initialize .surf to hold the image to display, which is currently a white box. You also define and initialize .rect, which you’ll use to draw the player later. To use this new class, you need to create a new object and change the drawing code as well. Expand the code block below to see it all together:

 1 # Import the pygame module 2 importpygame 3  4 # Import pygame.locals for easier access to key coordinates 5 # Updated to conform to flake8 and black standards 6 frompygame.localsimport( 7 K_UP, 8 K_DOWN, 9 K_LEFT,10 K_RIGHT,11 K_ESCAPE,12 KEYDOWN,13 QUIT,14 )15 16 # Define constants for the screen width and height17 SCREEN_WIDTH=80018 SCREEN_HEIGHT=60019 20 # Define a player object by extending pygame.sprite.Sprite21 # The surface drawn on the screen is now an attribute of 'player'22 classPlayer(pygame.sprite.Sprite):23 def__init__(self):24 super(Player,self).__init__()25 self.surf=pygame.Surface((75,25))26 self.surf.fill((255,255,255))27 self.rect=self.surf.get_rect()28 29 # Initialize pygame30 pygame.init()31 32 # Create the screen object33 # The size is determined by the constant SCREEN_WIDTH and SCREEN_HEIGHT34 screen=pygame.display.set_mode((SCREEN_WIDTH,SCREEN_HEIGHT))35 36 # Instantiate player. Right now, this is just a rectangle.37 player=Player()38 39 # Variable to keep the main loop running40 running=True41 42 # Main loop43 whilerunning:44 # for loop through the event queue45 foreventinpygame.event.get():46 # Check for KEYDOWN event47 ifevent.type==KEYDOWN:48 # If the Esc key is pressed, then exit the main loop49 ifevent.key==K_ESCAPE:50 running=False51 # Check for QUIT event. If QUIT, then set running to false.52 elifevent.type==QUIT:53 running=False54 55 # Fill the screen with black56 screen.fill((0,0,0))57 58 # Draw the player on the screen59 screen.blit(player.surf,(SCREEN_WIDTH/2,SCREEN_HEIGHT/2))60 61 # Update the display62 pygame.display.flip()

Run this code. You’ll see a white rectangle at roughly the middle of the screen:

Basic player sprite being drawn

What do you think would happen if you changed line 59 to screen.blit(player.surf, player.rect)? Try it and see:

55 # Fill the screen with black56 screen.fill((0,0,0))57 58 # Draw the player on the screen59 screen.blit(player.surf,player.rect)60 61 # Update the display62 pygame.display.flip()

When you pass a Rect to .blit(), it uses the coordinates of the top left corner to draw the surface. You’ll use this later to make your player move!

User Input

So far, you’ve learned how to set up pygame and draw objects on the screen. Now, the real fun starts! You’ll make the player controllable using the keyboard.

Earlier, you saw that pygame.event.get() returns a list of the events in the event queue, which you scan for KEYDOWN event types. Well, that’s not the only way to read keypresses. pygame also provides pygame.event.get_pressed(), which returns a dictionary containing all the current KEYDOWN events in the queue.

Put this in your game loop right after the event handling loop. This returns a dictionary containing the keys pressed at the beginning of every frame:

54 # Get the set of keys pressed and check for user input55 pressed_keys=pygame.key.get_pressed()

Next, you write a method in Player to accepts that dictionary. This will define the behavior of the sprite based off the keys that are pressed. Here’s what that might look like:

29 # Move the sprite based on user keypresses30 defupdate(self,pressed_keys):31 ifpressed_keys[K_UP]:32 self.rect.move_ip(0,-5)33 ifpressed_keys[K_DOWN]:34 self.rect.move_ip(0,5)35 ifpressed_keys[K_LEFT]:36 self.rect.move_ip(-5,0)37 ifpressed_keys[K_RIGHT]:38 self.rect.move_ip(5,0)

K_UP, K_DOWN, K_LEFT, and K_RIGHT correspond to the arrow keys on the keyboard. If the dictionary entry for that key is True, then that key is down, and you move the player .rect in the proper direction. Here you use .move_ip(), which stands for move in place, to move the current Rect.

Then you can call .update() every frame to move the player sprite in response to keypresses. Add this call right after the call to .get_pressed():

52 # Main loop53 whilerunning:54 # for loop through the event queue55 foreventinpygame.event.get():56 # Check for KEYDOWN event57 ifevent.type==KEYDOWN:58 # If the Esc key is pressed, then exit the main loop59 ifevent.key==K_ESCAPE:60 running=False61 # Check for QUIT event. If QUIT, then set running to false.62 elifevent.type==QUIT:63 running=False64 65 # Get all the keys currently pressed66 pressed_keys=pygame.key.get_pressed()67 68 # Update the player sprite based on user keypresses69 player.update(pressed_keys)70 71 # Fill the screen with black72 screen.fill((0,0,0))

Now you can move your player rectangle around the screen with the arrow keys:

Keypresses moving a sprite in pygame

You may notice two small problems:

  1. The player rectangle can move very fast if a key is held down. You’ll work on that later.
  2. The player rectangle can move off the screen. Let’s solve that one now.

To keep the player on the screen, you need to add some logic to detect if the rect is going to move off screen. To do that, you check whether the rect coordinates have moved beyond the screen’s boundary. If so, then you instruct the program to move it back to the edge:

25 # Move the sprite based on user keypresses26 defupdate(self,pressed_keys):27 ifpressed_keys[K_UP]:28 self.rect.move_ip(0,-5)29 ifpressed_keys[K_DOWN]:30 self.rect.move_ip(0,5)31 ifpressed_keys[K_LEFT]:32 self.rect.move_ip(-5,0)33 ifpressed_keys[K_RIGHT]:34 self.rect.move_ip(5,0)35 36 # Keep player on the screen37 ifself.rect.left<0:38 self.rect.left=039 ifself.rect.right>SCREEN_WIDTH:40 self.rect.right=SCREEN_WIDTH41 ifself.rect.top<=0:42 self.rect.top=043 ifself.rect.bottom>=SCREEN_HEIGHT:44 self.rect.bottom=SCREEN_HEIGHT

Here, instead of using .move(), you just change the corresponding coordinates of .top, .bottom, .left, or .right directly. Test this, and you’ll find the player rectangle can no longer move off the screen.

Now let’s add some enemies!

Enemies

What’s a game without enemies? You’ll use the techniques you’ve already learned to create a basic enemy class, then create a lot of them for your player to avoid. First, import the random library:

 4 # Import random for random numbers 5 importrandom

Then create a new sprite class called Enemy, following the same pattern you used for Player:

55 # Define the enemy object by extending pygame.sprite.Sprite56 # The surface you draw on the screen is now an attribute of 'enemy'57 classEnemy(pygame.sprite.Sprite):58 def__init__(self):59 super(Enemy,self).__init__()60 self.surf=pygame.Surface((20,10))61 self.surf.fill((255,255,255))62 self.rect=self.surf.get_rect(63 center=(64 random.randint(SCREEN_WIDTH+20,SCREEN_WIDTH+100),65 random.randint(0,SCREEN_HEIGHT),66 )67 )68 self.speed=random.randint(5,20)69 70 # Move the sprite based on speed71 # Remove the sprite when it passes the left edge of the screen72 defupdate(self):73 self.rect.move_ip(-self.speed,0)74 ifself.rect.right<0:75 self.kill()

There are four notable differences between Enemy and Player:

  1. On lines 62 to 67, you update rect to be a random location along the right edge of the screen. The center of the rectangle is just off the screen. It’s located at some position between 20 and 100 pixels away from the right edge, and somewhere between the top and bottom edges.

  2. On line 68, you define .speed as a random number between 5 and 20. This specifies how fast this enemy moves towards the player.

  3. On lines 73 to 76, you define .update(). It takes no arguments since enemies move automatically. Instead, .update() moves the enemy toward the left side of the screen at the .speed defined when it was created.

  4. On line 74, you check whether the enemy has moved off-screen. To make sure the Enemy is fully off the screen and won’t just disappear while it’s still visible, you check that the right side of the .rect has gone past the left side of the screen. Once the enemy is off-screen, you call .kill() to prevent it from being processed further.

So, what does .kill() do? To figure this out, you have to know about Sprite Groups.

Sprite Groups

Another super useful class that pygame provides is the Sprite Group. This is an object that holds a group of Sprite objects. So why use it? Can’t you just track your Sprite objects in a list instead? Well, you can, but the advantage of using a Group lies in the methods it exposes. These methods help to detect whether any Enemy has collided with the Player, which makes updates much easier.

Let’s see how to create sprite groups. You’ll create two different Group objects:

  1. The first Group will hold every Sprite in the game.
  2. The second Group will hold just the Enemy objects.

Here’s what that looks like in code:

82 # Create the 'player'83 player=Player()84 85 # Create groups to hold enemy sprites and all sprites86 # - enemies is used for collision detection and position updates87 # - all_sprites is used for rendering88 enemies=pygame.sprite.Group()89 all_sprites=pygame.sprite.Group()90 all_sprites.add(player)91 92 # Variable to keep the main loop running93 running=True

When you call .kill(), the Sprite is removed from every Group to which it belongs. This removes the references to the Sprite as well, which allows Python’s garbage collector to reclaim the memory as necessary.

Now that you have an all_sprites group, you can change how objects are drawn. Instead of calling .blit() on just Player, you can iterate over everything in all_sprites:

117 # Fill the screen with black118 screen.fill((0,0,0))119 120 # Draw all sprites121 forentityinall_sprites:122 screen.blit(entity.surf,entity.rect)123 124 # Flip everything to the display125 pygame.display.flip()

Now, anything put into all_sprites will be drawn with every frame, whether it’s an enemy or the player.

There’s just one problem… You don’t have any enemies! You could create a bunch of enemies at the beginning of the game, but the game would quickly become boring when they all left the screen a few seconds later. Instead, let’s explore how to keep a steady supply of enemies coming as the game progresses.

Custom Events

The design calls for enemies to appear at regular intervals. This means that at set intervals, you need to do two things:

  1. Create a new Enemy.
  2. Add it to all_sprites and enemies.

You already have code that handles random events. The event loop is designed to look for random events occurring every frame and deal with them appropriately. Luckily, pygame doesn’t restrict you to using only the event types it has defined. You can define your own events to handle as you see fit.

Let’s see how to create a custom event that’s generated every few seconds. You can create a custom event by naming it:

78 # Create the screen object79 # The size is determined by the constant SCREEN_WIDTH and SCREEN_HEIGHT80 screen=pygame.display.set_mode((SCREEN_WIDTH,SCREEN_HEIGHT))81 82 # Create a custom event for adding a new enemy83 ADDENEMY=pygame.USEREVENT+184 pygame.time.set_timer(ADDENEMY,250)85 86 # Instantiate player. Right now, this is just a rectangle.87 player=Player()

pygame defines events internally as integers, so you need to define a new event with a unique integer. The last event pygame reserves is called USEREVENT, so defining ADDENEMY = pygame.USEREVENT + 1 on line 83 ensures it’s unique.

Next, you need to insert this new event into the event queue at regular intervals throughout the game. That’s where the time module comes in. Line 84 fires the new ADDENEMY event every 250 milliseconds, or four times per second. You call .set_timer() outside the game loop since you only need one timer, but it will fire throughout the entire game.

Add the code to handle your new event:

100 # Main loop101 whilerunning:102 # Look at every event in the queue103 foreventinpygame.event.get():104 # Did the user hit a key?105 ifevent.type==KEYDOWN:106 # Was it the Escape key? If so, stop the loop.107 ifevent.key==K_ESCAPE:108 running=False109 110 # Did the user click the window close button? If so, stop the loop.111 elifevent.type==QUIT:112 running=False113 114 # Add a new enemy?115 elifevent.type==ADDENEMY:116 # Create the new enemy and add it to sprite groups117 new_enemy=Enemy()118 enemies.add(new_enemy)119 all_sprites.add(new_enemy)120 121 # Get the set of keys pressed and check for user input122 pressed_keys=pygame.key.get_pressed()123 player.update(pressed_keys)124 125 # Update enemy position126 enemies.update()

Whenever the event handler sees the new ADDENEMY event on line 115, it creates an Enemy and adds it to enemies and all_sprites. Since Enemy is in all_sprites, it will get drawn every frame. You also need to call enemies.update() on line 126, which updates everything in enemies, to ensure they move properly:

Enemies flying by in pygame

However, that’s not the only reason there’s a group for just enemies.

Collision Detection

Your game design calls for the game to end whenever an enemy collides with the player. Checking for collisions is a basic technique of game programming, and usually requires some non-trivial math to determine whether two sprites will overlap each other.

This is where a framework like pygame comes in handy! Writing collision detection code is tedious, but pygame has a LOT of collision detection methods available for you to use.

For this tutorial, you’ll use a method called .spritecollideany(), which is read as “sprite collide any.” This method accepts a Sprite and a Group as parameters. It looks at every object in the Group and checks if its .rect intersects with the .rect of the Sprite. If so, then it returns True. Otherwise, it returns False. This is perfect for this game since you need to check if the single player collides with one of a Group of enemies.

Here’s what that looks like in code:

130 # Draw all sprites131 forentityinall_sprites:132 screen.blit(entity.surf,entity.rect)133 134 # Check if any enemies have collided with the player135 ifpygame.sprite.spritecollideany(player,enemies):136 # If so, then remove the player and stop the loop137 player.kill()138 running=False

Line 135 tests whether player has collided with any of the objects in enemies. If so, then player.kill() is called to remove it from every group to which it belongs. Since the only objects being rendered are in all_sprites, the player will no longer be rendered. Once the player has been killed, you need to exit the game as well, so you set running = False to break out of the game loop on line 138.

At this point, you’ve got the basic elements of a game in place:

Pygame window

Now, let’s dress it up a bit, make it more playable, and add some advanced capabilities to help it stand out.

Sprite Images

Alright, you have a game, but let’s be honest… It’s kind of ugly. The player and enemies are just white blocks on a black background. That was state-of-the-art when Pong was new, but it just doesn’t cut it anymore. Let’s replace all those boring white rectangles with some cooler images that will make the game feel like an actual game.

Earlier, you learned that images on disk can be loaded into a Surface with some help from the image module. For this tutorial, we made a little jet for the player and some missiles for the enemies. You’re welcome to use this art, draw your own, or download some free game art assets to use. You can click the link below to download the art used in this tutorial:

Clone Repo:Click here to clone the repo you'll use to learn how to use PyGame in this tutorial.

Altering the Object Constructors

Before you use images to represent the player and enemy sprites, you need to make some changes to their constructors. The code below replaces the code used previously:

 7 # Import pygame.locals for easier access to key coordinates 8 # Updated to conform to flake8 and black standards 9 # from pygame.locals import *10 frompygame.localsimport(11 RLEACCEL,12 K_UP,13 K_DOWN,14 K_LEFT,15 K_RIGHT,16 K_ESCAPE,17 KEYDOWN,18 QUIT,19 )20 21 # Define constants for the screen width and height22 SCREEN_WIDTH=80023 SCREEN_HEIGHT=60024 25 26 # Define the Player object by extending pygame.sprite.Sprite27 # Instead of a surface, use an image for a better-looking sprite28 classPlayer(pygame.sprite.Sprite):29 def__init__(self):30 super(Player,self).__init__()31 self.image=pygame.image.load("jet.png").convert()32 self.image.set_colorkey((255,255,255),RLEACCEL)33 self.rect=self.image.get_rect()

Let’s unpack line 31 a bit. pygame.image.load() loads an image from the disk. You pass it a path to the file. It returns a Surface, and the .convert() call optimizes the Surface, making future .blit() calls faster.

Line 32 uses .set_colorkey() to indicate the color pygame will render as transparent. In this case, you choose white, because that’s the background color of the jet image. The RLEACCEL constant is an optional parameter that helps pygame render more quickly on non-accelerated displays. This is added to the pygame.locals import statement on line 11.

Nothing else needs to change. The image is still a Surface, except now it has a picture painted on it. You still use it in the same way.

Here’s what similar changes to the Enemy look like:

59 # Define the enemy object by extending pygame.sprite.Sprite60 # Instead of a surface, use an image for a better-looking sprite61 classEnemy(pygame.sprite.Sprite):62 def__init__(self):63 super(Enemy,self).__init__()64 self.surf=pygame.image.load("missile.png").convert()65 self.surf.set_colorkey((255,255,255),RLEACCEL)66 # The starting position is randomly generated, as is the speed67 self.rect=self.surf.get_rect(68 center=(69 random.randint(SCREEN_WIDTH+20,SCREEN_WIDTH+100),70 random.randint(0,SCREEN_HEIGHT),71 )72 )73 self.speed=random.randint(5,20)

Running the program now should show that this is the same game you had before, except now you’ve added some nice graphics skins with images. But why stop at just making the player and enemy sprites look nice? Let’s add a few clouds going past to give the impression of a jet flying through the sky.

Adding Background Images

For background clouds, you use the same principles as you did for Player and Enemy:

  1. Create the Cloud class.
  2. Add an image of a cloud to it.
  3. Create a method .update() that moves the cloud toward the left side of the screen.
  4. Create a custom event and handler to create new cloud objects at a set time interval.
  5. Add the newly created cloud objects to a new Group called clouds.
  6. Update and draw the clouds in your game loop.

Here’s what Cloud looks like:

 83 # Define the cloud object by extending pygame.sprite.Sprite 84 # Use an image for a better-looking sprite 85 classCloud(pygame.sprite.Sprite): 86 def__init__(self): 87 super(Cloud,self).__init__() 88 self.surf=pygame.image.load("cloud.png").convert() 89 self.surf.set_colorkey((0,0,0),RLEACCEL) 90 # The starting position is randomly generated 91 self.rect=self.surf.get_rect( 92 center=( 93 random.randint(SCREEN_WIDTH+20,SCREEN_WIDTH+100), 94 random.randint(0,SCREEN_HEIGHT), 95 ) 96  97 # Move the cloud based on a constant speed 98 # Remove the cloud when it passes the left edge of the screen 99 defupdate(self):100 self.rect.move_ip(-5,0)101 ifself.rect.right<0:102 self.kill()

That should all look very familiar. It’s pretty much the same as Enemy.

To have clouds appear at certain intervals, you’ll use event creation code similar to what you used to create new enemies. Put it right below the enemy creation event:

116 # Create custom events for adding a new enemy and a cloud117 ADDENEMY=pygame.USEREVENT+1118 pygame.time.set_timer(ADDENEMY,250)119 ADDCLOUD=pygame.USEREVENT+2120 pygame.time.set_timer(ADDCLOUD,1000)

This says to wait 1000 milliseconds, or one second, before creating the next cloud.

Next, create a new Group to hold each newly created cloud:

125 # Create groups to hold enemy sprites, cloud sprites, and all sprites126 # - enemies is used for collision detection and position updates127 # - clouds is used for position updates128 # - all_sprites is used for rendering129 enemies=pygame.sprite.Group()130 clouds=pygame.sprite.Group()131 all_sprites=pygame.sprite.Group()132 all_sprites.add(player)

Next, add a handler for the new ADDCLOUD event in the event handler:

137 # Main loop138 whilerunning:139 # Look at every event in the queue140 foreventinpygame.event.get():141 # Did the user hit a key?142 ifevent.type==KEYDOWN:143 # Was it the Escape key? If so, then stop the loop.144 ifevent.key==K_ESCAPE:145 running=False146 147 # Did the user click the window close button? If so, stop the loop.148 elifevent.type==QUIT:149 running=False150 151 # Add a new enemy?152 elifevent.type==ADDENEMY:153 # Create the new enemy and add it to sprite groups154 new_enemy=Enemy()155 enemies.add(new_enemy)156 all_sprites.add(new_enemy)157 158 # Add a new cloud?159 elifevent.type==ADDCLOUD:160 # Create the new cloud and add it to sprite groups161 new_cloud=Cloud()162 clouds.add(new_cloud)163 all_sprites.add(new_cloud)

Finally, make sure the clouds are updated every frame:

167 # Update the position of enemies and clouds168 enemies.update()169 clouds.update()170 171 # Fill the screen with sky blue172 screen.fill((135,206,250))

Line 172 updates the original screen.fill() to fill the screen with a pleasant sky blue color. You can change this color to something else. Maybe you want an alien world with a purple sky, a toxic wasteland in neon green, or the surface of Mars in red!

Note that each new Cloud and Enemy are added to all_sprites as well as clouds and enemies. This is done because each group is used for a separate purpose:

  • Rendering is done using all_sprites.
  • Position updates are done using clouds and enemies.
  • Collision detection is done using enemies.

You create multiple groups so that you can change the way sprites move or behave without impacting the movement or behavior of other sprites.

Game Speed

While testing the game you may have noticed that the enemies move a little fast. If not, then that’s okay, as different machines will see different results at this point.

The reason for this is that the game loop processes frames as fast as the processor and environment will allow. Since all the sprites move once per frame, they can move hundreds of times each second. The number of frames handled each second is called the frame rate, and getting this right is the difference between a playable game and a forgettable one.

Normally, you want as high a frame rate as possible, but for this game, you need to slow it down a bit for the game to be playable. Fortunately, the module time contains a Clock which is designed exactly for this purpose.

Using Clock to establish a playable frame rate requires just two lines of code. The first creates a new Clock before the game loop begins:

106 # Setup the clock for a decent framerate107 clock=pygame.time.Clock()

The second calls .tick() to inform pygame that the program has reached the end of the frame:

188 # Flip everything to the display189 pygame.display.flip()190 191 # Ensure program maintains a rate of 30 frames per second192 clock.tick(30)

The argument passed to .tick() establishes the desired frame rate. To do this, .tick() calculates the number of milliseconds each frame should take, based on the desired frame rate. Then, it compares that number to the number of milliseconds that have passed since the last time .tick() was called. If not enough time has passed, then .tick() delays processing to ensure that it never exceeds the specified frame rate.

Passing in a smaller frame rate will result in more time in each frame for calculations, while a larger frame rate provides smoother (and possibly faster) gameplay:

Setting the frame rate in pygame

Play around with this number to see what feels best for you!

Sound Effects

So far, you’ve focused on gameplay and the visual aspects of your game. Now let’s explore giving your game some auditory flavor as well. pygame provides mixer to handle all sound-related activities. You’ll use this module’s classes and methods to provide background music and sound effects for various actions.

The name mixer refers to the fact that the module mixes various sounds into a cohesive whole. Using the music sub-module, you can stream individual sound files in a variety of formats, such as MP3, Ogg, and Mod. You can also use Sound to hold a single sound effect to be played, in either Ogg or uncompressed WAV formats. All playback happens in the background, so when you play a Sound, the method returns immediately as the sound plays.

Note: The pygame documentation states that MP3 support is limited, and unsupported formats can cause system crashes. The sounds referenced in this article have been tested, and we recommend testing any sounds thoroughly before releasing your game.

As with most things pygame, using mixer starts with an initialization step. Luckily, this is already handled by pygame.init(). You only need to call pygame.mixer.init() if you want to change the defaults:

106 # Setup for sounds. Defaults are good.107 pygame.mixer.init()108 109 # Initialize pygame110 pygame.init()111 112 # Set up the clock for a decent framerate113 clock=pygame.time.Clock()

pygame.mixer.init() accepts a number of arguments, but the defaults work fine in most cases. Note that if you want to change the defaults, you need to call pygame.mixer.init() before calling pygame.init(). Otherwise, the defaults will be in effect regardless of your changes.

After the system is initialized, you can get your sounds and background music setup:

135 # Load and play background music136 # Sound source: http://ccmixter.org/files/Apoxode/59262137 # License: https://creativecommons.org/licenses/by/3.0/138 pygame.mixer.music.load("Apoxode_-_Electric_1.mp3")139 pygame.mixer.music.play(loops=-1)140 141 # Load all sound files142 # Sound sources: Jon Fincher143 move_up_sound=pygame.mixer.Sound("Rising_putter.ogg")144 move_down_sound=pygame.mixer.Sound("Falling_putter.ogg")145 collision_sound=pygame.mixer.Sound("Collision.ogg")

Lines 138 and 139 load a background sound clip and begin playing it. You can tell the sound clip to loop and never end by setting the named parameter loops=-1.

Lines 143 to 145 load three sounds you’ll use for various sound effects. The first two are rising and falling sounds, which are played when the player moves up or down. The last is the sound used whenever there is a collision. You can add other sounds as well, such as a sound for whenever an Enemy is created, or a final sound for when the game ends.

So, how do you use the sound effects? You want to play each sound when a certain event occurs. For example, when the ship moves up, you want to play move_up_sound. Therefore, you add a call to .play() whenever you handle that event. In the design, that means adding the following calls to .update() for Player:

26 # Define the Player object by extending pygame.sprite.Sprite27 # Instead of a surface, use an image for a better-looking sprite28 classPlayer(pygame.sprite.Sprite):29 def__init__(self):30 super(Player,self).__init__()31 self.surf=pygame.image.load("jet.png").convert()32 self.surf.set_colorkey((255,255,255),RLEACCEL)33 self.rect=self.surf.get_rect()34 35 # Move the sprite based on keypresses36 defupdate(self,pressed_keys):37 ifpressed_keys[K_UP]:38 self.rect.move_ip(0,-5)39 move_up_sound.play()40 ifpressed_keys[K_DOWN]:41 self.rect.move_ip(0,5)42 move_down_sound.play()

For a collision between the player and an enemy, you play the sound for when collisions are detected:

201 # Check if any enemies have collided with the player202 ifpygame.sprite.spritecollideany(player,enemies):203 # If so, then remove the player204 player.kill()205 206 # Stop any moving sounds and play the collision sound207 move_up_sound.stop()208 move_down_sound.stop()209 collision_sound.play()210 211 # Stop the loop212 running=False

Here, you stop any other sound effects first, because in a collision the player is no longer moving. Then you play the collision sound and continue execution from there.

Finally, when the game is over, all sounds should stop. This is true whether the game ends due to a collision or the user exits manually. To do this, add the following lines at the end of the program after the loop:

220 # All done! Stop and quit the mixer.221 pygame.mixer.music.stop()222 pygame.mixer.quit()

Technically, these last few lines are not required, as the program ends right after this. However, if you decide later on to add an intro screen or an exit screen to your game, then there may be more code running after the game ends.

That’s it! Test it again, and you should see something like this:

Pygame window

A Note on Sources

You may have noticed the comment on lines 136-137 when the background music was loaded, listing the source of the music and a link to the Creative Commons license. This was done because the creator of that sound required it. The license requirements stated that in order to use the sound, both proper attribution and a link to the license must be provided.

Here are some sources for music, sound, and art that you can search for useful content:

As you make your games and use downloaded content such as art, music, or code from other sources, please be sure that you are complying with the licensing terms of those sources.

Conclusion

Throughout this tutorial, you’ve learned how game programming with pygame differs from standard procedural programming. You’ve also learned how to:

  • Implement event loops
  • Draw items on the screen
  • Play sound effects and music
  • Handle user input

To do this, you used a subset of the pygame modules, including the display, mixer and music, time, image, event, and key modules. You also used several pygame classes, including Rect, Surface, Sound, and Sprite. But these only scratch the surface of what pygame can do! Check out the official pygame documentation for a full list of available modules and classes.

You can find all of the code, graphics, and sound files for this article by clicking the link below:

Clone Repo:Click here to clone the repo you'll use to learn how to use PyGame in this tutorial.

Feel free to leave comments below as well. Happy Pythoning!


[ Improve Your Python With 🐍 Python Tricks 💌 – Get a short & sweet Python Trick delivered to your inbox every couple of days. >> Click here to learn more and see examples ]

TechBeamers Python: Python Multiple Inheritance (with Examples)

$
0
0

In this tutorial, we’ll describe Python Multiple Inheritance concept and explain how to use it in your programs. We’ll also cover multilevel inheritance, the super() function, and focus on the method resolution order. In the previous tutorial, we have gone through Python Class and Python (Single) Inheritance. There, you have seen that a child class inherits from a base class. However, Multiple Inheritance is a feature where a class can derive attributes and methods from more than one base classes. Hence, it creates a high level of complexity and ambiguity and known as the diamond problem in the technical world.

The post Python Multiple Inheritance (with Examples) appeared first on Learn Programming and Software Testing.

NumFOCUS: Introducing Our Newest Corporate Sponsorship Prospectus


Stack Abuse: Reading and Writing YAML to a File in Python

$
0
0

Introduction

In this tutorial, we're going to learn how to use the YAML library in Python 3. YAML stands for Yet Another Markup Language.

In recent years it has become very popular for its use in storing data in a serialized manner for configuration files. Since YAML essentially is a data format, the YAML library is quite brief, as the only functionality required of it is the ability to parse YAML formatted files.

In this article we will start with seeing how data is stored in a YAML file, followed by loading that data into a Python object. Lastly, we will learn how to store a Python object in a YAML file. So, let's begin.

Before we move further, there are a few prerequisites for this tutorial. You should have a basic understanding of Python's syntax, and/or have done at least beginner level programming experience with some other language. Other than that, the tutorial is quite simple and easy to follow for beginners.

Installation

The installation process for YAML is fairly straight forward. There are two ways to do it; we'll start with the easy one first:

Method 1: Via Pip

The easiest way to install the YAML library in Python is via the pip package manager. If you have pip installed in your system, run the following command to download and install YAML:

$ pip install pyyaml

Method 2: Via Source

In case you do not have pip installed, or are facing some problem with the method above, you can go to the library's source page. Download the repository as a zip file, open the terminal or command prompt, and navigate to the directory where the file is downloaded. Once you are there, run the following command:

$ python setup.py install

YAML Code Examples

In this section, we will learn how to handle (manipulate) YAML files, starting with how to read them i.e. how to load them into our Python script so that we can use them as per our needs. So, let's start.

Reading YAML Files in Python

In this section, we will see how to read YAML files in Python.

Let's start by making two YAML formatted files.

The contents of the first file are as follows:

# fruits.yaml file

apples: 20
mangoes: 2
bananas: 3
grapes: 100
pineapples: 1

The contents of the second file are as follows:

# categories.yaml file

sports:

  - soccer
  - football
  - basketball
  - cricket
  - hockey
  - table tennis

countries:

  - Pakistan
  - USA
  - India
  - China
  - Germany
  - France
  - Spain

You can see that the fruits.yaml and categories.yaml files contain different types of data. The former contains information only about one entity, i.e. fruits, while the latter contains information about sports and countries.

Let's now try to read the data from the two files that we created using a Python script. The load() method from the yaml module can be used to read YAML files. Look at the following script:

# process_yaml.py file

import yaml

with open(r'E:\data\fruits.yaml') as file:
    # The FullLoader parameter handles the conversion from YAML
    # scalar values to Python the dictionary format
    fruits_list = yaml.load(file, Loader=yaml.FullLoader)

    print(fruits_list)

Output:

{ 'apples': 20, 'mangoes': 2, 'bananas': 3, 'grapes': 100, 'pineapples': 1 }

In the script above we specified yaml.FullLoader as the value for the Loader parameter which loads the full YAML language, avoiding the arbitrary code execution. Instead of using the load function and then passing yaml.FullLoader as the value for the Loader parameter, you can also use the full_load() function, as we will see in the next example.

Let's now try and read the second YAML file in a similar manner using a Python script:

# read_categories.py file

import yaml

with open(r'E:\data\categories.yaml') as file:
    documents = yaml.full_load(file)

    for item, doc in documents.items():
        print(item, ":", doc)

Since there are 2 documents in the categories.yaml file, we ran a loop to read both of them.

Output:

sports : ['soccer', 'football', 'basketball', 'cricket', 'hockey', 'table tennis']
countries : ['Pakistan', 'USA', 'India', 'China', 'Germany', 'France', 'Spain']

As you can see from the last two examples, the library automatically handles the conversion of YAML formatted data to Python dictionaries and lists.

Writing YAML Files in Python

Now that we have learned how to convert a YAML file into a Python dictionary, let's try to do things the other way around i.e. serialize a Python dictionary and store it into a YAML formatted file. For this purpose, let's use the same dictionary that we got as an output from our last program.

import yaml

dict_file = [{'sports' : ['soccer', 'football', 'basketball', 'cricket', 'hockey', 'table tennis']},
{'countries' : ['Pakistan', 'USA', 'India', 'China', 'Germany', 'France', 'Spain']}]

with open(r'E:\data\store_file.yaml', 'w') as file:
    documents = yaml.dump(dict_file, file)

The dump() method takes the Python dictionary as the first, and a File object as the second parameter.

Once the above code executes, a file named store_file.yaml will be created in your current working directory.

# store_file.yaml file contents:

- sports:

  - soccer
  - football
  - basketball
  - cricket
  - hockey
  - table tennis
- countries:

  - Pakistan
  - USA
  - India
  - China
  - Germany
  - France
  - Spain

Another useful functionality that the YAML library offers for the dump() method is the sort_keys parameter. To show what it does, let's apply it on our first file, i.e. fruits.yaml:

import yaml

with open(r'E:\data\fruits.yaml') as file:
    doc = yaml.load(file, Loader=yaml.FullLoader)

    sort_file = yaml.dump(doc, sort_keys=True)
    print(sort_file)

Output:

apples: 20
bananas: 3
grapes: 100
mangoes: 2
pineapples: 1

You can see in the output that the fruits have been sorted in the alphabetical order.

Conclusion

In this brief tutorial, we learned how to install Python's YAML library (pyyaml) to manipulate YAML formatted files. We covered loading the contents of a YAML file into our Python program as dictionaries, as well as serializing Python dictionaries in to YAML files and storing their keys. The library is quite brief and only offers basic functionalities.

Rene Dudfield: post modern C tooling - draft

$
0
0
DRAFT - I'm still working on this, but it's already useful and I'd like some feedback - so I decided to share it early.


In 2001 or so people started using the phrase "Modern C++". So now that it's 2019, I guess we're in the post modern era? Anyway, this isn't a post about C++ code, but some of this information applies there too.

This is a post about contemporary C tooling. Tooling for making higher quality C, faster.
The C language has no logo, but it's everywhere.

Welcome to the post modern era.

Some of the C++ people have pulled off one of the cleverest and sneakiest tricks ever. They required 'modern' C99 and C11 features in 'recent' C++ standards. Microsoft has famously still clung onto some 80s version of C with their compiler for the longest time. So it's been a decade of hacks for people writing portable code in C. For a while I thought we'd be stuck in the 80s with C89 forever. However, now that some C99 and C11 features are more widely available in the Microsoft compiler, we can use these features in highly portable code (but forget about C17/C18 ISO/IEC 9899:2018/C2X stuff!!).

So, we have some pretty modern language features in C with C11.  But what about tooling?

Tools and protection for our feet.

C, whilst a work horse being used in everything from toasters, trains, phones, web browsers, ... (everything basically) - is also an excellent tool for shooting yourself in the foot.

Noun

footgun (pluralfootguns)
  1. (informal,humorous,derogatory) Any feature whose addition to a product results in the user shooting themselves in the foot. C.

Tools like linters, test coverage checkers, static analyzers, memory checkers, documentation generators, thread checkers, continuous integration, nice error messages, ... and such help protect our feet.

How do we do continuous delivery with a language that lets us do the most low level footgunie things ever? On a dozen CPU architectures, 32 bit, 64bit, little endian, big endian, 64 bit with 32bit pointers (wat?!?), with multiple compilers, on a dozen different OS, with dozens of different versions of your dependencies?

Surely there won't be enough time to do releases, and have time left to eat my vegan shaved ice desert after lunch?


Reverse debugger

Normally a program runs forwards. But what about when you are debugging and you want to run the program backwards?

How do you tame non determinism to allow a program to run the same way it did when it crashed? In C and with threads some times it's really hard to reproduce problems.

rr helps with this. It's actual magic.

https://rr-project.org/


Portable building, and package management

C doesn't have a package manager... or does it?

Ever since Debian dpkg, Redhat rpm, and Perl started doing package management in the early 90s people world wide have been able to share pieces of software more easily.

Following those systems, many other systems like Ruby gems, JavaScript npm, and Pythons cheese shop came into being. Allowing many to share code easily.

But what about C? How can we define dependencies on different 'packages' or libraries and have them compile on different platforms?

How do we build with Microsofts compiler, with gcc, with clang, or Intels C compiler? How do we build on Mac, on Windows, on Ubuntu, on Arch linux?

Part of the answer to that is CMake. "Modern CMake" lets you define your dependencies,


There are several 

https://conan.io/


Testing coverage.

Tests let us know that some certain function is running ok. Which code do we still need to test?

gcov, a tool you can use in conjunction with GCC to test code coverage in your programs.
lcov, LCOV is a graphical front-end for GCC's coverage testing tool gcov.


Instructions from codecov.io on how to use it with C, and clang or gcc. (codecov.io is free for public open source repos).
https://github.com/codecov/example-c


Here's documentation for how CPython gets coverage results for C.
 https://devguide.python.org/coverage/#measuring-coverage-of-c-code-with-gcov-and-lcov

Here is the CPython Travis CI configuration they use.
https://github.com/python/cpython/blob/master/.travis.yml#L69
    - os: linux
language: c
compiler: gcc
env: OPTIONAL=true
addons:
apt:
packages:
- lcov
- xvfb
before_script:
- ./configure
- make coverage -s -j4
# Need a venv that can parse covered code.
- ./python -m venv venv
- ./venv/bin/python -m pip install -U coverage
- ./venv/bin/python -m test.pythoninfo
script:
# Skip tests that re-run the entire test suite.
- xvfb-run ./venv/bin/python -m coverage run --pylib -m test --fail-env-changed -uall,-cpu -x test_multiprocessing_fork -x test_multiprocessing_forkserver -x test_multiprocessing_spawn -x test_concurrent_futures
after_script: # Probably should be after_success once test suite updated to run under coverage.py.
# Make the `coverage` command available to Codecov w/ a version of Python that can parse all source files.
- source ./venv/bin/activate
- make coverage-lcov
- bash > (curl -s https://codecov.io/bash)


Static analysis

"Static analysis has not been helpful in finding bugs in SQLite." -- https://www.sqlite.org/testing.html

According to David Wheeler in "How to Prevent the next Heartbleed" (https://dwheeler.com/essays/heartbleed.html#static-not-found the security problem with a logo, a website, and a marketing team) only one static analysis tool found the Heartbleed vulnerability before it was known. This tool is called CQual++. One reason for projects not using these tools is that they have been (and some still are) hard to use. The LLVM project only started using the clang static analysis tool on it's own projects recently for example. However, since Heartbleed tools have improved in both usability and their ability to detect issues.

I think it's generally accepted that static analysis tools are incomplete, in that each tool does not guarantee detecting every problem or even always detecting the same issues all the time. Using multiple tools can therefore be said to find multiple different types of problems.

Compiling code with gcc "-Wall -Wextra -pedantic" options catches quite a number of potential or actual problems (https://gcc.gnu.org/onlinedocs/gcc/Warning-Options.html). Other compilers check different things as well. So using multiple compilers with their warnings can find plenty of different types of issues for you.

Note, that static analysis can be much slower than the analysis usually provided by compilation. It trades off more CPU time for (perhaps) better results.

In the talk "Clang Static Analysis" (https://www.youtube.com/watch?v=UcxF6CVueDM) talks about an LLVM tool called codechecker (https://github.com/Ericsson/codechecker). Clang's Static Analyzer, a free static analyzer based on Clang.  Not that XCode IDE on Mac includes the clang static analyser.

Visual studio by Microsoft can also do static code analysis too. ( https://docs.microsoft.com/en-us/visualstudio/code-quality/code-analysis-for-c-cpp-overview?view=vs-2017)

cppcheck focuses of low false positives and can find many actual problems.
Coverity, a commercial static analyzer, free for open source developers
CppDepend, a commercial static analyzer based on Clang
codechecker, https://github.com/Ericsson/codechecker
cpplint, Cpplint is a command-line tool to check C/C++ files for style issues following Google's C++ style guide.
Awesome static analysis, a page full of static analysis tools for C/C++. https://github.com/mre/awesome-static-analysis#cc


Probably one of the most useful parts of static analysis is being able to write your own checks. This allows you to do checks specific to your code base in which general checks will not work. One example of this is the gcc cpychecker (https://gcc-python-plugin.readthedocs.io/en/latest/cpychecker.html). With this, gcc can find within CPython extensions written in C reference counting bugs, and NULL pointer dereferences, and other types of issues. You can write custom checkers with LLVM as well in the "Checker Developer Manual" (https://clang-analyzer.llvm.org/checker_dev_manual.html)


Performance profiling and measurement

“The objective (not always attained) in creating high-performance software is to make the software able to carry out its appointed tasks so rapidly that it responds instantaneously, as far as the user is concerned.”  Michael Abrash. “Michael Abrash’s Graphics Programming Black Book.”
Reducing energy usage, and run time requirements of apps can often be a requirement or very necessary. For a mobile or embedded application it can mean the difference of being able to run the program at all. Performance can directly be related to user happiness but also to the financial performance of a piece of software.

But how to we measure the performance of a program, and how to we know what parts of a program need improvement? Tooling can help.

Valgrind

Valgrind has its own section here because it does lots of different things for us. It's a great tool, or set of tools for improving your programs. It used to be available only on linux, but is now also available on MacOS.

Apparently Valgrind would have caught the heartbleed issue if it was used with a fuzzer.

http://valgrind.org/docs/manual/quick-start.html

Apple Performance Tools

Apple provides many performance related development tools. Along with the gcc and llvm based tools, the main tool is called Instruments. Instruments (part of Xcode) allows you to record and analyse programs for lots of different aspects of performance - including graphics, memory activity, file system, energy and other program events. By being able to record and analyse different types of events together can make it convienient to find performance issues.

Many of the low level parts of the tools in XCode are made open source through the LLVM project. See "LLVM Machine Code Analyzer" ( https://llvm.org/docs/CommandGuide/llvm-mca.html) as one example.

Free and Open Source performance tools.


Microsoft performance tools.


Caching builds

https://ccache.samba.org/

ccache is very useful for reducing the compile time of large C projects. Especially when you are doing a 'rebuild from scratch'. This is because ccache can cache the compilation of parts in this situation when the files do not change.
http://itscompiling.eu/2017/02/19/speed-cpp-compilation-compiler-cache/

This is also useful for speeding up CI builds, and especially when large parts of the code base rarely change.


Distributed building.


distcc https://github.com/distcc/distcc
icecream https://github.com/icecc/icecream


Complexity of code.


How complex is your code?
http://www.gnu.org/software/complexity/

complexity src_c/*.c


Testing your code on different OS/architectures.

Sometimes you need to be able to fix an issue on an OS or architecture that you don't have access to. Luckily these days there are many tools available to quickly use a different system through emulation, or container technology.


Vagrant
Virtualbox
Docker
Launchpad, compile and run tests on many architectures.
Mini cloud (ppc machines for debugging)

If you pay Travis CI, they allow you to connect to the testing host with ssh when a test fails.


Code Formatting

clang-format

clang-format - rather than manually fix various formatting errors found with a linter, many projects are just using clang-format to format the code into some coding standard.


Services

LGTM is an 'automated code review tool' with github (and other code repos) support. https://lgtm.com/help/lgtm/about-automated-code-review

Coveralls provides a store for test coverage results with github (and other code repos) support. https://coveralls.io/


How are other projects tested?

We can learn a lot by how other C projects are going about their business today.
Also, thanks to CI testing tools defining things in code we can see how automated tests are run on services like Travis CI and Appveyor.

SQLite

"How SQLite Is Tested"

Curl

"Testing Curl"
https://github.com/curl/curl/blob/master/.travis.yml

Python

"How is CPython tested?"
https://github.com/python/cpython/blob/master/.travis.yml

OpenSSL

"How is OpenSSL tested?"

https://github.com/openssl/openssl/blob/master/.travis.yml
They use Coverity too: https://github.com/openssl/openssl/pull/9805
https://github.com/openssl/openssl/blob/master/fuzz/README.md

libsdl

"How is SDL tested?" [No response]


Linux

As of early 2019, Linux used no unit testing within the kernel tree (some unit tests exist outside of the kernel tree).

There's no in-tree unit tests, but linux is probably one of the most highly tested pieces of code there is.

Linux relies a lot on community testing. With thousands of developers working on Linux every day, that is a lot of people testing things out. Additionally, because all of the source code is available for Linux many more people are able to try things out, and test things on different systems.


https://stackoverflow.com/questions/3177338/how-is-the-linux-kernel-tested

https://www.linuxjournal.com/content/linux-kernel-testing-and-debugging


Haproxy

https://github.com/haproxy/haproxy/blob/master/.travis.yml


Roberto Alsina: Episodio 8: Complejo y Complicado

$
0
0

Un intento (probablemente fallido) de explicar complejidad algorítmica, o por lo menos lo más básico del tema sin complicarla demasiado.

Moshe Zadka: Adding Methods Retroactively

$
0
0

The following post was originally published on OpenSource.com as part of a series on seven libraries that help solve common problems.

Imagine you have a "shapes" library. We have a Circle class, a Square class, etc.

A Circle has a radius, a Square has a side, and maybe Rectangle has height and width. The library already exists: we do not want to change it.

However, we do want to add an area calculation. If this was our library, we would just add an area method, so that we can call shape.area(), and not worry about what the shape is.

While it is possible to reach into a class and add a method, this is a bad idea: nobody expects their class to grow new methods, and things might break in weird ways.

Instead, the singledispatch function in functools can come to our rescue:

@singledispatch
def get_area(shape):
    raise NotImplementedError("cannot calculate area for unknown shape",
                              shape)

The "base" implementation for the get_area function just fails. This makes sure that if we get a new shape, we will cleanly fail instead of returning a nonsense result.

@get_area.register(Square)
def _get_area_square(shape):
    return shape.side ** 2
@get_area.register(Circle)
def _get_area_circle(shape):
    return math.pi * (shape.radius ** 2)

One nice thing about doing things this way is that if someone else writes a new shape that is intended to play well with our code, they can implement the get_area themselves:

from area_calculator import get_area

@attr.s(auto_attribs=True, frozen=True)
class Ellipse:
    horizontal_axis: float
    vertical_axis: float

@get_area.register(Ellipse)
def _get_area_ellipse(shape):
    return math.pi * shape.horizontal_axis * shape.vertical_axis

Callingget_area is straightforward:

print(get_area(shape))

This means we can change a function that has a long if isintance()/elif isinstance() chain to work this way, without changing the interface. The next time you are tempted to check if isinstance, try using singledispatch!

Codementor: Top programming languages of 2019

$
0
0
The most popular languages according to the world’s largest organization for engineering and applied science. It can be hard to gauge which programming language to learn — should you go for the...
Viewing all 22864 articles
Browse latest View live


<script src="https://jsc.adskeeper.com/r/s/rssing.com.1596347.js" async> </script>